How-To: Mazdaspeed6 Replace Pads and Rotors
To begin, I decided to completely upgrade my brake system, considering that my car will do some track time this summer. If you are planning on doing all that I did, make sure that you have plenty of time, brake jobs can be very time consuming. If this is your first brake job, all I have to say is good luck and I hope that you find this how-to helpful. I’m ASE certified in brakes, and I’ve done a lot of brake jobs on many types of cars. If you are having any troubles or have some questions, shoot me a pm, I’d be glad to help.
Difficulty for just pad and rotor replacement = 5
Cost total = $400+
New parts! Thanks go to Mark at SU
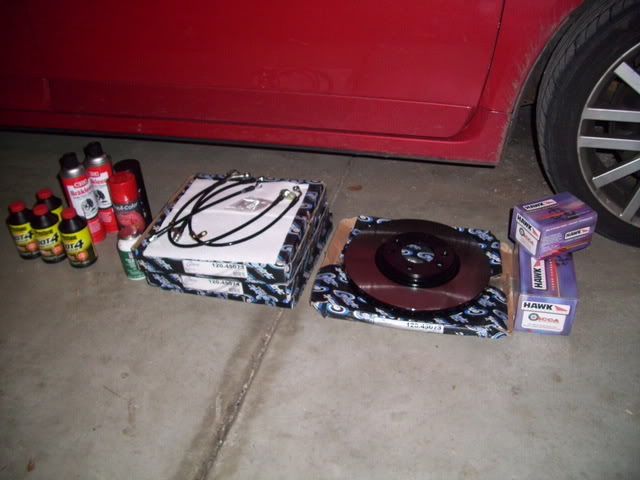
Tools needed for just pad and rotor replacement + why?:
Jack + jack stands – lift car
21mm socket wrench/or impact gun – remove wheels
7mm hex head wrench – front caliper guide pins
17mm socket wrench – front caliper bracket
Needle nose pliers – front caliper retaining clip, depress rear caliper
pistons(the method I used)
C-clamp – depress front caliper pistons
14mm socket wrench – rear caliper guide pins, bracket, e-brake bracket
10mm brake wrench – rear caliper bleeder
9mm brake wrench – front caliper bleeder
Impact wrench with screwdriver bits – remove rotor screws. Note: If you can’t get these out use a power drill + various size bits to drill out the rotor screws.
Recommended supplies needed for just pad and rotor replacement + why?:
Brake-clean – to clean all friction mating surfaces
Caliper guide pin lube – self explanatory
Brake fluid DOT3 or DOT4 – you will want to bleed the brakes
A friend – to help bleed the brakes(these are hard to find. If no friends exist, buy a brake bleeder thingy)
A bolt – to push rotor off hub(I don’t know the type, but one of the brake line bracket bolts will work)
Rubber hammer – to free rotor from hub
Gloves – this is a very dirty job
Let’s get started! Pad and rotor replacement:
1. Jack up the car, find a good spot for the jack stands(I used the inner car frame), remove the wheels. Note: If you do not know how to support a car safely in the air, stop now and go to a mechanic.
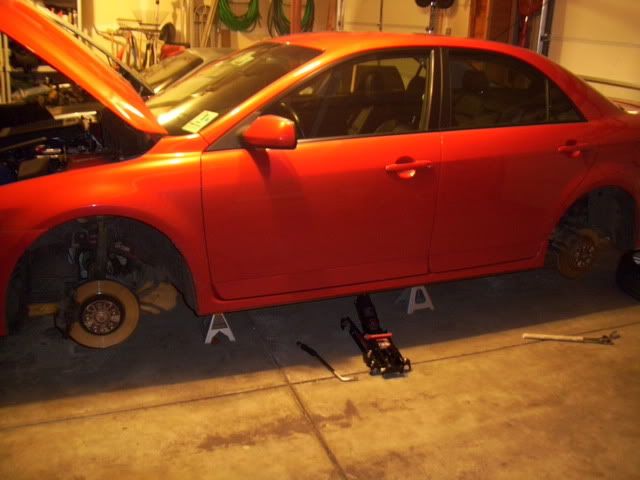
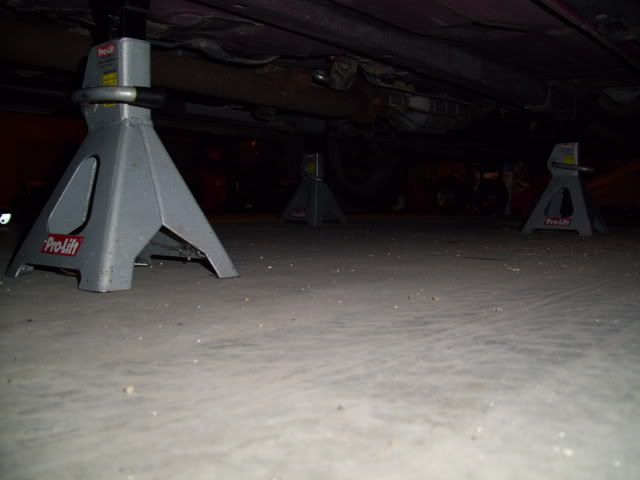
2. Locate and remove the 2 hexbolt guide pins on the rear of the front calipers, you will have to remove the dust caps to access these.
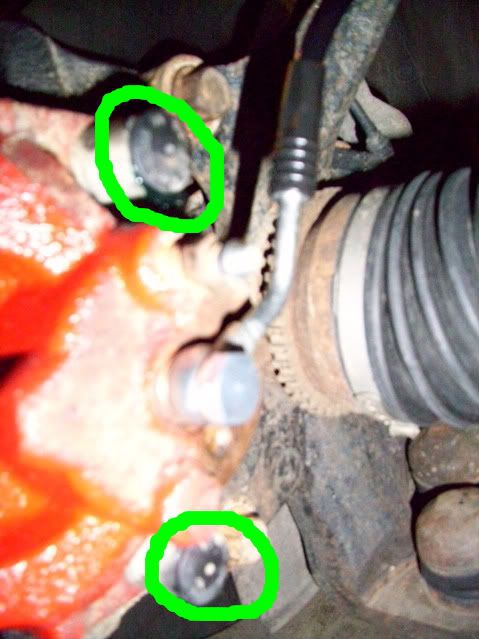
3. Remove the metal spring clip thing.
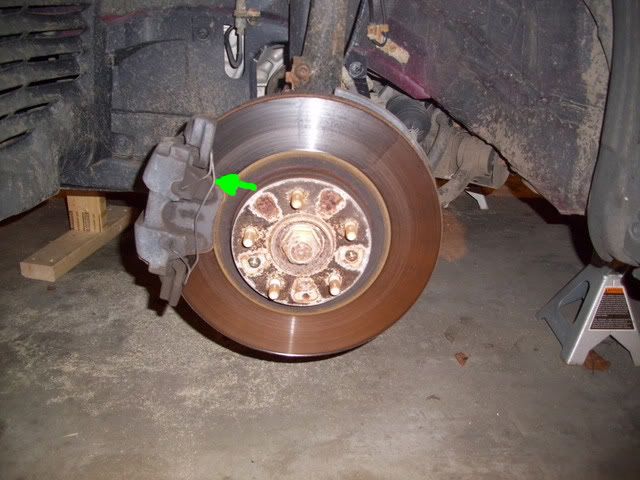
4. Remove the caliper. Once it is off the hub, you can depress the piston; use the old pad for a flat clamping surface.
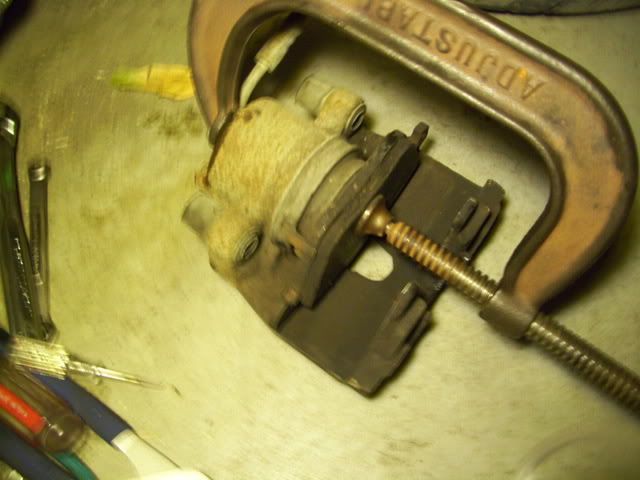
5. Remove the pads.
6. Clean the guide pin sleeves in the caliper with brake-clean and paper towels.
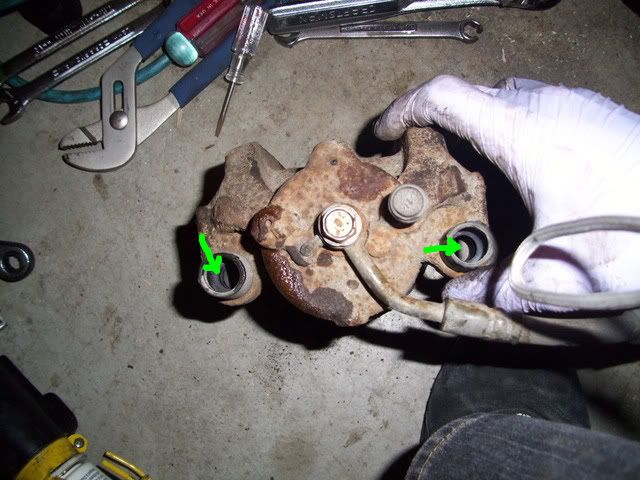
7. Locate and remove the 2 caliper bracket bolts, and remove the bracket.
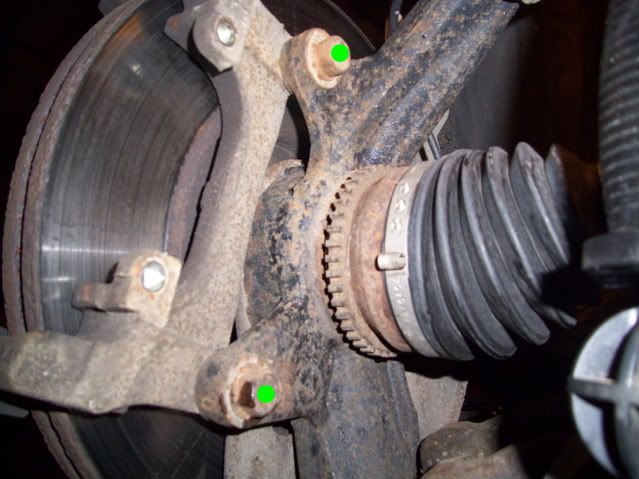
8. Now here comes the fun part. In order to remove the rotor, these screws need to come out. Get the Impact ready. If they do not come out easily, get the drill ready to drill out the screw heads. You really don’t have to replace these screws, the wheel hold the rotor on just fine. With the screws off, remove the rotor. If it won’t come off itself, use a bold in the threaded rotor hole, and screw it in until the rotor brakes free.
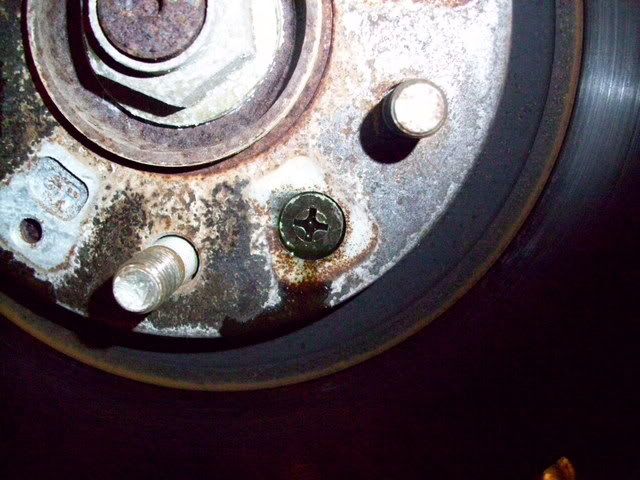
9. With the rotor off, inspect and clean the rotor-hub-mating-surface of rust build-up.
10. Install new rotor
11. Install the caliper bracket, making sure the bolts are tight.
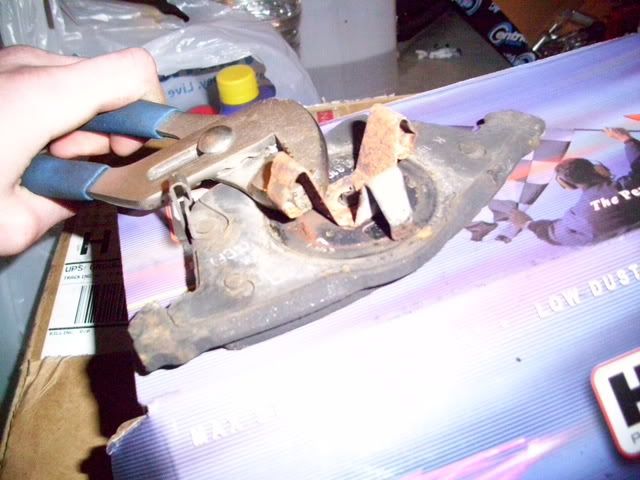
12. Place the outer pad on the bracket, and the inner pad into the caliper piston. Note with Hawk HPS pads I had to bend inward on the tabs to get the pad into the piston.(this is an example with the old pads)
13. Now place the caliper onto the bracket and line up the guide pin holes.
14. Clean the guide pins with brake-clean and paper towels.
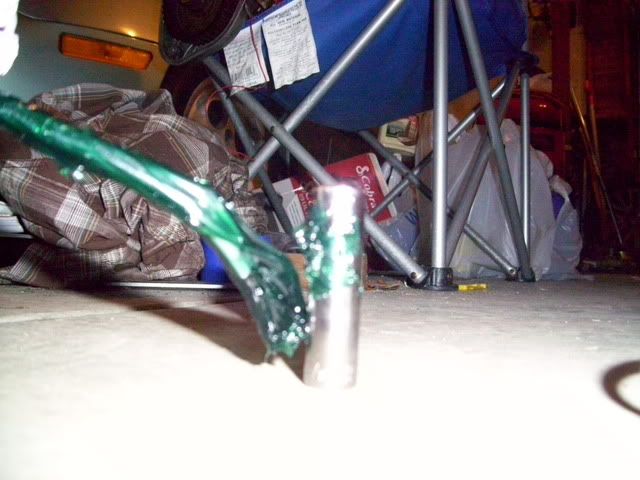
15. Lube up the guide pins and insert them into the caliper sleeves. Once you have them pressed in, thread the pins into the bracket, and tighten them in. Do not over tighten! Put the dust caps back on.(this is an example with a socket)
16. Install the metal spring clip thing, front brakes are done!
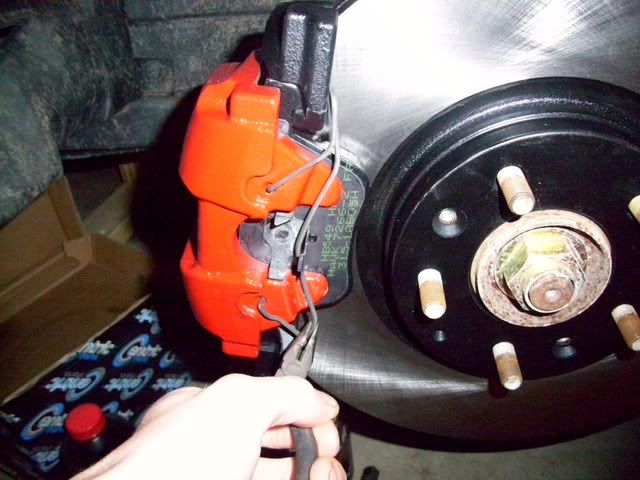
17. Locate and remove this bolt that holds on the e-brake mechanism. Slide the e-brake
mechanism out of its bracket, and set it aside.
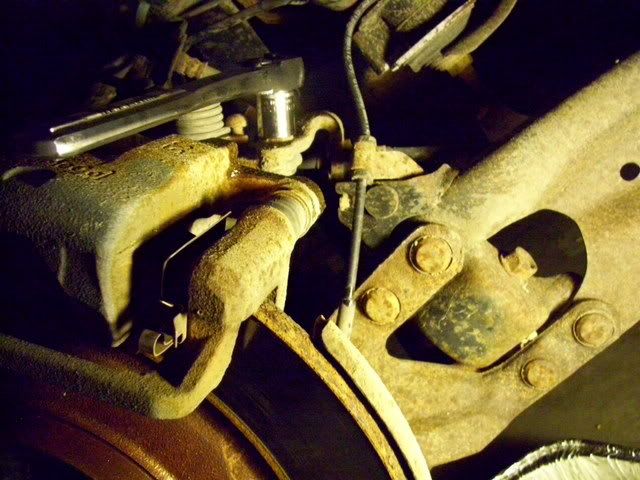
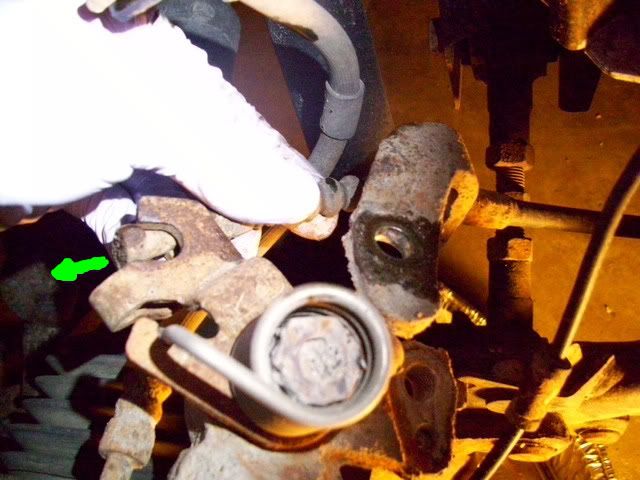
18. Remove the 2 caliper guide pin bolts, and remove the caliper.
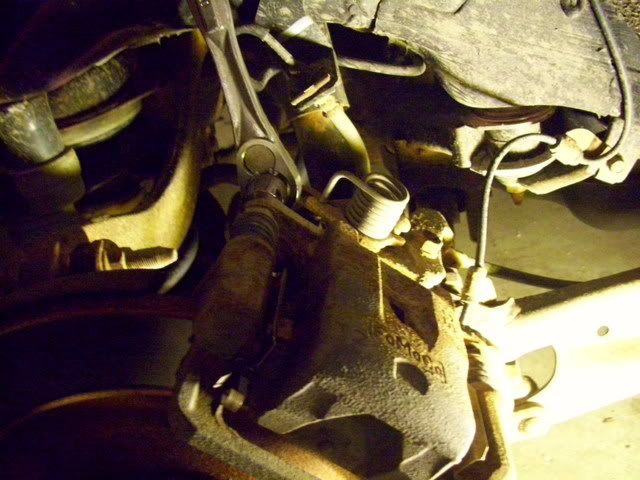
19. Remove the pads, a flathead screwdriver can help with prying them from the retaining clips.
20. Locate and remove the caliper bracket bolts, and set the bracket aside
21. Remove the 2 rubber guide pin boots, clean the pins and lube them. Then insert them back into the caliper bracket.
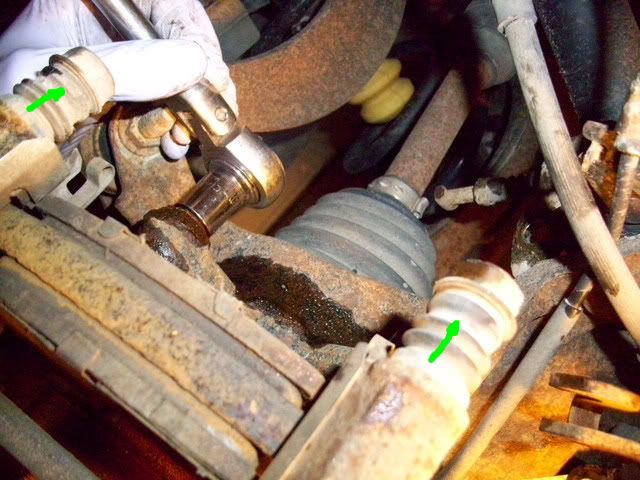
22. Remove/Install rotor same as steps 8, 9, 10.
23. Install the caliper bracket, tighten the bolts.
24. Place the new pads in the retaining clips on the caliper bracket.
25. Depress the caliper piston. In order to do this, you have to turn the piston. I used some pliers on the notches in the piston. Turn slowly, so that the piston dust boot does not bind up, gently with your fingers turn the boot back and forth to keep it from binding/ripping. Get it in enough so that it barely fits over the new pads/rotor, then loosen it ¼ turn. Make sure that the notches are vertical/horizontal with the orientation of the caliper, so that it will go on the little stub on the pad.
26. Bolt the caliper on. Do not over tighten!
27. Slide the e-brake mechanism into its bracket. Install the bolt that holds on the e-brake mechanism.
28. Bleed the brakes, make sure everything is on right, and then use brake-clean to clean all friction mating surfaces.
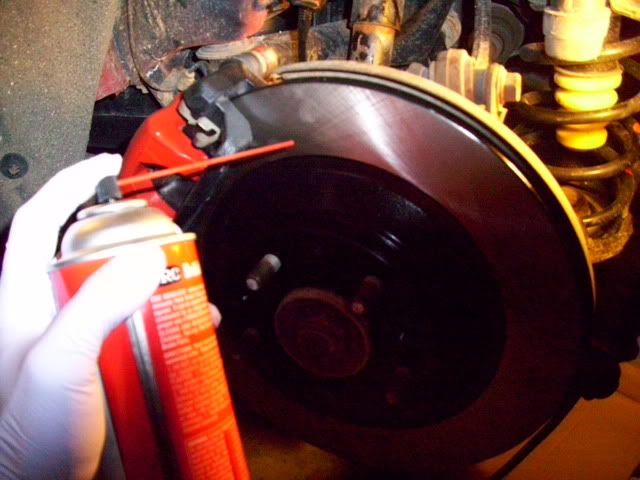
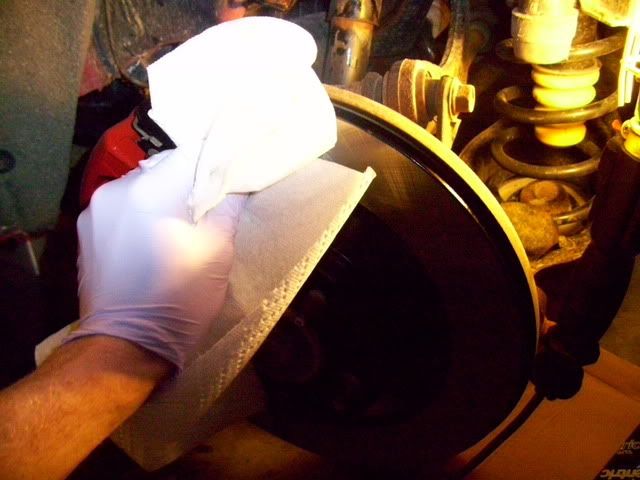
29. Burnish in the pads. Hawk’s instructions are on the box. If you are using different pads do about four 50-30mph firm brake applications.
30. Celebrate, you are done!
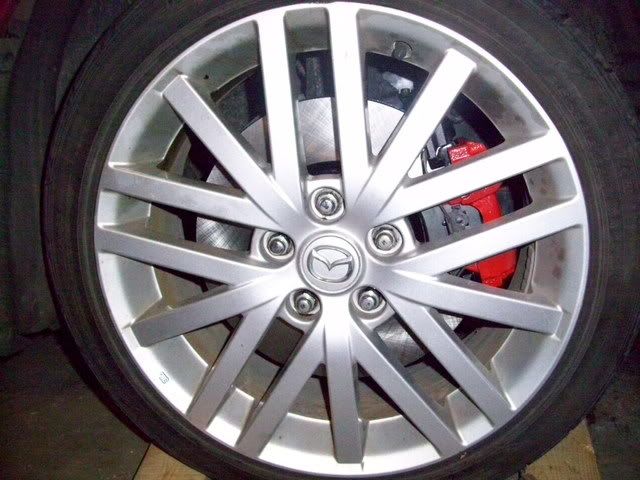
Note: if you avoid the cleaning and lubrication of the guide pins as stated in steps 6, 14, 15, 21, you may be susceptible to un-even pad wear. If you avoid steps 28, 29 you could experience noisy brakes and glazed rotors.
Sorry for no how-to on painting the brakes, there are plenty of them out there.
additional info space:
To begin, I decided to completely upgrade my brake system, considering that my car will do some track time this summer. If you are planning on doing all that I did, make sure that you have plenty of time, brake jobs can be very time consuming. If this is your first brake job, all I have to say is good luck and I hope that you find this how-to helpful. I’m ASE certified in brakes, and I’ve done a lot of brake jobs on many types of cars. If you are having any troubles or have some questions, shoot me a pm, I’d be glad to help.
Difficulty for just pad and rotor replacement = 5
Cost total = $400+
New parts! Thanks go to Mark at SU

Tools needed for just pad and rotor replacement + why?:
Jack + jack stands – lift car
21mm socket wrench/or impact gun – remove wheels
7mm hex head wrench – front caliper guide pins
17mm socket wrench – front caliper bracket
Needle nose pliers – front caliper retaining clip, depress rear caliper
pistons(the method I used)
C-clamp – depress front caliper pistons
14mm socket wrench – rear caliper guide pins, bracket, e-brake bracket
10mm brake wrench – rear caliper bleeder
9mm brake wrench – front caliper bleeder
Impact wrench with screwdriver bits – remove rotor screws. Note: If you can’t get these out use a power drill + various size bits to drill out the rotor screws.
Recommended supplies needed for just pad and rotor replacement + why?:
Brake-clean – to clean all friction mating surfaces
Caliper guide pin lube – self explanatory
Brake fluid DOT3 or DOT4 – you will want to bleed the brakes
A friend – to help bleed the brakes(these are hard to find. If no friends exist, buy a brake bleeder thingy)
A bolt – to push rotor off hub(I don’t know the type, but one of the brake line bracket bolts will work)
Rubber hammer – to free rotor from hub
Gloves – this is a very dirty job
Let’s get started! Pad and rotor replacement:
1. Jack up the car, find a good spot for the jack stands(I used the inner car frame), remove the wheels. Note: If you do not know how to support a car safely in the air, stop now and go to a mechanic.


2. Locate and remove the 2 hexbolt guide pins on the rear of the front calipers, you will have to remove the dust caps to access these.

3. Remove the metal spring clip thing.

4. Remove the caliper. Once it is off the hub, you can depress the piston; use the old pad for a flat clamping surface.

5. Remove the pads.
6. Clean the guide pin sleeves in the caliper with brake-clean and paper towels.

7. Locate and remove the 2 caliper bracket bolts, and remove the bracket.

8. Now here comes the fun part. In order to remove the rotor, these screws need to come out. Get the Impact ready. If they do not come out easily, get the drill ready to drill out the screw heads. You really don’t have to replace these screws, the wheel hold the rotor on just fine. With the screws off, remove the rotor. If it won’t come off itself, use a bold in the threaded rotor hole, and screw it in until the rotor brakes free.

9. With the rotor off, inspect and clean the rotor-hub-mating-surface of rust build-up.
10. Install new rotor
11. Install the caliper bracket, making sure the bolts are tight.
12. Place the outer pad on the bracket, and the inner pad into the caliper piston. Note with Hawk HPS pads I had to bend inward on the tabs to get the pad into the piston.(this is an example with the old pads)

13. Now place the caliper onto the bracket and line up the guide pin holes.
14. Clean the guide pins with brake-clean and paper towels.
15. Lube up the guide pins and insert them into the caliper sleeves. Once you have them pressed in, thread the pins into the bracket, and tighten them in. Do not over tighten! Put the dust caps back on.(this is an example with a socket)

16. Install the metal spring clip thing, front brakes are done!

17. Locate and remove this bolt that holds on the e-brake mechanism. Slide the e-brake
mechanism out of its bracket, and set it aside.


18. Remove the 2 caliper guide pin bolts, and remove the caliper.

19. Remove the pads, a flathead screwdriver can help with prying them from the retaining clips.
20. Locate and remove the caliper bracket bolts, and set the bracket aside
21. Remove the 2 rubber guide pin boots, clean the pins and lube them. Then insert them back into the caliper bracket.

22. Remove/Install rotor same as steps 8, 9, 10.
23. Install the caliper bracket, tighten the bolts.
24. Place the new pads in the retaining clips on the caliper bracket.
25. Depress the caliper piston. In order to do this, you have to turn the piston. I used some pliers on the notches in the piston. Turn slowly, so that the piston dust boot does not bind up, gently with your fingers turn the boot back and forth to keep it from binding/ripping. Get it in enough so that it barely fits over the new pads/rotor, then loosen it ¼ turn. Make sure that the notches are vertical/horizontal with the orientation of the caliper, so that it will go on the little stub on the pad.
26. Bolt the caliper on. Do not over tighten!
27. Slide the e-brake mechanism into its bracket. Install the bolt that holds on the e-brake mechanism.
28. Bleed the brakes, make sure everything is on right, and then use brake-clean to clean all friction mating surfaces.


29. Burnish in the pads. Hawk’s instructions are on the box. If you are using different pads do about four 50-30mph firm brake applications.
30. Celebrate, you are done!

Note: if you avoid the cleaning and lubrication of the guide pins as stated in steps 6, 14, 15, 21, you may be susceptible to un-even pad wear. If you avoid steps 28, 29 you could experience noisy brakes and glazed rotors.
Sorry for no how-to on painting the brakes, there are plenty of them out there.
additional info space:
