This thread was originally created back on MSF by @myarbro1 in August of 2014:
I recently asked if anyone knew jack about the CV joint on the driveshaft, aka propeller shaft, in our Speed6’s on FB.
I have those answers and thought I would share what I have learned.
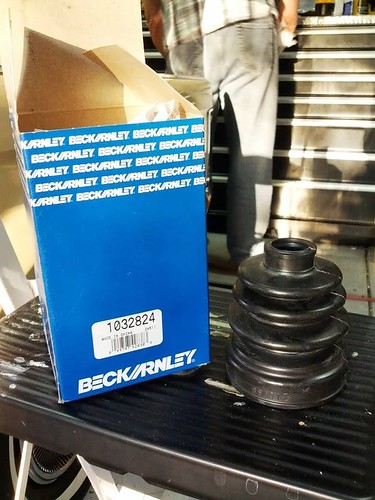
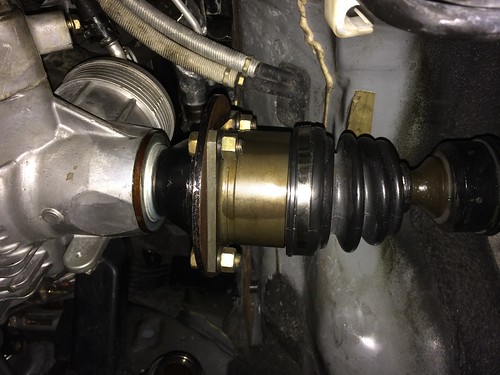
To begin, my CV boot was ripped and leaking. The joint and/or boot are not available separately; Mazda only sells the whole driveshaft. I found a post and picture once of someone who had installed a Subie boot on his, so I went that route. Beck Arnley PN#1032824. I do not know who to credit with that finding.
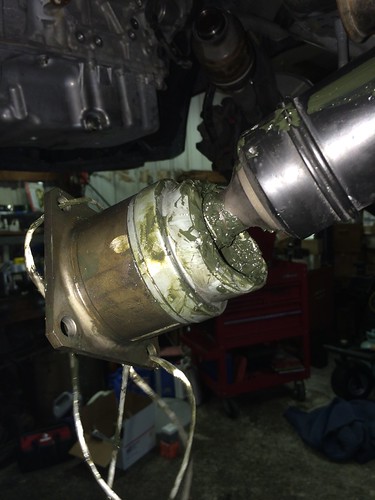
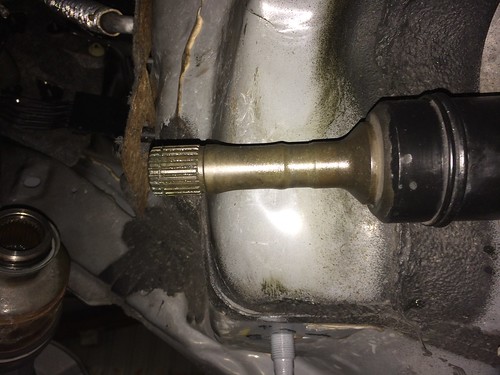
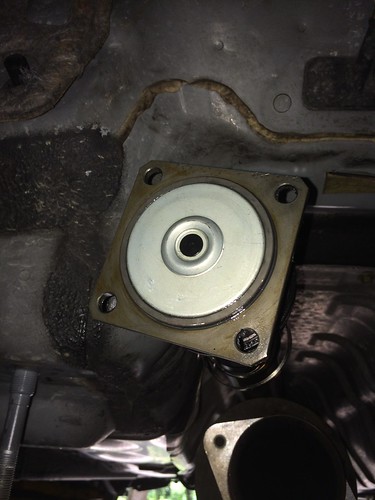
Looking at the joint once removed from the TC you’ll notice it is a heavy steel part with a soft thin metal at the rear. This part is the boot. The rubber boot part is actually inside; I later figured that the metal part protects it from the nearby downpipe.
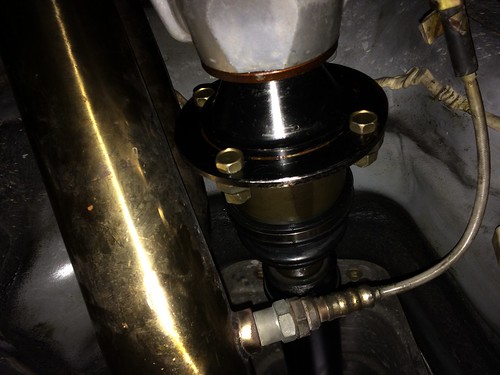
The trick to removing the joint is the take a chisel and hammer, and place the chisel on the shoulder of the soft metal part. Whacking it with the hammer will drive the joint backwards, and the metal cap on the end will get popped off by the shaft. I used a chisel as opposed to hitting the flange directly with a hammer to avoid bending it.
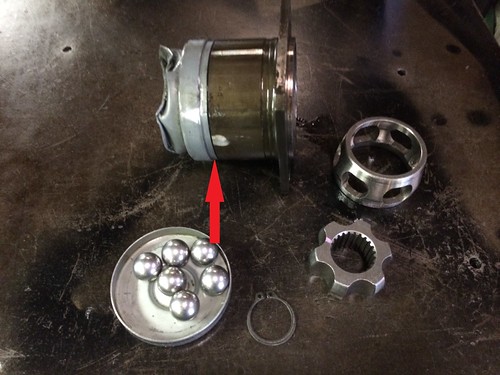
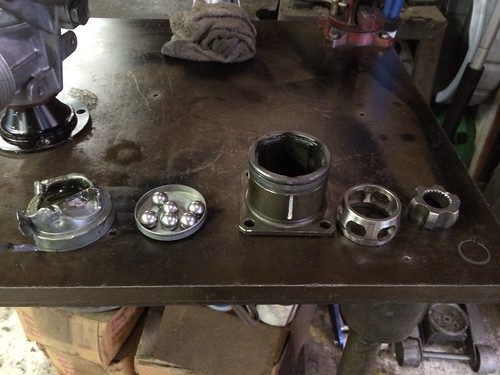
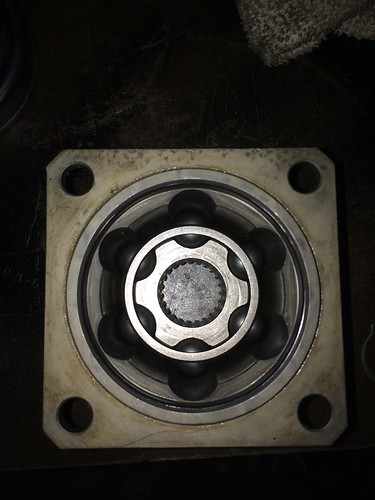
Inside you will find a circlip that will need to be removed, and the joint will pull off. I took the joint apart and cleaned it in mineral spirits to get rid of the stickiest grease on the fucking planet. DO NOT wipe that shit on your arms; it laughs at GOJO and every other soap/hand cleaner. Keep notice of how the cage comes out; it will physically fit and seem to work with the cage frontwards or backwards, but there is only 1 “right” way. It’s very easy, just pay attention.
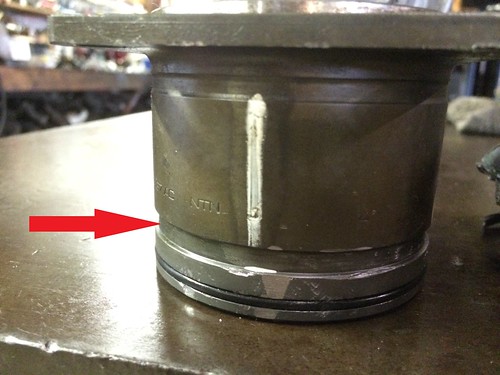
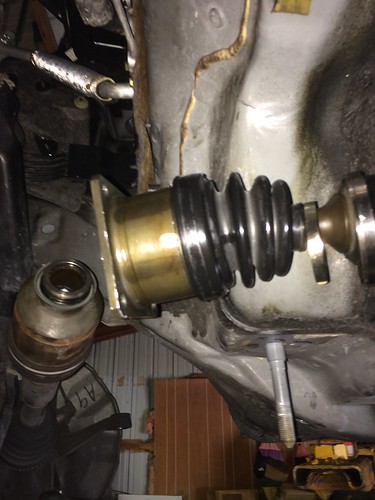
The OEM boot is a bitch to get off. Shown by arrows in the pics, the boot is crimped into that groove on the CV joint. I carefully used a grinder and chisel to thin the metal in two places so I could chop and peel it off.
Reassemble like you would any other CV joint and boot and you’re done. The rubber boot is close to the downpipe, so we shall see how long it lasts. My dad made a template for a heat shield to slip between the DP and CV; we will get that cut out of some thin metal and give it a go to see if it helps protect the boot long-term.

I recently asked if anyone knew jack about the CV joint on the driveshaft, aka propeller shaft, in our Speed6’s on FB.
I have those answers and thought I would share what I have learned.
To begin, my CV boot was ripped and leaking. The joint and/or boot are not available separately; Mazda only sells the whole driveshaft. I found a post and picture once of someone who had installed a Subie boot on his, so I went that route. Beck Arnley PN#1032824. I do not know who to credit with that finding.
Looking at the joint once removed from the TC you’ll notice it is a heavy steel part with a soft thin metal at the rear. This part is the boot. The rubber boot part is actually inside; I later figured that the metal part protects it from the nearby downpipe.
The trick to removing the joint is the take a chisel and hammer, and place the chisel on the shoulder of the soft metal part. Whacking it with the hammer will drive the joint backwards, and the metal cap on the end will get popped off by the shaft. I used a chisel as opposed to hitting the flange directly with a hammer to avoid bending it.
Inside you will find a circlip that will need to be removed, and the joint will pull off. I took the joint apart and cleaned it in mineral spirits to get rid of the stickiest grease on the fucking planet. DO NOT wipe that shit on your arms; it laughs at GOJO and every other soap/hand cleaner. Keep notice of how the cage comes out; it will physically fit and seem to work with the cage frontwards or backwards, but there is only 1 “right” way. It’s very easy, just pay attention.
The OEM boot is a bitch to get off. Shown by arrows in the pics, the boot is crimped into that groove on the CV joint. I carefully used a grinder and chisel to thin the metal in two places so I could chop and peel it off.
Reassemble like you would any other CV joint and boot and you’re done. The rubber boot is close to the downpipe, so we shall see how long it lasts. My dad made a template for a heat shield to slip between the DP and CV; we will get that cut out of some thin metal and give it a go to see if it helps protect the boot long-term.
