Patrick Martz
Greenie Member
We were just replacing the ITFP filter in these pictures but I will outline how to take the one more step to replace the pump too. MAKE SURE TO WEAR THICK GLOVES AS THE SHEET METAL IS SHARP!!!
First thing we did was pull the base of the back seat up and off. They just use one clip on each side, so grab where someone's butt would be and pull up and it will pop off.
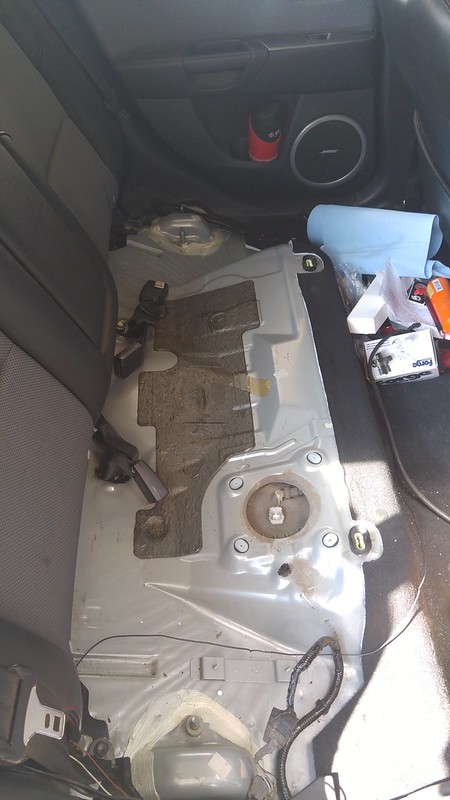
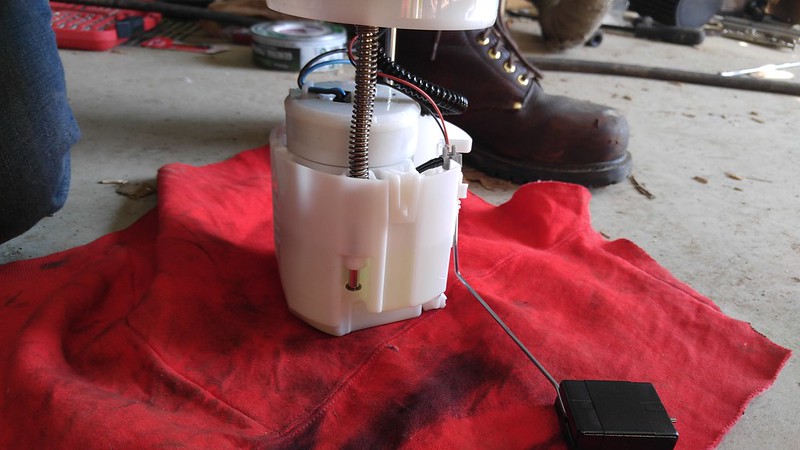
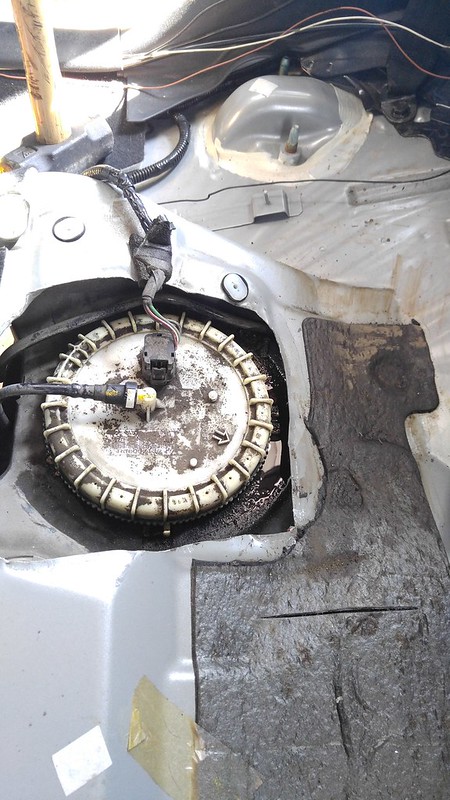
You're left with this under the seat (I had already taken the fuel tank basket cover off at this point but the cover is pictured next)
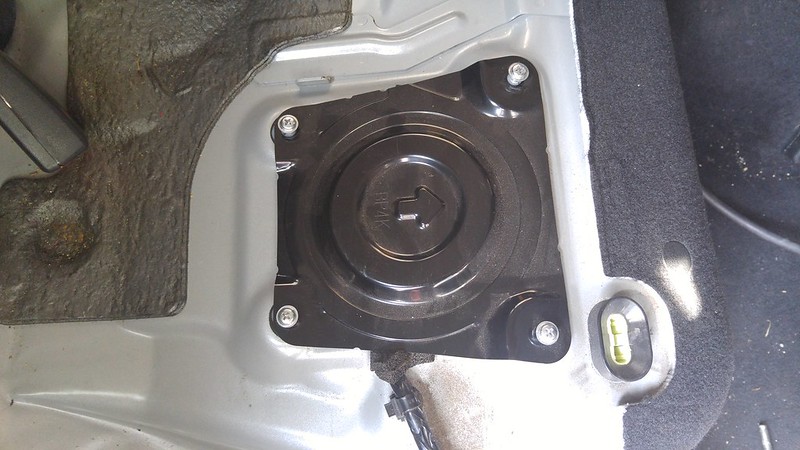
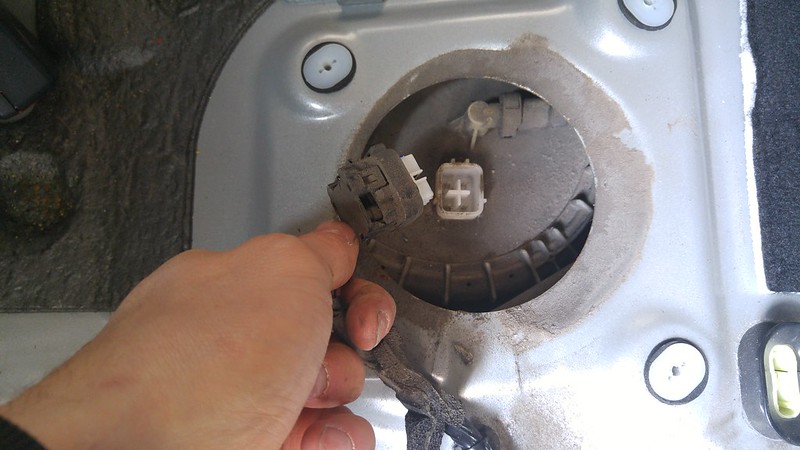
Take the 4 Philips head screws out then remove the cover, then unplug the pump trigger:
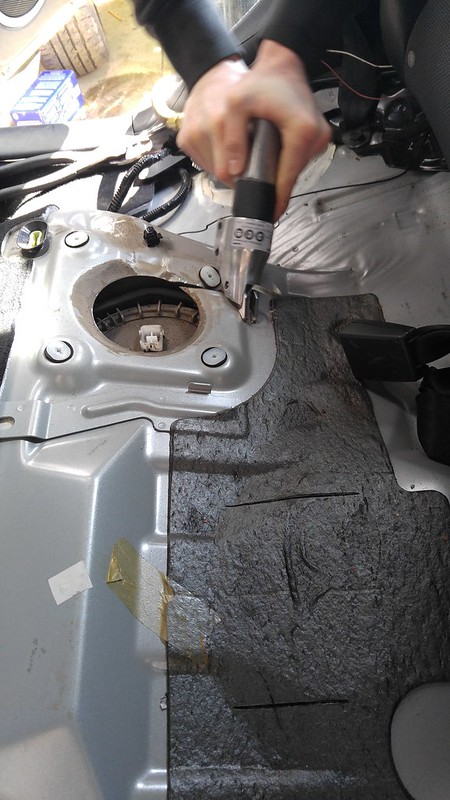
Here we start to cut the access hole bigger to be able to lift the ITFP basket out. Some say to use Air Nibblers but I used those on my car and broke them then had to finish the hole with metal snips which sucked. Also the Nibblers made a mess, regaurdless here is the link for the Nibblers. (http://www.harborfreight.com/air-tools/specialty-air-tools/16-gauge-air-nibbler-96661.html) What I used on Sho's car was Air Metal Shears (http://www.harborfreight.com/air-tools/specialty-air-tools/pistol-grip-air-shears-98580.html) They worked better IMO and didn't make a mess.
Chipped off the sound deadening so I can finish the cut:

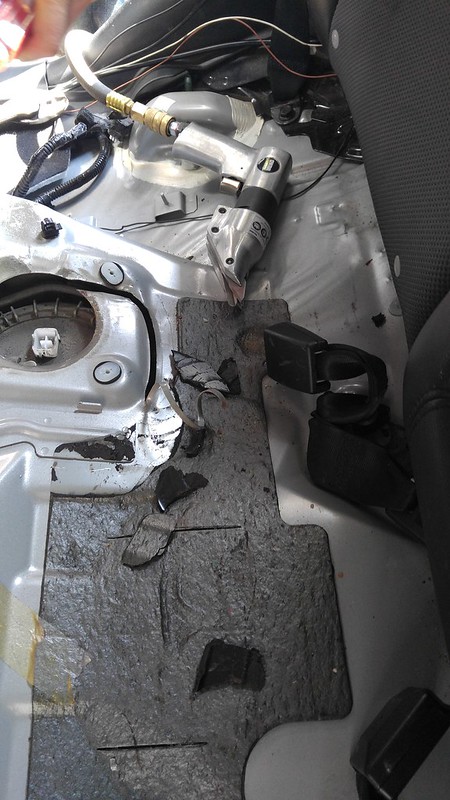
I've seen people be able to pop the rivets on the brace here but I couldn't get it on this car. I also didn't have any drill bits with me to drill out the rivets. So I just bent the top of it with the hole out of the way and cut around it.

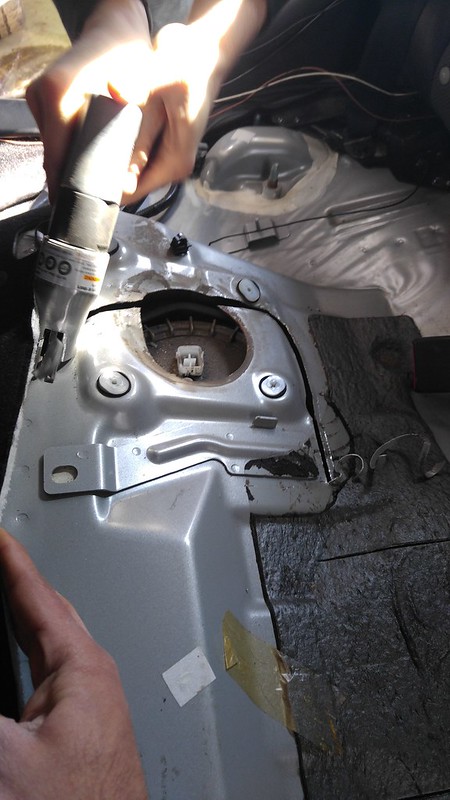
Now we unplug the fuel line going to the top of the basket. It has a white ring that you press in and it backs right off, see it in the video. Put a rag over it as it will shoot fuel everywhere (I forgot to do that here). Then find the ribs on the ring around the edge of the basket that are braced, if you're looking at the basket from the rear passenger door they should be at about 4-5 o'clock. Take a big flat head and a big hammer and GENTLY hit the ring counter clockwise off. I didn't have to put any lube on this one as it broke loose pretty easy (could have been all the e85 that went all over the top of it when I took the fuel line off, oops). Mine I had to spray some penetrating lube around the ring to get it to break loose.
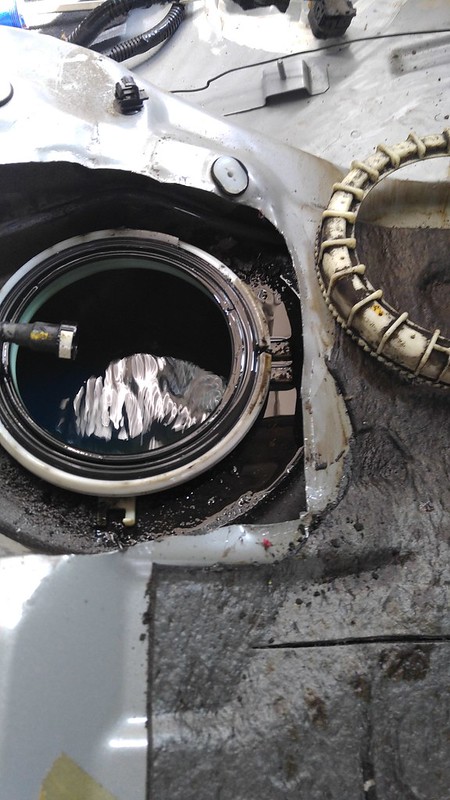
Once the ring is completely off just wiggle the basket back and forth and it should break loose from the rubber seal and pull right up. The float is in there too so you'll have to tip the basket at an angle to bring it out right without breaking the float. Also the basket will be filled with fuel, don't dump it everywhere.
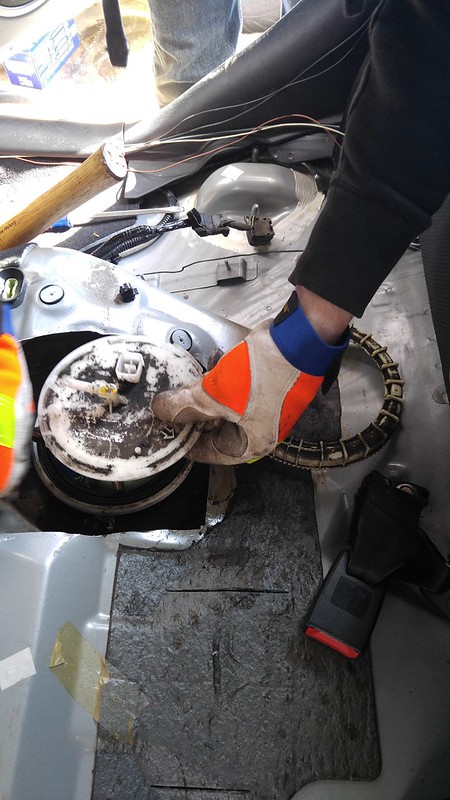

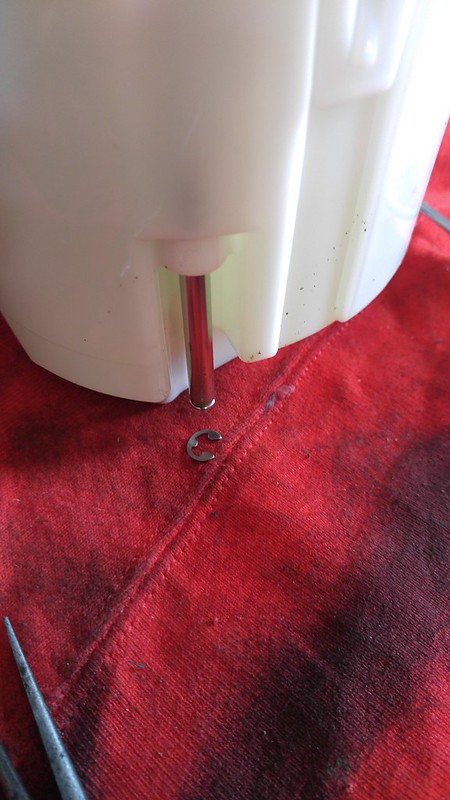
Now take the basket aside and depress the top hat of the basket and remove the lock ring on the bottom of the post with the spring:
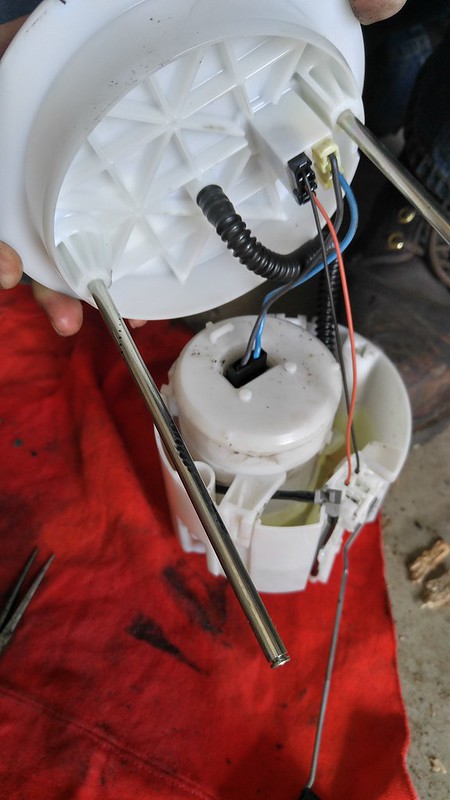
Now unplug these guys, Take note where they go, white on the outside and black on the inside. I don't know if they will even plug into the other ones spot I didn't try, just don't do it.
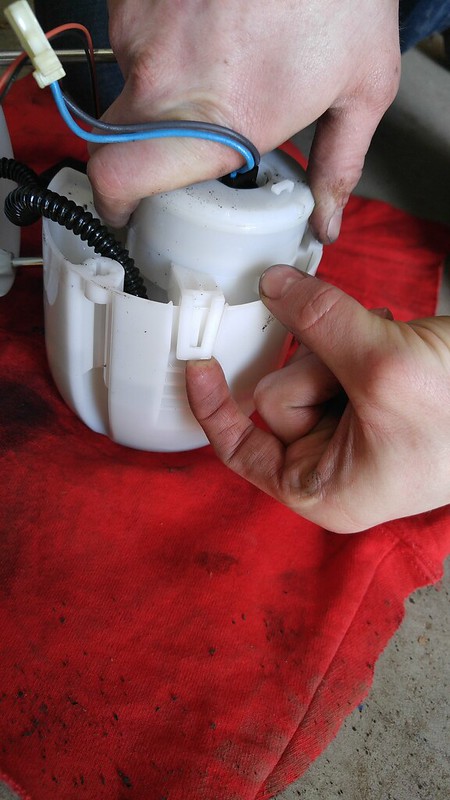
Pop all these tabs off, there are 3:
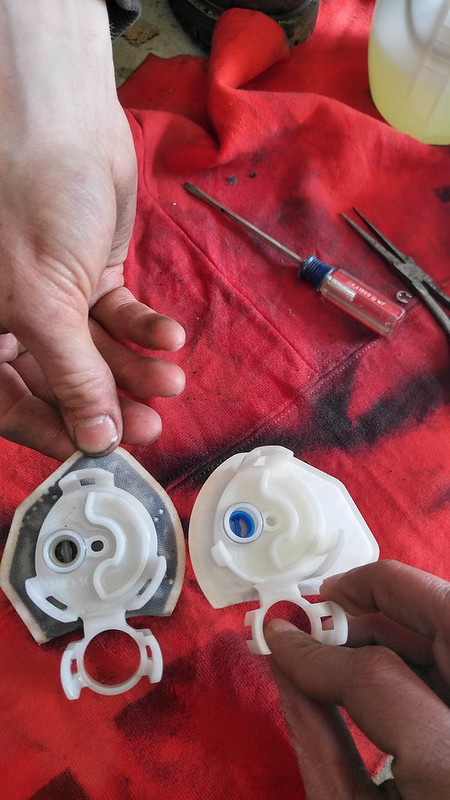
Then once you have the pump cradle out pop off all the tabs holding the filter on. I believe there are 5 of them.
Here is the part number for the new filter from Mazda. If you're putting in a new pump it will most likely come with a new filter, my DW300c did at least.
Mazda ITFP filter Part Number: LFB6-13-ZE1
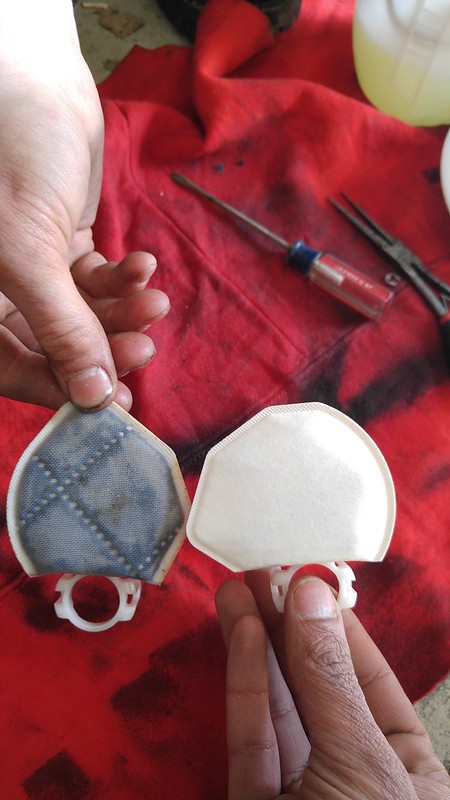
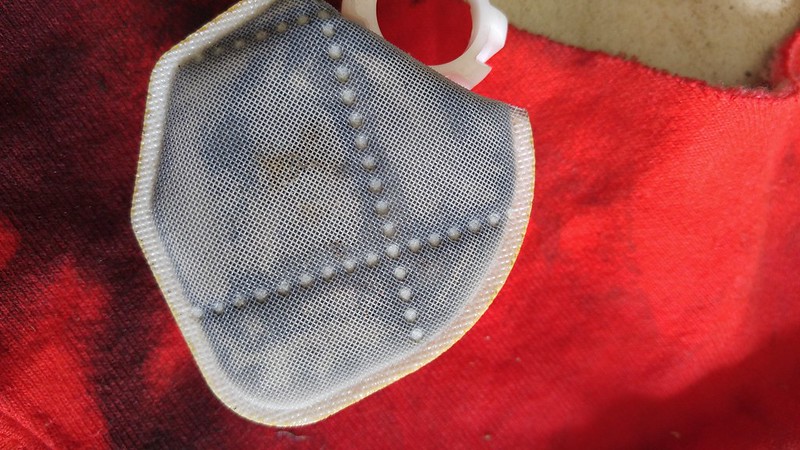
and a couple pictures to compare. The old filter had 185k miles, 90k of which was on an E20-E33 mix.
So if you're going further than just a filter replacement all you have to do is pull the pump out the bottom as the filter kind of holds it in there. My DW pump came with a new o-ring to seal into the basket. Just pop the new one in and then reassemble everything with the basket. Time to put it back in!
Tighten the lock ring back around the basket:
Plug everything back in and clean everything up.
I sprayed some rust inhibitor around the fresh metal that was cut to prevent rusting as this car is a DD.
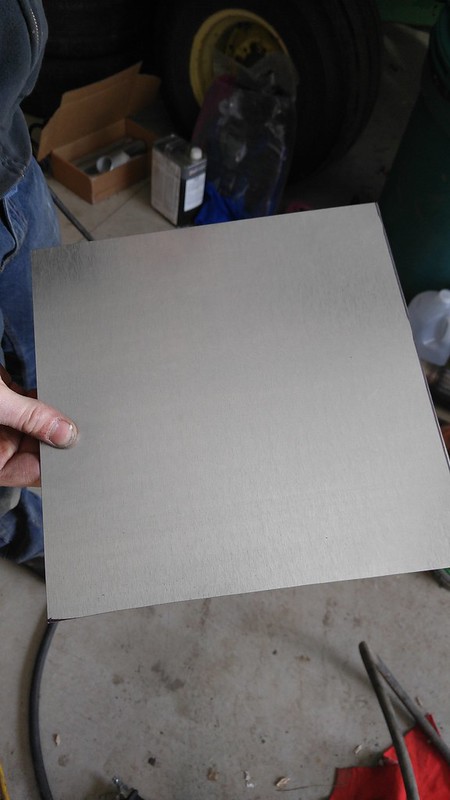
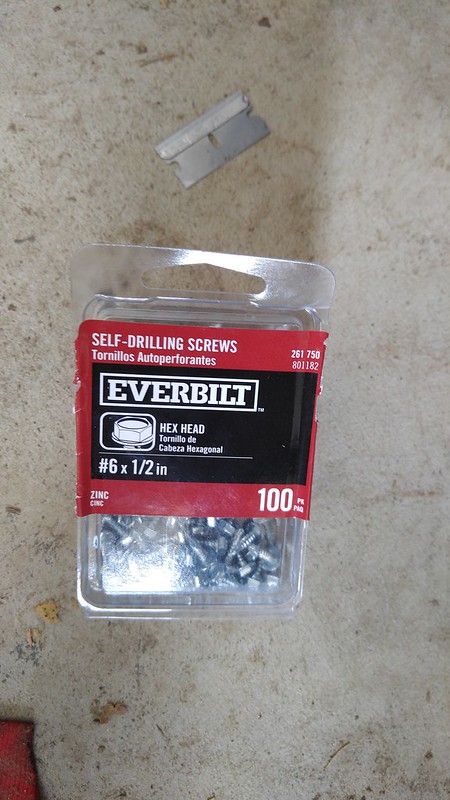
Next we have to cover up the hole that we just made under the back seat as its open to the ground. I bought some self tapping metal heat duct #6x1/2" screws and a flat sheet of heating duct metal that was then cut into a 10" by 10" square that was then screwed down to the sheet metal of the car under the seat.
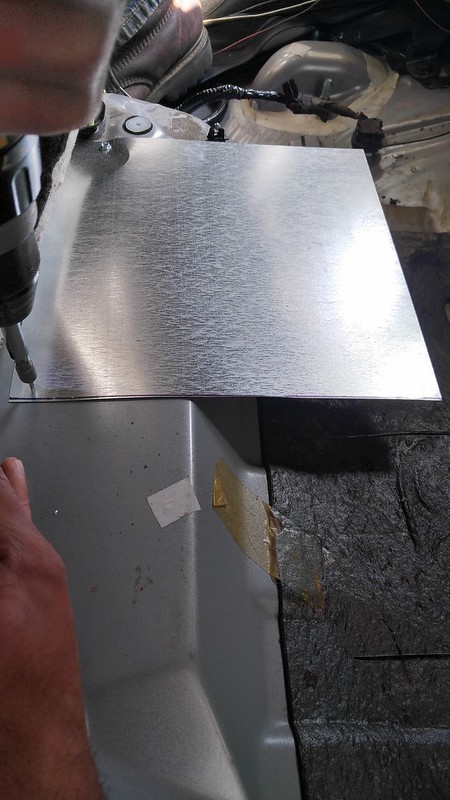
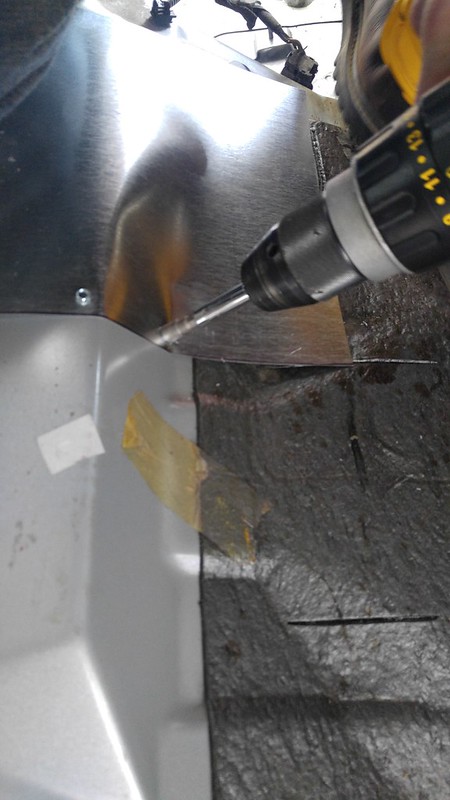
not the prettiest but it will get the job done:
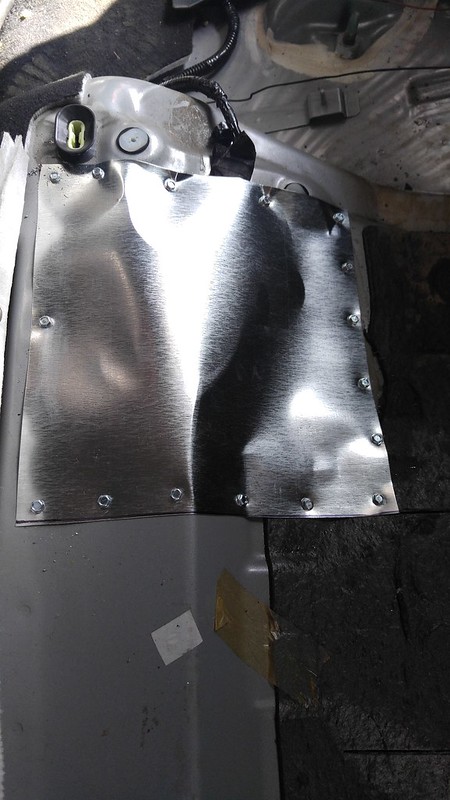
I then put duck tape over the screws to seal on the inside of them and then another over and on the outside of the screws and sheet metal to seal it to the car to make sure the outside stays on the outside. Then as a final touch we threw on a sticker to remind all of us this is how we do.
First thing we did was pull the base of the back seat up and off. They just use one clip on each side, so grab where someone's butt would be and pull up and it will pop off.
You're left with this under the seat (I had already taken the fuel tank basket cover off at this point but the cover is pictured next)
Take the 4 Philips head screws out then remove the cover, then unplug the pump trigger:
Here we start to cut the access hole bigger to be able to lift the ITFP basket out. Some say to use Air Nibblers but I used those on my car and broke them then had to finish the hole with metal snips which sucked. Also the Nibblers made a mess, regaurdless here is the link for the Nibblers. (http://www.harborfreight.com/air-tools/specialty-air-tools/16-gauge-air-nibbler-96661.html) What I used on Sho's car was Air Metal Shears (http://www.harborfreight.com/air-tools/specialty-air-tools/pistol-grip-air-shears-98580.html) They worked better IMO and didn't make a mess.
Chipped off the sound deadening so I can finish the cut:
I've seen people be able to pop the rivets on the brace here but I couldn't get it on this car. I also didn't have any drill bits with me to drill out the rivets. So I just bent the top of it with the hole out of the way and cut around it.
Now we unplug the fuel line going to the top of the basket. It has a white ring that you press in and it backs right off, see it in the video. Put a rag over it as it will shoot fuel everywhere (I forgot to do that here). Then find the ribs on the ring around the edge of the basket that are braced, if you're looking at the basket from the rear passenger door they should be at about 4-5 o'clock. Take a big flat head and a big hammer and GENTLY hit the ring counter clockwise off. I didn't have to put any lube on this one as it broke loose pretty easy (could have been all the e85 that went all over the top of it when I took the fuel line off, oops). Mine I had to spray some penetrating lube around the ring to get it to break loose.
Once the ring is completely off just wiggle the basket back and forth and it should break loose from the rubber seal and pull right up. The float is in there too so you'll have to tip the basket at an angle to bring it out right without breaking the float. Also the basket will be filled with fuel, don't dump it everywhere.
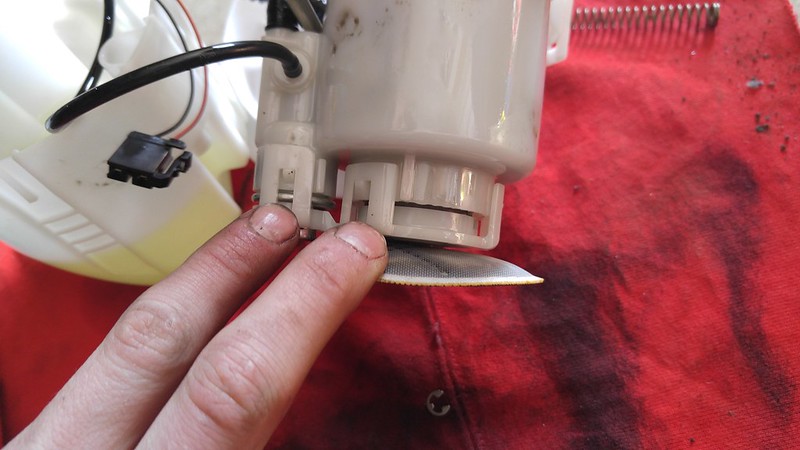
Now take the basket aside and depress the top hat of the basket and remove the lock ring on the bottom of the post with the spring:
Now unplug these guys, Take note where they go, white on the outside and black on the inside. I don't know if they will even plug into the other ones spot I didn't try, just don't do it.
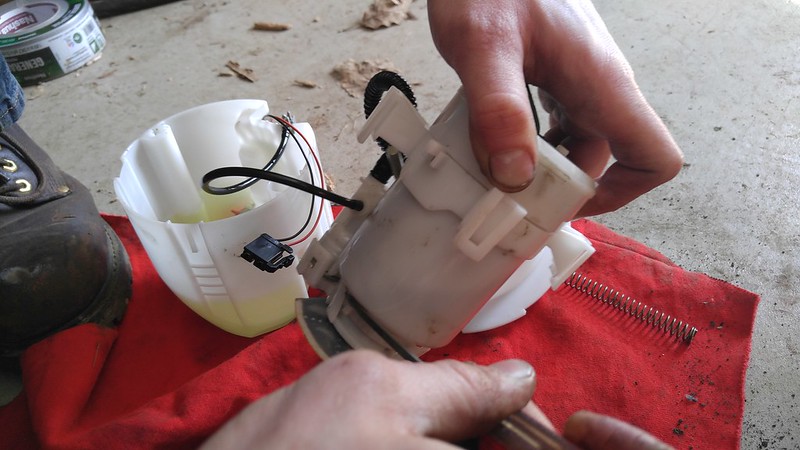
Pop all these tabs off, there are 3:
Then once you have the pump cradle out pop off all the tabs holding the filter on. I believe there are 5 of them.
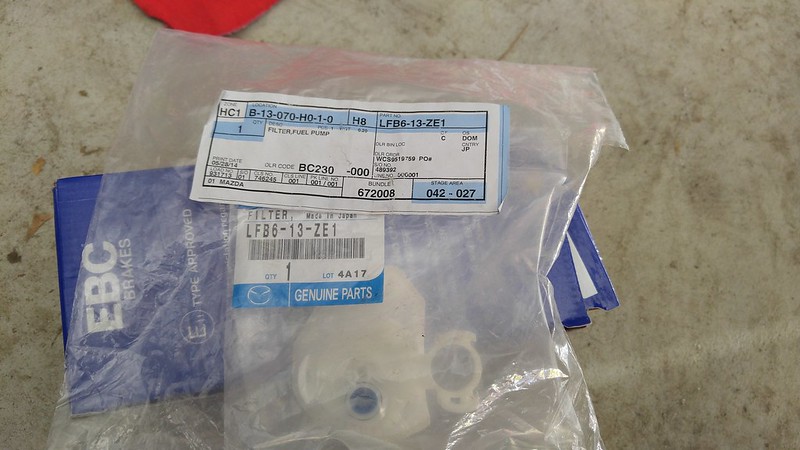
Here is the part number for the new filter from Mazda. If you're putting in a new pump it will most likely come with a new filter, my DW300c did at least.
Mazda ITFP filter Part Number: LFB6-13-ZE1
and a couple pictures to compare. The old filter had 185k miles, 90k of which was on an E20-E33 mix.
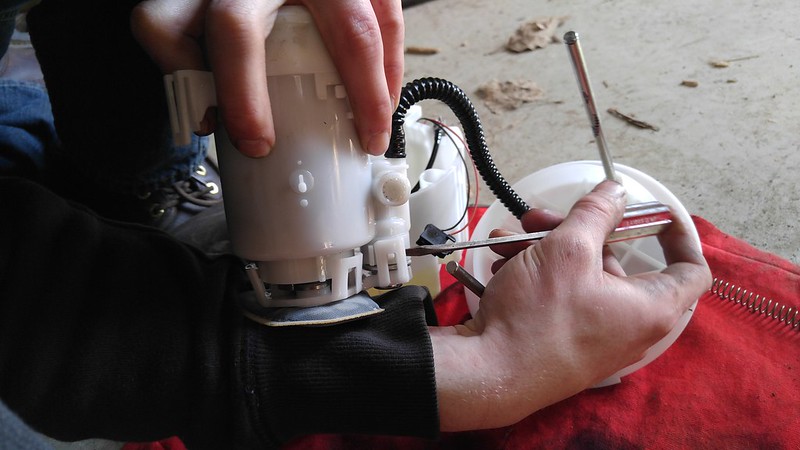
So if you're going further than just a filter replacement all you have to do is pull the pump out the bottom as the filter kind of holds it in there. My DW pump came with a new o-ring to seal into the basket. Just pop the new one in and then reassemble everything with the basket. Time to put it back in!
Tighten the lock ring back around the basket:
Plug everything back in and clean everything up.
I sprayed some rust inhibitor around the fresh metal that was cut to prevent rusting as this car is a DD.
Next we have to cover up the hole that we just made under the back seat as its open to the ground. I bought some self tapping metal heat duct #6x1/2" screws and a flat sheet of heating duct metal that was then cut into a 10" by 10" square that was then screwed down to the sheet metal of the car under the seat.
not the prettiest but it will get the job done:
I then put duck tape over the screws to seal on the inside of them and then another over and on the outside of the screws and sheet metal to seal it to the car to make sure the outside stays on the outside. Then as a final touch we threw on a sticker to remind all of us this is how we do.

