Faeker
Greenie Member
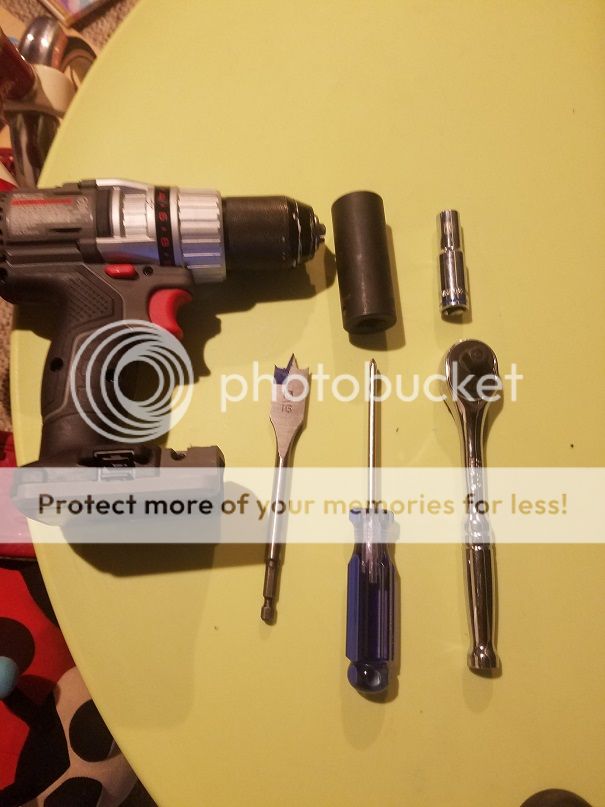
The followoing guide is for the installation of the 2nd Gen Mazdaspeed 3 rear most bumper cover latch for the front bumper cover. You will need these tools for proper installation:
1. 10mm deep socket (use whatever ratchet you have be it 1/8, 1/2, or 3/4)
2. Phillips screw driver
3. Drill
4. 13/16 Drill bit. (I used a wood drill bit because they start easier and there's less chance of slipping. A step bit is also an option as stated in the Gen1 how-to.)
5. 7/8 Inch/22mm socket.
The first thing you'll be doing is removing the screws and push in tabs holding the fender liner onto the front bumper cover. Once those are removed you can do 1 or 2 things; either pull the bumper cover off of the bracket on the side or take off a few more push in tabs and 1 bigger screw under the hood that attaches the bumper cover to the frame. I did not do that. I worked with space I had with just pulling the bumper cover off of the bracket.
Once you do 1 of those 2, you will remove the bracket bolt closest to the fender well. You will use the 10mm deep socket for this part. Once that is taken out, you can assemble the bolt kit for the latch system.
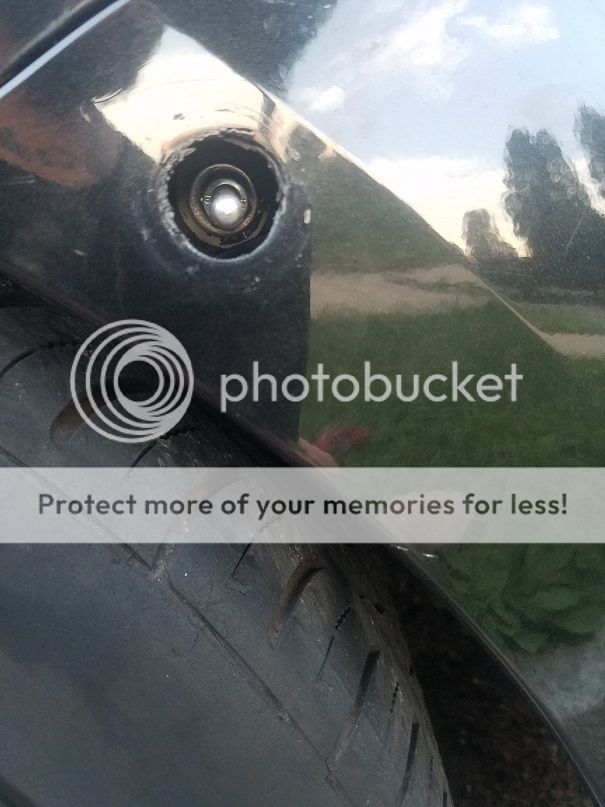
Take the bolt included in the kit and thread the nut onto it roughly 3/4 of the way up. Then you will place the washer onto the bolt. Once those 2 parts are on the bolt, thread the bolt into the hole left by removing the bracket bolt. What's nice about this set up is that you have quite a bit of adjustment in and out for the latch. I have mine about 3 threads past the hole. You can feel the new bolt's depth simply by placing your fingers behind the bracket area. Once you have the bolt at the above depth, use your 10mm deep socket and tighten down the nut that was attached to the bolt. This will give the bolt stability.

Next up is figuring out just where you will be drilling a hole into your bumper cover. As @Raider has said before, a great method is taking a small ball of clay from a clay bar and placing it on the head of the latch bolt. Then you'll simply eye up the bumper cover line to the fender line and gently apply pressure to the bumper cover onto the bolt. When you pull the cover back off you'll see that the clay bar ball stuck to the bumper. That will be where you will place the center of the drill bit and drill out the hole. I did it a different way since it's been stupid hot here. I just took the bumper cover and pressed it hard onto the latch bolt until an imprint of the bolt head could be seen on the outside of the bumper cover. This can be done in colder temperature's as well, but you will need to use a heat gun to get the bumper cover pliable enough.
Once you have the hole drilled, place the Quik latch into the hole and tighten it on with either a crescent wrench or a 22mm or 7/8 inch socket. I used the socket since it was easier to get it nice and tight. Once you have the latch installed on the bumper cover, proceed to push the latch onto the bolt. If you placed the hole in the proper place, the lines of the fender and the bumper cover will be at their OEM spots.

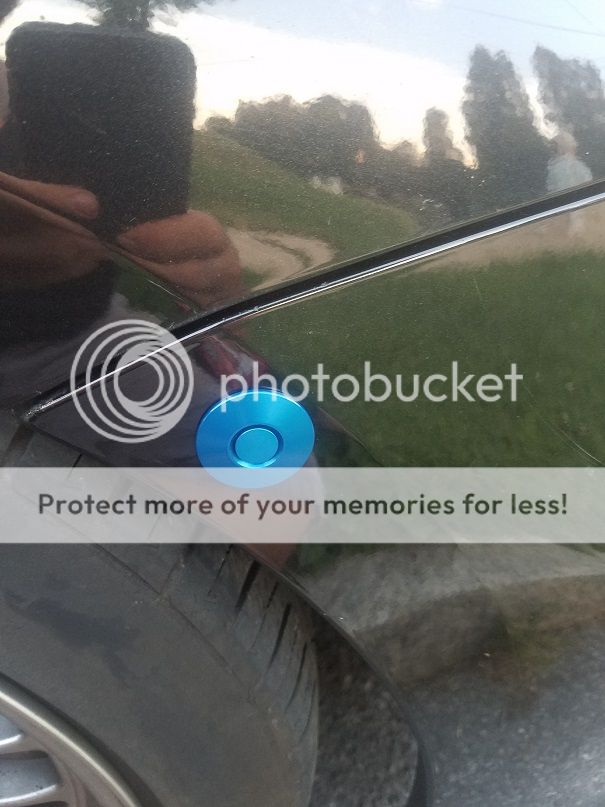
Now, if you missed your mark by a little bit you can still fix this. You have about 1/4 inch leeway up and down once the hole is drilled. If you find that you need to move it up or down, I suggest using a dremel to carefully grind out the hole just a little bit until it's where you need it.
Aside from installing the latch and bolt, you can also elect to purchase the helper spring kit from Quik Latch which makes it easier to remove the latch but honestly, I don't feel like you'll need it for the fender latch.
Once everything is done, you can stand back, look at the superior latching system and give Mazda the finger for making us find a better way to keep our bumper covers attached.

1. 10mm deep socket (use whatever ratchet you have be it 1/8, 1/2, or 3/4)
2. Phillips screw driver
3. Drill
4. 13/16 Drill bit. (I used a wood drill bit because they start easier and there's less chance of slipping. A step bit is also an option as stated in the Gen1 how-to.)
5. 7/8 Inch/22mm socket.

The first thing you'll be doing is removing the screws and push in tabs holding the fender liner onto the front bumper cover. Once those are removed you can do 1 or 2 things; either pull the bumper cover off of the bracket on the side or take off a few more push in tabs and 1 bigger screw under the hood that attaches the bumper cover to the frame. I did not do that. I worked with space I had with just pulling the bumper cover off of the bracket.
Once you do 1 of those 2, you will remove the bracket bolt closest to the fender well. You will use the 10mm deep socket for this part. Once that is taken out, you can assemble the bolt kit for the latch system.
Take the bolt included in the kit and thread the nut onto it roughly 3/4 of the way up. Then you will place the washer onto the bolt. Once those 2 parts are on the bolt, thread the bolt into the hole left by removing the bracket bolt. What's nice about this set up is that you have quite a bit of adjustment in and out for the latch. I have mine about 3 threads past the hole. You can feel the new bolt's depth simply by placing your fingers behind the bracket area. Once you have the bolt at the above depth, use your 10mm deep socket and tighten down the nut that was attached to the bolt. This will give the bolt stability.

Next up is figuring out just where you will be drilling a hole into your bumper cover. As @Raider has said before, a great method is taking a small ball of clay from a clay bar and placing it on the head of the latch bolt. Then you'll simply eye up the bumper cover line to the fender line and gently apply pressure to the bumper cover onto the bolt. When you pull the cover back off you'll see that the clay bar ball stuck to the bumper. That will be where you will place the center of the drill bit and drill out the hole. I did it a different way since it's been stupid hot here. I just took the bumper cover and pressed it hard onto the latch bolt until an imprint of the bolt head could be seen on the outside of the bumper cover. This can be done in colder temperature's as well, but you will need to use a heat gun to get the bumper cover pliable enough.

Once you have the hole drilled, place the Quik latch into the hole and tighten it on with either a crescent wrench or a 22mm or 7/8 inch socket. I used the socket since it was easier to get it nice and tight. Once you have the latch installed on the bumper cover, proceed to push the latch onto the bolt. If you placed the hole in the proper place, the lines of the fender and the bumper cover will be at their OEM spots.


Now, if you missed your mark by a little bit you can still fix this. You have about 1/4 inch leeway up and down once the hole is drilled. If you find that you need to move it up or down, I suggest using a dremel to carefully grind out the hole just a little bit until it's where you need it.
Aside from installing the latch and bolt, you can also elect to purchase the helper spring kit from Quik Latch which makes it easier to remove the latch but honestly, I don't feel like you'll need it for the fender latch.
Once everything is done, you can stand back, look at the superior latching system and give Mazda the finger for making us find a better way to keep our bumper covers attached.
