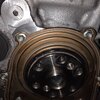
Replace Rear Main Seal?

  • Thread starter Thread starter Jonb
  • Start date Start date
  • Watchers Watchers 7

Jonb

Greenie Member
Hey All,

I am swapping out my clutch on my Gen2 sitting at 125k on the ODO. What is everyone’s thoughts on changing out the rear main seal whilst I’m in there?

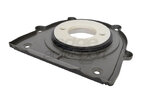
I got a main seal with the install tool, and the axle seals. The rear main looks fine when inspecting it and probably does not need to be changed out at this time.

Would ya’ll change it out preemptively as hopefully not have to go back in there relatively soon? Or could changing it out possibly mess up a good thing?
 
Back in the day, rear main seal technology led to the idea of changing it while there is access.
Todays seals are far superior to the old rope and 2 piece designs. You are probably fine.
 
It's at minimum 11 years old now. Swap it with a new oem one.

Back in the day, rear main seal technology led to the idea of changing it while there is access.
Todays seals are far superior to the old rope and 2 piece designs. You are probably fine.

Holy Fuck long reply lmfao. Thank you two for responding. I’m sure it would have been fine, but went ahead and installed it recently.

With working a lot and having no motivation, it took a while. On the upside, now that she’s back on the road, I’m definitely happy I’m back driving the Speed.

Also luckily for me, I had an E blend in there for 9 months
 
Reviving this for a second because I need some advice about sourcing the install tool for the seal. Is this not the install tool I am looking for? Or is this just the reusable version?
It does not look like the one that I used. Not saying that it couldn’t work. I’m 90% sure they don’t sell the tools anymore. I got the tool with the seal. I’m pretty sure it was from Graveyard Performance as I believe they still had some stock left for the seals with the tool.
 
It does not look like the one that I used. Not saying that it couldn’t work. I’m 90% sure they don’t sell the tools anymore. I got the tool with the seal. I’m pretty sure it was from Graveyard Performance as I believe they still had some stock left for the seals with the tool.
Funny story, I picked up the seal from the dealer today. No included install tool, but there was a paper that had the tool I linked above on it, with the exact part number. Guess that is the dealer version that is reusable, as opposed to the one use version that comes with the seal.
 
If you're super careful, you don't need the tool; just be patient and gentle and you can get it on there with naught but fingers.
 
Rear Main seal is back in. tool was nice.
 

Attachments

  • IMG_20260207_223517.jpg
    IMG_20260207_223517.jpg
    1.7 MB · Views: 13
  • IMG_20260208_152415.jpg
    IMG_20260208_152415.jpg
    2.3 MB · Views: 13
  • IMG_20260208_152418.jpg
    IMG_20260208_152418.jpg
    2.2 MB · Views: 13
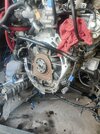
I got the seal on there without damaging the seal lip or anything as far as I can tell but the back part of the seal protrudes past the front lip. Based on your image there it isn't supposed to do that, so either I gently push that in somehow without the tool or buy the tool?
 
I bought the seal through speedperformance and it came in a plastic container but It doesn't seem to be a usable tool unless I am supposed to cut it out?
 
I bought the seal through speedperformance and it came in a plastic container but It doesn't seem to be a usable tool unless I am supposed to cut it out?
Tried, did not work, plus pushing on that seal like that even with finger nails seems risky, it moves slightly with finger nails but not much.
 
OK I've done this manually before, and here's what you need to do.

1. Drink a beer, relax a bit as this will take time (DO NOT RUSH)
2. Get a chair to sit on next to the engine while you work on this, unless you're comfortable kneeling or whatever position you'll be in
3. Make sure the sharp edge of the metal part of the seal is out (away from block); this will have the sharp edge of the round sealing part of the seal is in (towards block), which is why it's a pain.
4. Carefully start to line up the seal with the crank and get it started lopsided before letting the seal touch the front of the crank on the opposite side of where you started it (where the seal should be touching the spinning side of the crank, not the front)
5. From here, you can gently use your fingers (pinkie if your fingers are big) or soft, dull plastic piece (like a soda bottle top) to gently stretch the seal past the face of the crank and to the side; think of this like how you would put an oring on the crank, and carefully walk it on around like that.
6. You may need to turn and wiggle (gently) to get better positioning for your fingers/hands/tool (again, no sharp or square tools) until you work it on all the way around. Note that the seal is meant to have a little stretch in it, so it will be tighter towards the end, but if you're careful and patient, you'll get it done without issue.

I did this for someone using only my hands in just a few minutes, but it wasn't exactly my first time doing something like that.

Godspeed.
 
OK I've done this manually before, and here's what you need to do.

1. Drink a beer, relax a bit as this will take time (DO NOT RUSH)
2. Get a chair to sit on next to the engine while you work on this, unless you're comfortable kneeling or whatever position you'll be in
3. Make sure the sharp edge of the metal part of the seal is out (away from block); this will have the sharp edge of the round sealing part of the seal is in (towards block), which is why it's a pain.
4. Carefully start to line up the seal with the crank and get it started lopsided before letting the seal touch the front of the crank on the opposite side of where you started it (where the seal should be touching the spinning side of the crank, not the front)
5. From here, you can gently use your fingers (pinkie if your fingers are big) or soft, dull plastic piece (like a soda bottle top) to gently stretch the seal past the face of the crank and to the side; think of this like how you would put an oring on the crank, and carefully walk it on around like that.
6. You may need to turn and wiggle (gently) to get better positioning for your fingers/hands/tool (again, no sharp or square tools) until you work it on all the way around. Note that the seal is meant to have a little stretch in it, so it will be tighter towards the end, but if you're careful and patient, you'll get it done without issue.

I did this for someone using only my hands in just a few minutes, but it wasn't exactly my first time doing something like that.

Godspeed.

Thanks, I tried but this is the result. I went ahead and ordered the special tool on Amazon for about $30. I'm hoping to push that lip back, do you see it between the black part and the crank?
 

Attachments

  • 20260702_223440.jpg
    20260702_223440.jpg
    1.1 MB · Views: 6
Back
Top