Vansquish
Gold Member
This thread was originally created on MSF by @JDMCRX back in May of 2014.
Hey guys thought I would toss up a few pics of the power steering pump re seal.
First remove your serpentine belt.
Remove your pressure sensor connection
Place some cardboard and a large drain pan under front corner.
Remove the 17mm pressure side banjo fitting on top you may need to hold the lower banjo with a 27mm wrench becarful not to use the actual pressure line instead of holding the lower banjo nut or you will ruin the pressure line.
Remove your lower recirc line it's just a spring clamp.
Once you remove the lower line its going to empty the whole reservoir of ATF out of it.
There is two 12m bolts on top and one 12mm bolt under the pump.
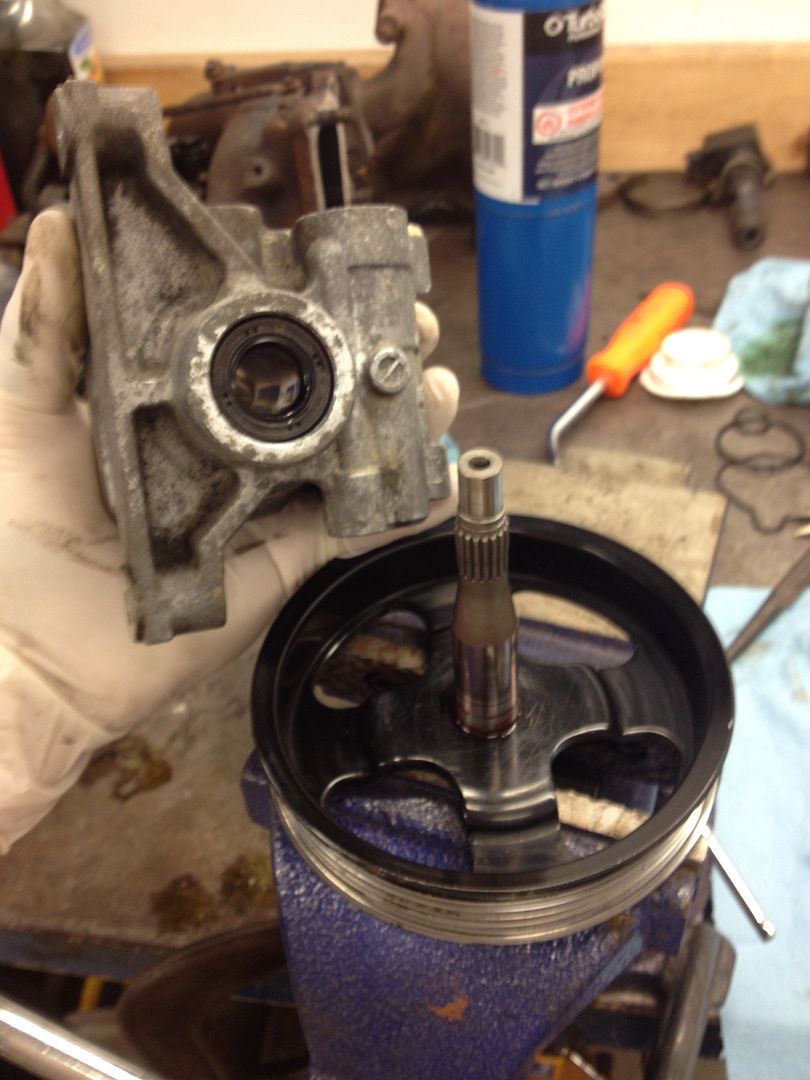
Once the pump is out place it in the vise with the pulley facing down and gently clamp the pulley cone.
Remove the two spring clips that hold the resivor in place

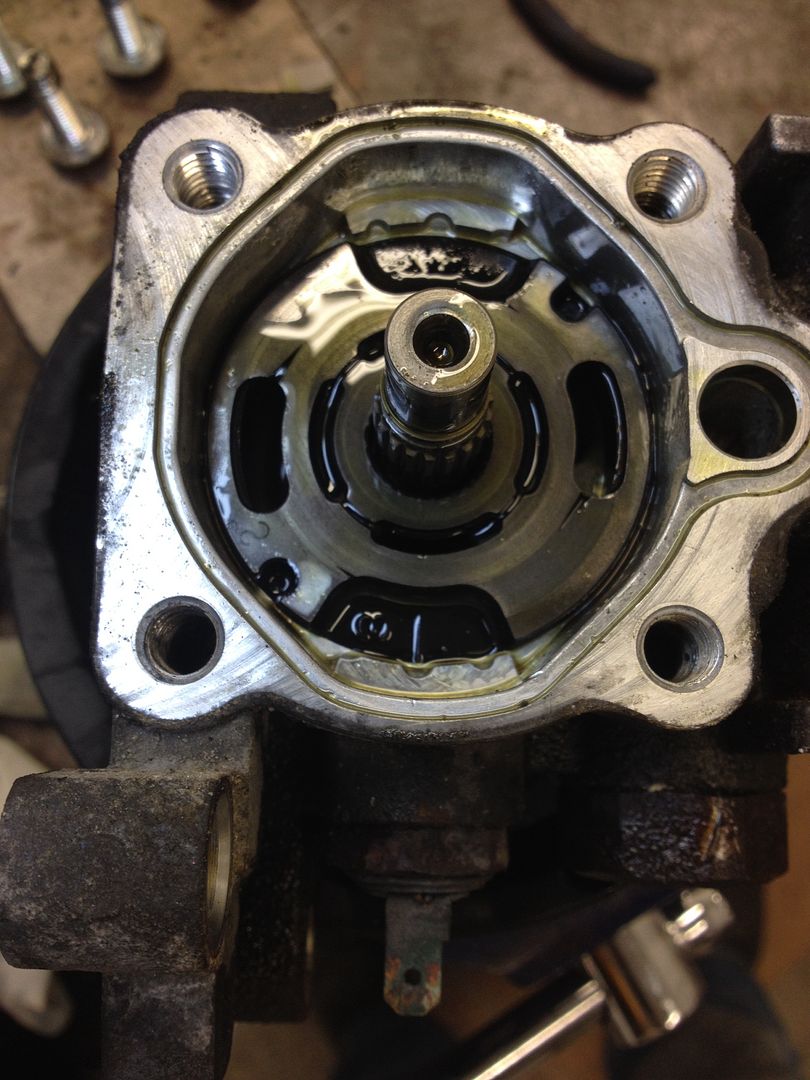
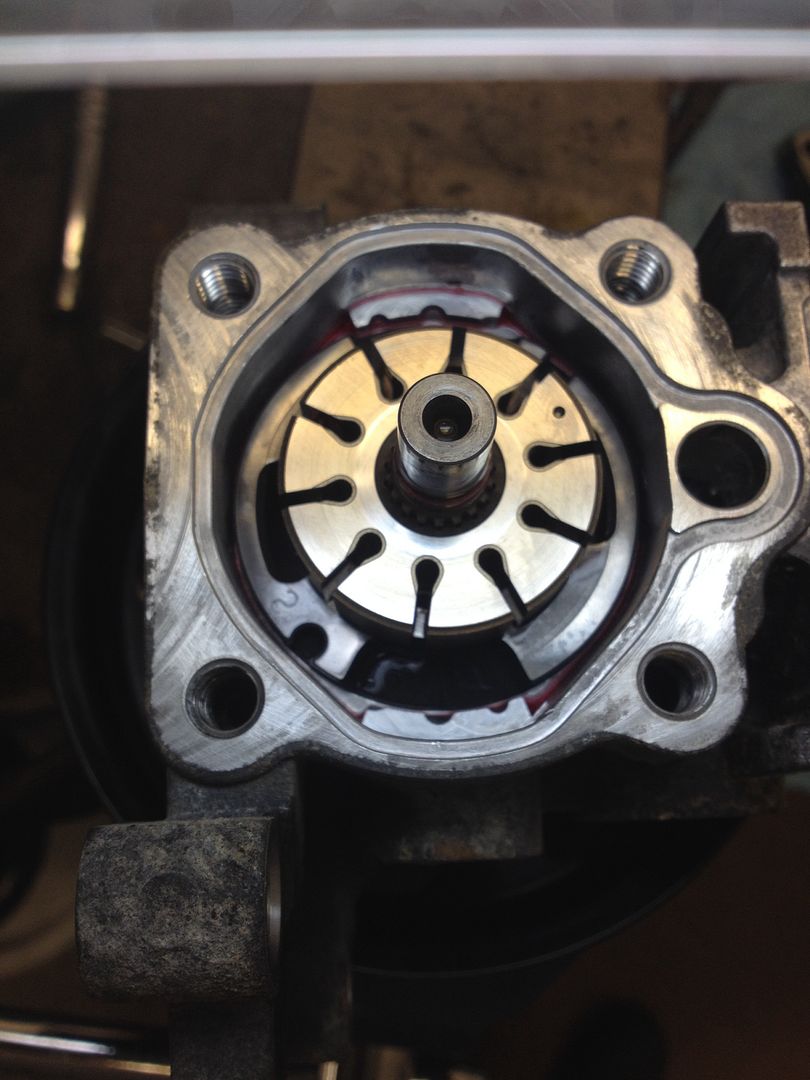
Remove the four 12mm bolts from the back of the case and slowly pull back on it, it will feel stuck due to suction .
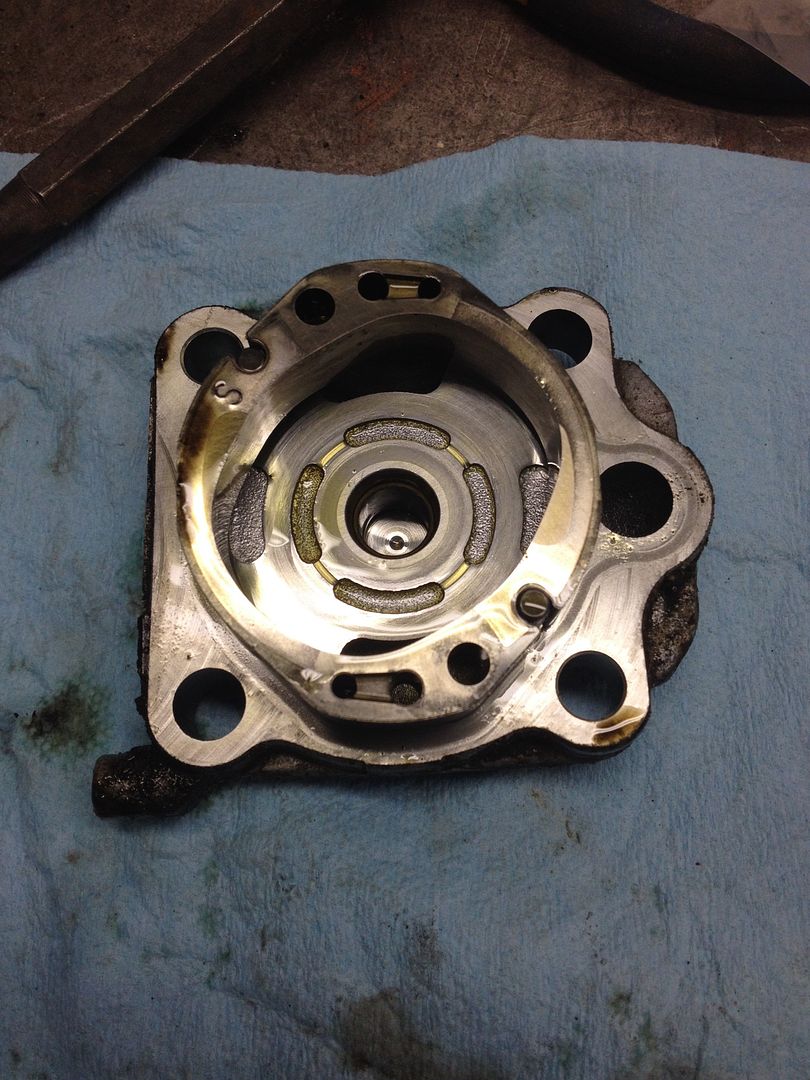
Once the rear cover is off the outer ring of the pump will come off with the rear cover so stay in the case.

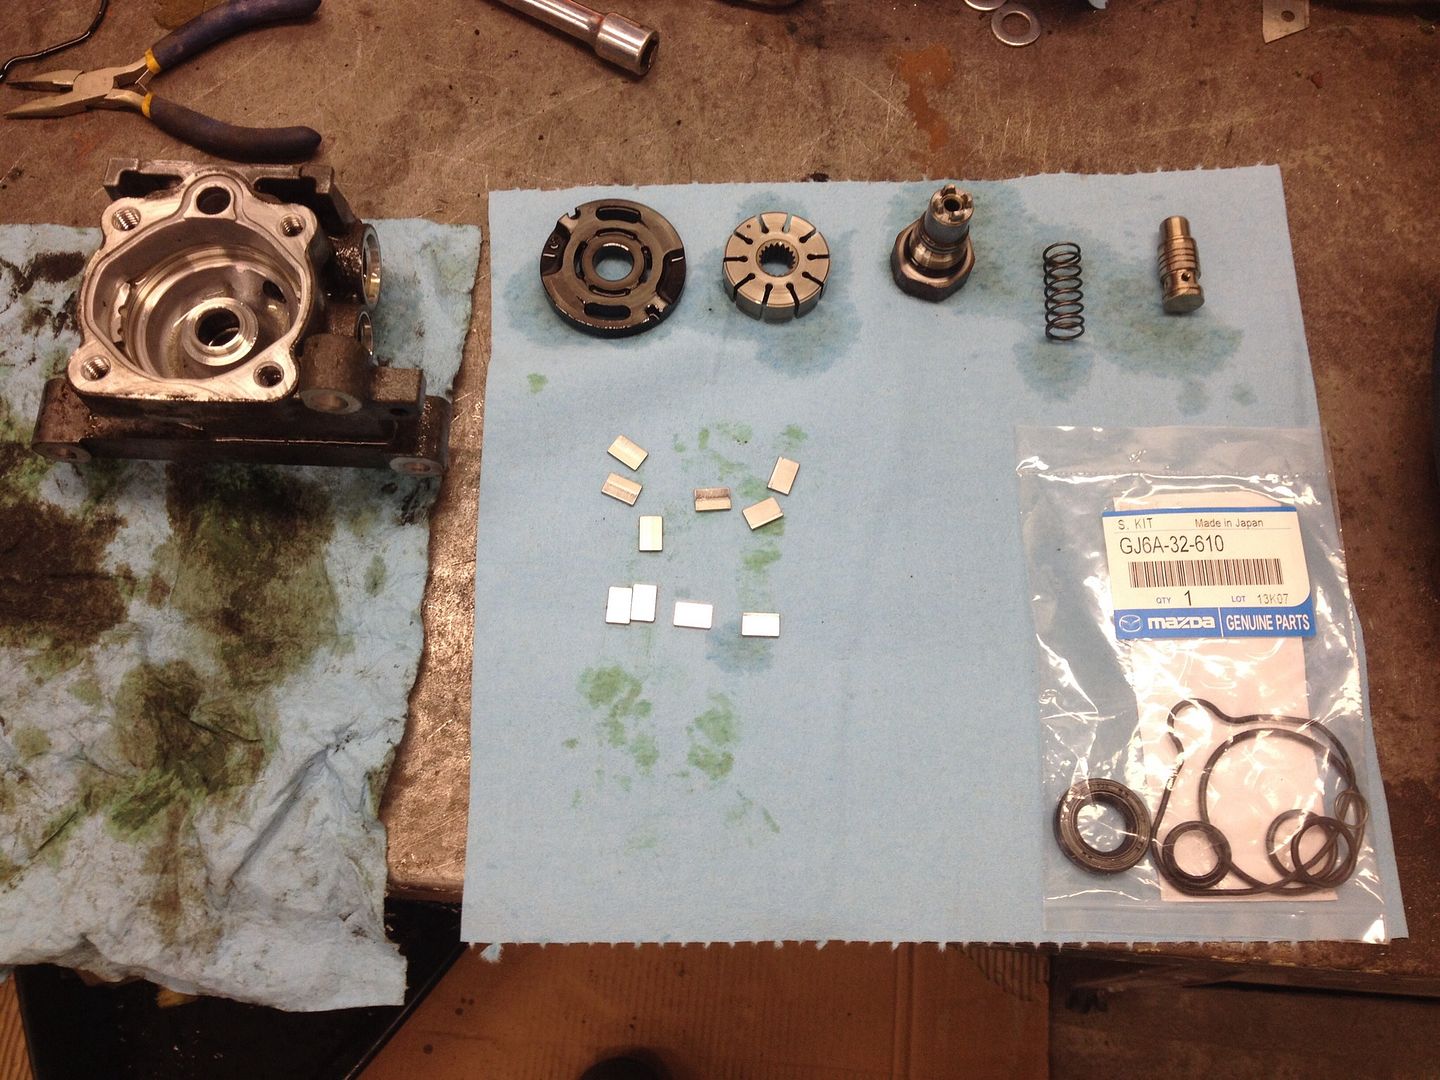
Now notice the ten small pump vein ends remove these and place on a rag, there is a small round wire ring clip you will need to remove. use a small screw driver and insert between the gap and rotate the screw driver and this will spread the clip enough for you to use a pick to get under it to move it up. Once the clip is removed remove the vein inner assembly and remove the vein backing also notice the orientation there is a S that corresponds with the vein outer ring.
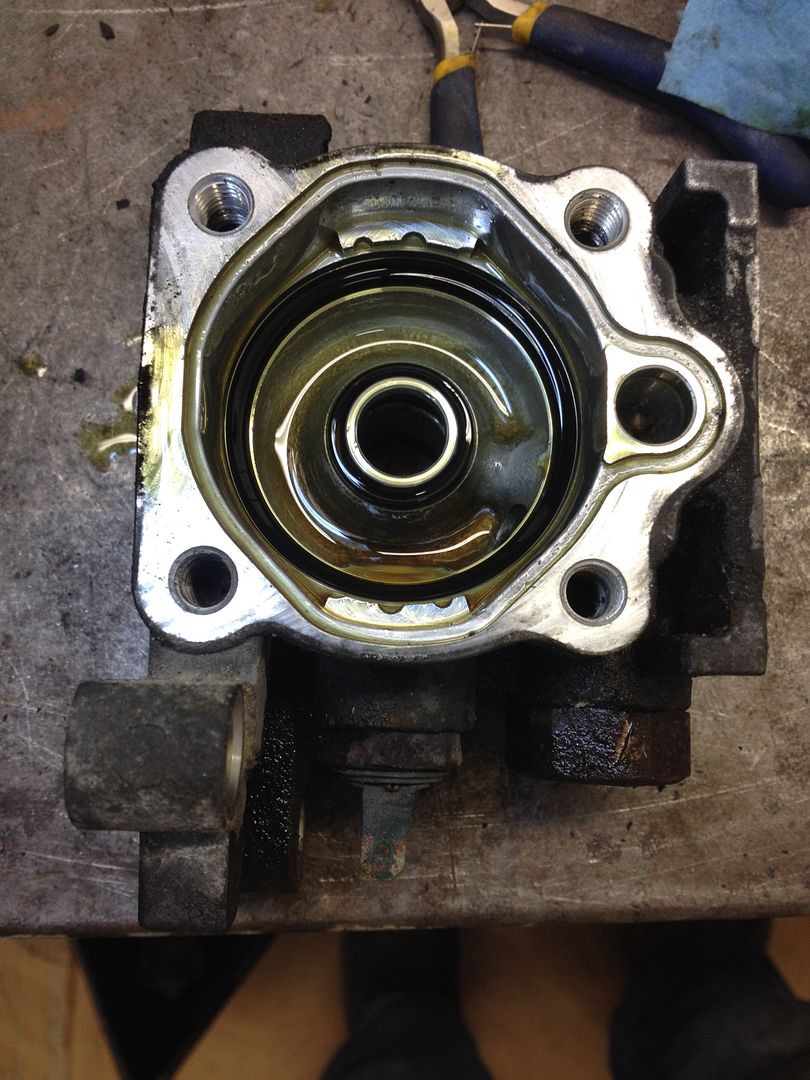
Once the vein backing is out you can now remove the body off the shaft and remove the prints and wash all the parts.
On the top of the pump remove the top banjo and you will have a pressure valve and spring remove this
Wash all your parts
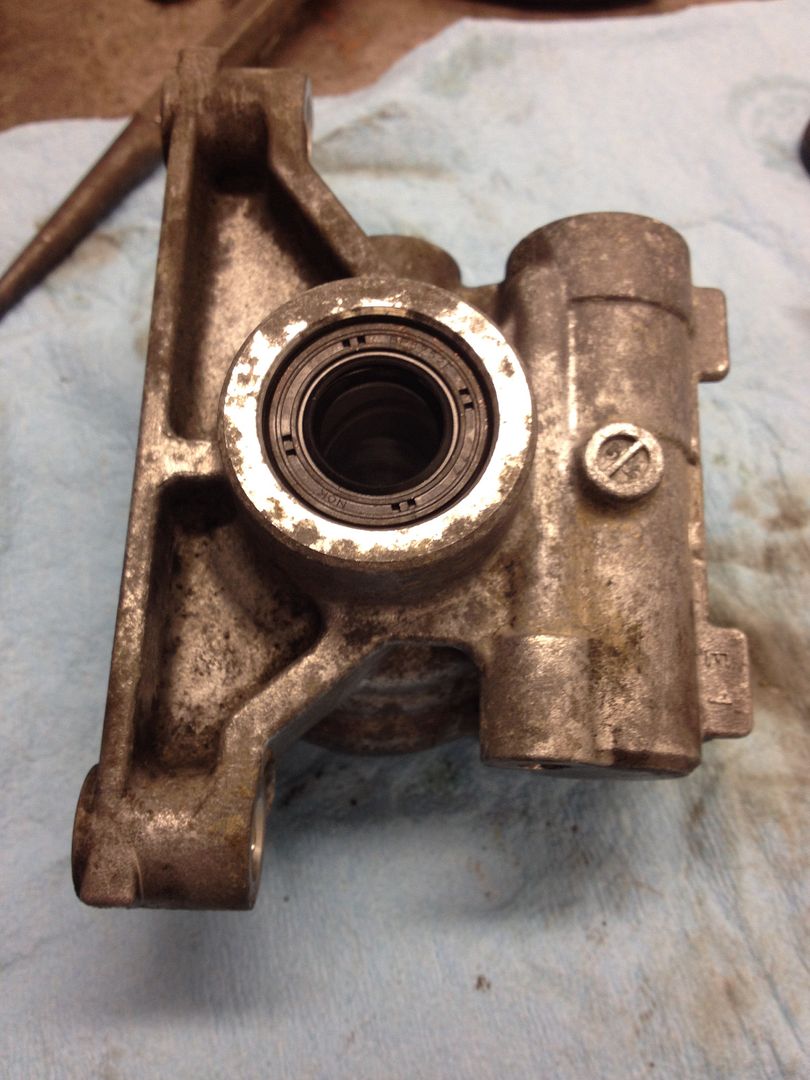
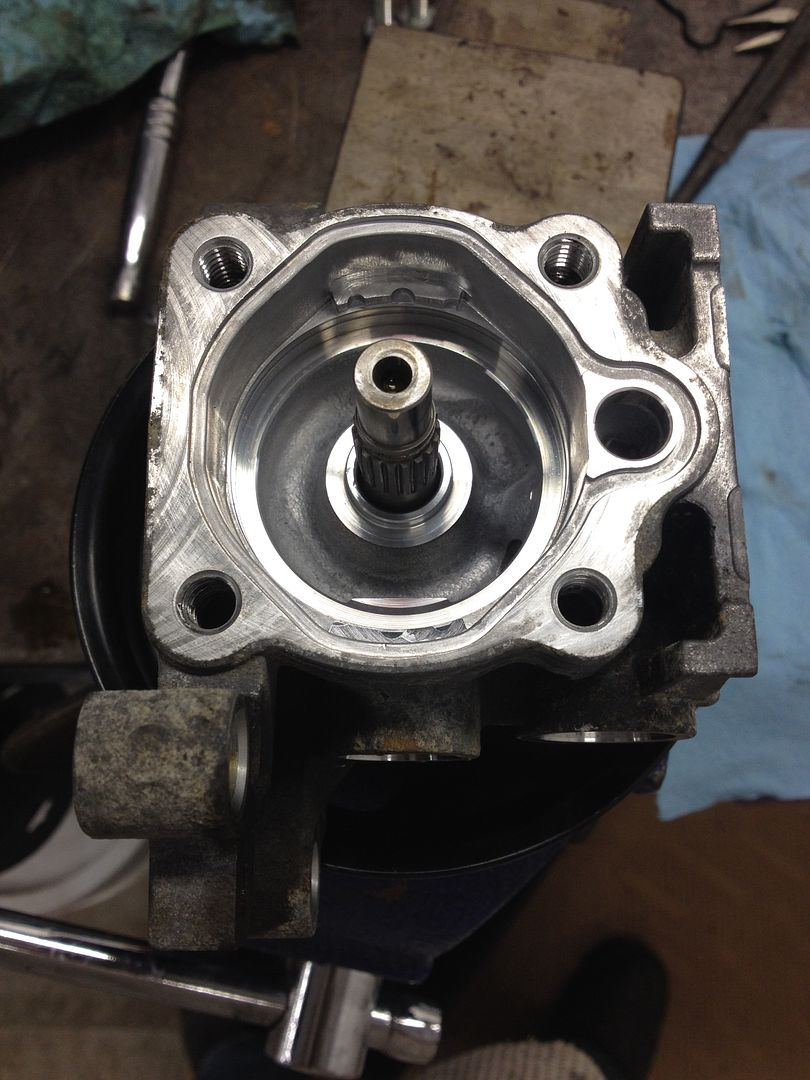
Install your new pump shaft seal and with ATF lube up the shaft and inner part of the seal and drop the body onto the shaft.
Reinstall your two inner orings and lube with ATF
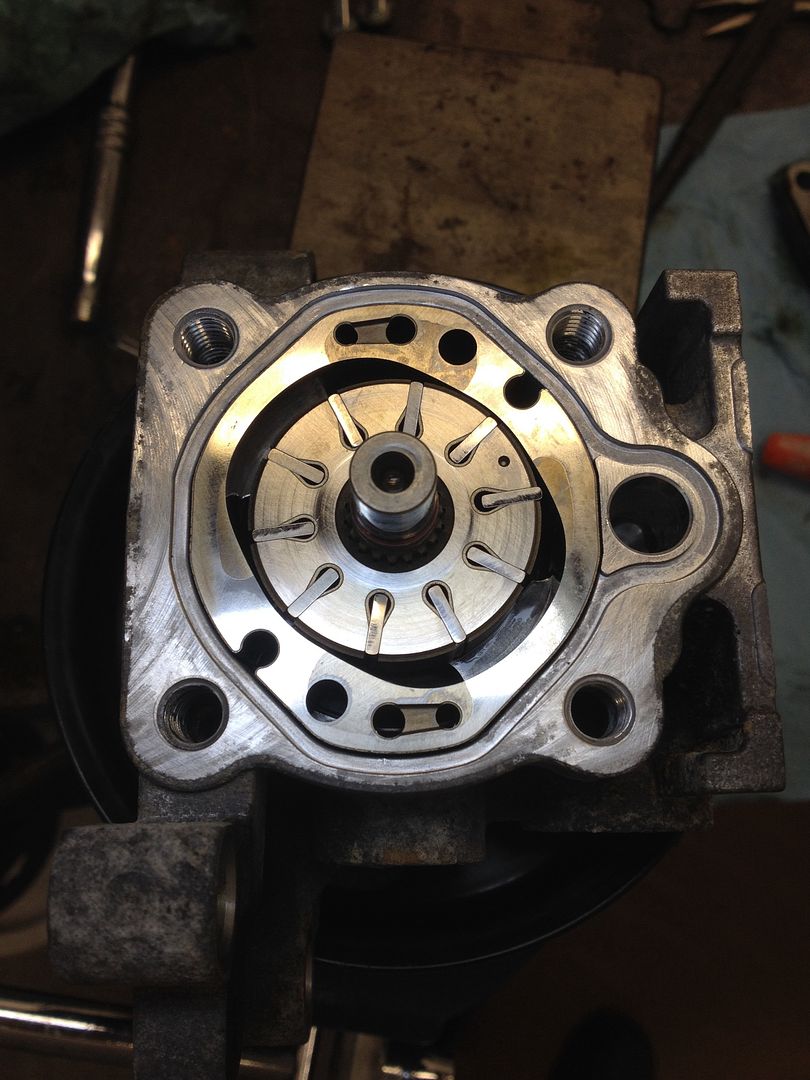
Reinstall your pump vein inner assembly with the S in the right orientation and drop in your pump vein in with the dot up and install your new ring clip.
Install your pump vein outer ring and your ten vein pump ends. And lube the area with ATF.
Now reinstall your outer oring seal and lube it and reinstall your pump backing and tigtheen your four 12mm bolts and reinstall your res and you are done.
Sorry I missed some pics next pump in a few weeks will add more pics.
Hey guys thought I would toss up a few pics of the power steering pump re seal.
First remove your serpentine belt.
Remove your pressure sensor connection
Place some cardboard and a large drain pan under front corner.
Remove the 17mm pressure side banjo fitting on top you may need to hold the lower banjo with a 27mm wrench becarful not to use the actual pressure line instead of holding the lower banjo nut or you will ruin the pressure line.
Remove your lower recirc line it's just a spring clamp.
Once you remove the lower line its going to empty the whole reservoir of ATF out of it.
There is two 12m bolts on top and one 12mm bolt under the pump.
Once the pump is out place it in the vise with the pulley facing down and gently clamp the pulley cone.
Remove the two spring clips that hold the resivor in place
Remove the four 12mm bolts from the back of the case and slowly pull back on it, it will feel stuck due to suction .
Once the rear cover is off the outer ring of the pump will come off with the rear cover so stay in the case.
Now notice the ten small pump vein ends remove these and place on a rag, there is a small round wire ring clip you will need to remove. use a small screw driver and insert between the gap and rotate the screw driver and this will spread the clip enough for you to use a pick to get under it to move it up. Once the clip is removed remove the vein inner assembly and remove the vein backing also notice the orientation there is a S that corresponds with the vein outer ring.
Once the vein backing is out you can now remove the body off the shaft and remove the prints and wash all the parts.
On the top of the pump remove the top banjo and you will have a pressure valve and spring remove this
Wash all your parts
Install your new pump shaft seal and with ATF lube up the shaft and inner part of the seal and drop the body onto the shaft.
Reinstall your two inner orings and lube with ATF
Reinstall your pump vein inner assembly with the S in the right orientation and drop in your pump vein in with the dot up and install your new ring clip.
Install your pump vein outer ring and your ten vein pump ends. And lube the area with ATF.
Now reinstall your outer oring seal and lube it and reinstall your pump backing and tigtheen your four 12mm bolts and reinstall your res and you are done.
Sorry I missed some pics next pump in a few weeks will add more pics.