

apk493
Greenie N00B Member
Alright friends, here’s a guide for a full disassembly and rebuild of the rear brake calipers. I was disappointed with the resources out there for our calipers (which are the same as the standard 3s, for the record). The manual doesn’t go into detail about the caliper internals, only the piston removal. The closest I could find was this video rebuilding an NB Miata caliper which is similar but not the same to ours, so I figured I’d pay it forward with a full write up with pictures, etc, bc that’s what I wish I had. Special shoutout to @seppukufunny on the MS3 discord who helped me out with some questions since he redid his calipers not too long ago.
This is my first post on here (career lurker) so apologies if the formatting gets messed up, I’ll work on fixing that after I hit submit if it looks like trash.
Some recommended tools for doing all this:
First step, which is probably obvious, is things off the wheel hub. The bolts for the caliper brackets are 14mm, I remember using a combo of sockets and box end wrenches since you’ll have to work around brake lines and cables if you haven’t removed those first. Those will be easiest with some flare nut wrenches (or if you’re replacing/upgrading the brake lines, you could cut them and use a deep socket later).
Before starting this job, make sure that your handbrake cable isn’t corrosion-welded into the caliper. I had one side that was so rusted I ended up cutting it off with a grinder, found a less-rusty gen 2 mz3 caliper at a junkyard, and used that instead. You’ll also want to remove the brake pad retainer spring on the outside, which also likes to rust-weld into those little pinholes. Be careful with that unless you plan on drilling out those holes. Take off that retainer spring and the handbrake lever spring and set those aside.
Once the caliper is off the wheel, you can slap that thing in a vice to make it easier to work with. The 7mm Allen socket is for the slide pins. The stock calipers have rubber bushings with a plastic cap on the end, so take off the caps, remove the slide pins, and take out the bushings. There will likely be some aluminum dust corrosion around those slide pin holes, so use a sanding drum or sandpaper to clean those up if you don’t plan on giving your calipers a chemical bath. With those removed the caliper bracket will pop out along with the brake pads. Note the built-in spring on the inner pad vs the outer pad.
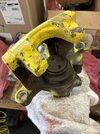
Time to remove the piston. You can choose to remove the dust boot first, or wait until the piston is extended a little bit, but either way they will have to come off together. The base of the boot that sits on the caliper has a metal ring in it for stiffness (or maybe it’s a spring, I didn’t look too close), so if you start to pry off the boot you’ll want to make sure you get under that ring, then it pops off pretty easily. If its really dirty/corroded, I found it helpful to slide the blade of a box knife/razor blade under the base of the boot to make some room to get a flat end pick or screwdriver in there to pry the whole thing off.
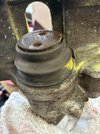
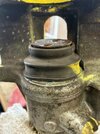
Now you can try to use the handbrake lever to push the piston up and out. I ended up draining my brake fluid first so this didn’t work, but if it does then you save a little time. If it doesn’t, then you have a few options of tools to get it out. First (and cheapest) is to get an appropriately sized pair of needle nose pliers, slide the ends of the jaws into those two holes you see on the piston, and twist and hope it comes out. If you like excuses to buy new single-use tools, then you can try one of those nifty little cube attachments. I said fuck it and bought one off Amazon, and none of the sides fit the piston holes anyway. Neat!
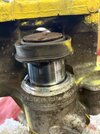
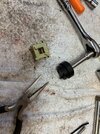
The most correct way is to use a brake caliper compression tool. Harbor Freight sells one under the Maddox brand. I had a buddy with a set that I borrowed. But also this is the only thing you’ll probably be using this for, so if you want to save some money then just use a pair of pliers. Pic below shows each of the options.
Once the piston is removed, you can either clean it if you plan on reusing it, or throw it wherever if you’re replacing it. If you do reuse it, slide the old dust boot off the lip of the piston and over the top face of it. It’s also worth cleaning off the face of the piston if it has some dirt/gunk/rust on it. No sense putting all new seals and shit in these bad boys and using a crusty piston, now is there? If you look into the internals of the caliper, you’ll see a rod with screw threads on it and another retainer that holds a spring and a washer inside.
Side note: there is one additional seal inside the actual piston, you can see it if you turn it over and shine a flashlight into it. It sits below a retainer ring and a spring on the inside. I did NOT have to disassemble the piston to change this seal because the kit I bought came with a new piston pre-assembled. I have been told that this thing is a nightmare to take apart and put back together, but if you end up having a seal left over from a kit you use, its probably the one sitting inside this piston.
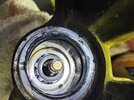
Now we get to the first seal to remove. Take a pick and remove the rubber square ring that sits in the caliper wall just under where the dust boot rested.
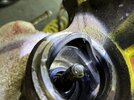
Now comes the (not) fun part. The next thing to go is that retainer. This thing is a bitch to remove, and an even bigger bitch to re-install, but we’ll get to the latter in a bit. The best way I found to get the retainer out is using a fuck load of long, flat ended picks and flathead screwdrivers. The retainer has 6 prongs, each needs pried inward to get the retainer above the lip it sits under. I ended up doing 3 prongs at a time, which usually would lodge the retainer halfway out of the lip, then I’d reset and get the other 3 prongs. It’s going to take some fiddling, but the more prongs you pry above the lip, the easier it gets. Eventually, it should pop free and you can remove it, along with the spring and washer that sits underneath it.
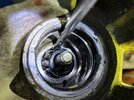
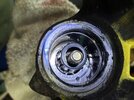
Now the threaded rod can come out. This is only just resting inside the caliper body, so you can grab the end of the rod with your hands and just wiggle it back and forth while pulling outward and it will eventually pop free. The base of the rod has a small o-ring on it, you can remove that now and set the rod aside.
The next thing to go is a small pill-shaped piece of metal that is sitting just behind where the threaded rod was resting. Take a picture of the way it’s oriented while sitting inside there, that’ll be important later. It likely won’t fall out on its own because of a buildup of grease and gunk on the inside, but if you stick a pair of needle nose pliers in there it’ll come right out. Set that aside too and don’t lose it. Now you have all of the caliper-side internals out.
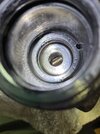
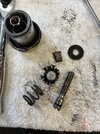
The last thing to go is the handbrake lever itself. It was being held inside by that small metal pill piece you just took out, and now you can slide it straight up and out after you remove a pin on the body of the caliper. This is just pressed into a hole with both sides being knurled(-ish). Time to get an appropriately sized punch and tap it out. Using the vice makes this easier, but you might need some force since it’ll also likely have corrosion around it.
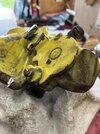
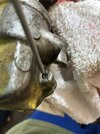
Once that’s out, you should be able to just slide the handbrake lever straight up and out with little resistance. This also has a flared seal on the underside where it sits on the caliper body. It will either come out with the lever, or might sit inside the body. Either way, use a pick or screwdriver to remove this seal, and make sure you remove all of it because it might tear apart as you take it out.
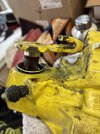
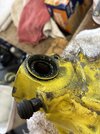
That’s the last piece of the disassembly. Your calipers may also have some needle bearings inside the handbrake lever hole. One that I disassembled did, the others I took apart didn’t. If you do have them, its worth spraying some brake cleaner in there to try and un-gunk them. You can see from this picture mine were pretty funky.
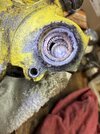
Also, now is the time to clean everything else that came from inside the caliper. Dirt, grease, rust, all gotta go. Make sure to clean the inside of the caliper too. The area with the handbrake lever probably has some gross grease buildup in it, get that all out. Use brake cleaner, q-tips, paper towels, whatever you need to do.
Now that everything is clean, the assembly is quite literally the reverse of what you just did to take it all apart. Make sure to use rubber grease on all the seals when installing them, and grease the fuck out of the handbrake lever and metal pill before putting them back in (I used brake grease for this). Before putting the pill back in, you can gently tap the knurled pin for the handbrake lever back into place as well.
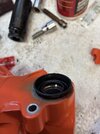
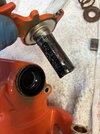
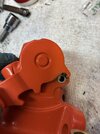
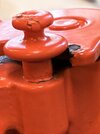
The metal pill only really has one way to fit inside the handbrake lever cavity. If you try and rotate it around in there with pliers, you’ll find it will settle a certain way. Hopefully you took a picture of it like I told you to before so you don’t second guess yourself.
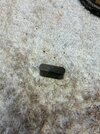
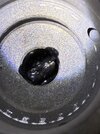
Put a new small o-ring on the base of the threaded rod. You’ll notice the base also has a rounded slot cut into it, that is supposed to rest on the other side of the metal pill we just put back. Wiggle the rod back into place until it doesn’t go down any further.
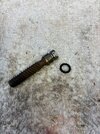
Now is a good time to test to make sure the handbrake mechanism is all aligned. If you turn the handbrake lever with your hand, you should notice the threaded rod slightly extends outward. This is what makes your handbrake engage when you pull the handle in the cabin. Go ahead and push it back to its resting position.
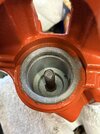
Now comes the worst part of the rebuild. Start dropping in your clean washer, spring and 6-prong retainer clip.
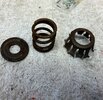
I probably spent the better part of two hours trying to press in this clip with a combination of flathead screwdrivers, engine picks, sockets, and anything else I had laying in my garage that I thought would help. It looked like I was doing brain surgery on this thing at one point. I tried pushing it into a large socket to get it in, that didn’t work either.
I eventually gave up and phoned a friend with a 3D printer. We designed a simple collar in CAD that the retainer would fit into and had a large enough opening to use a socket to press it down into place. The collar would squeeze the prongs under the lip on the body, and would also catch on that lip as you pressed down and compressed the spring with a socket. It took all of 10 seconds to pop each retainer in after that. If you take no other advice from this entire thread, save yourself the frustration and just print out a few collars for this.
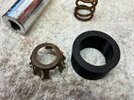
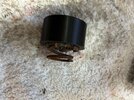
The collar itself is just a hollow cylinder. 1.4 inch outer diameter, 1.0 inch inner diameter. 3/4 inch height. I don’t have the file on-hand or I’d attach it for you.
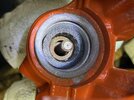
The rest of this is a cakewalk. Next seal is the square ring, lube that guy up and push it into the channel of the caliper body. You can use a small pick to make sure it sits flush, just don’t tear it.
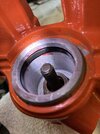
Lube up your dust boot and re-seat it onto your new (or cleaned) piston. As you probably already figured out, the piston screws onto the rod. Lube the sides of the piston, too, that’ll help it slide into place. Once it engages you’ll need to use one of the three methods mentioned earlier to keep rotating it down into the body. Before you fully compress it, make sure to press the base of the dust boot around the outer edge of the body.
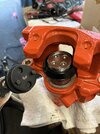
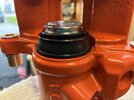
Those are the last steps I will cover in detail in this guide. Your next steps would be to re-assemble the brakes as if you were changing brake pads. Slide pin bushings, slide pins, grease, and pads in the brackets. Don’t forget your bleeder screw and external springs. As I mentioned above, Damond’s guide for their slide pin bushings is wonderful, even if you are re-using the rubber ones. They have torque specs for all the bolts, too. Hopefully you found this rambling guide helpful.
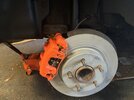
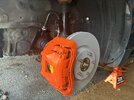
And since I know no one asked, the reason I did all this was because (as you probably noticed in the pictures) my previous owner decided to do a bad job of spray painting his calipers yellow at some point. I wanted to powder coat them orange, and since they needed to be fully disassembled for the cleaning process of that work I re-did all the seals and stuff too. I was also doing new EBC pads, rotors and SS lines as well, so I wanted to do all this work at once. Nice, shiny, clean new calipers! And it only took a ripped dust boot, a bent lever pin, and a lot of swearing.
This is my first post on here (career lurker) so apologies if the formatting gets messed up, I’ll work on fixing that after I hit submit if it looks like trash.
Some recommended tools for doing all this:
- 14mm socket
- 7mm Allen key socket
- lots of picks and flathead screwdrivers
- flare nut wrench set (metric)
- some metric box end wrenches, maybe
- needle nose pliers
- either the above mentioned pliers, a piston cube off Amazon, or one of those fancy brake piston ratchet extension sets like you can get at Harbor Freight
- a small punch and a hammer to do the punching
- Brake cleaner and rags, maybe some q-tips
First step, which is probably obvious, is things off the wheel hub. The bolts for the caliper brackets are 14mm, I remember using a combo of sockets and box end wrenches since you’ll have to work around brake lines and cables if you haven’t removed those first. Those will be easiest with some flare nut wrenches (or if you’re replacing/upgrading the brake lines, you could cut them and use a deep socket later).
Before starting this job, make sure that your handbrake cable isn’t corrosion-welded into the caliper. I had one side that was so rusted I ended up cutting it off with a grinder, found a less-rusty gen 2 mz3 caliper at a junkyard, and used that instead. You’ll also want to remove the brake pad retainer spring on the outside, which also likes to rust-weld into those little pinholes. Be careful with that unless you plan on drilling out those holes. Take off that retainer spring and the handbrake lever spring and set those aside.
Once the caliper is off the wheel, you can slap that thing in a vice to make it easier to work with. The 7mm Allen socket is for the slide pins. The stock calipers have rubber bushings with a plastic cap on the end, so take off the caps, remove the slide pins, and take out the bushings. There will likely be some aluminum dust corrosion around those slide pin holes, so use a sanding drum or sandpaper to clean those up if you don’t plan on giving your calipers a chemical bath. With those removed the caliper bracket will pop out along with the brake pads. Note the built-in spring on the inner pad vs the outer pad.
Time to remove the piston. You can choose to remove the dust boot first, or wait until the piston is extended a little bit, but either way they will have to come off together. The base of the boot that sits on the caliper has a metal ring in it for stiffness (or maybe it’s a spring, I didn’t look too close), so if you start to pry off the boot you’ll want to make sure you get under that ring, then it pops off pretty easily. If its really dirty/corroded, I found it helpful to slide the blade of a box knife/razor blade under the base of the boot to make some room to get a flat end pick or screwdriver in there to pry the whole thing off.
Now you can try to use the handbrake lever to push the piston up and out. I ended up draining my brake fluid first so this didn’t work, but if it does then you save a little time. If it doesn’t, then you have a few options of tools to get it out. First (and cheapest) is to get an appropriately sized pair of needle nose pliers, slide the ends of the jaws into those two holes you see on the piston, and twist and hope it comes out. If you like excuses to buy new single-use tools, then you can try one of those nifty little cube attachments. I said fuck it and bought one off Amazon, and none of the sides fit the piston holes anyway. Neat!
The most correct way is to use a brake caliper compression tool. Harbor Freight sells one under the Maddox brand. I had a buddy with a set that I borrowed. But also this is the only thing you’ll probably be using this for, so if you want to save some money then just use a pair of pliers. Pic below shows each of the options.
Once the piston is removed, you can either clean it if you plan on reusing it, or throw it wherever if you’re replacing it. If you do reuse it, slide the old dust boot off the lip of the piston and over the top face of it. It’s also worth cleaning off the face of the piston if it has some dirt/gunk/rust on it. No sense putting all new seals and shit in these bad boys and using a crusty piston, now is there? If you look into the internals of the caliper, you’ll see a rod with screw threads on it and another retainer that holds a spring and a washer inside.
Side note: there is one additional seal inside the actual piston, you can see it if you turn it over and shine a flashlight into it. It sits below a retainer ring and a spring on the inside. I did NOT have to disassemble the piston to change this seal because the kit I bought came with a new piston pre-assembled. I have been told that this thing is a nightmare to take apart and put back together, but if you end up having a seal left over from a kit you use, its probably the one sitting inside this piston.
Now we get to the first seal to remove. Take a pick and remove the rubber square ring that sits in the caliper wall just under where the dust boot rested.
Now comes the (not) fun part. The next thing to go is that retainer. This thing is a bitch to remove, and an even bigger bitch to re-install, but we’ll get to the latter in a bit. The best way I found to get the retainer out is using a fuck load of long, flat ended picks and flathead screwdrivers. The retainer has 6 prongs, each needs pried inward to get the retainer above the lip it sits under. I ended up doing 3 prongs at a time, which usually would lodge the retainer halfway out of the lip, then I’d reset and get the other 3 prongs. It’s going to take some fiddling, but the more prongs you pry above the lip, the easier it gets. Eventually, it should pop free and you can remove it, along with the spring and washer that sits underneath it.
Now the threaded rod can come out. This is only just resting inside the caliper body, so you can grab the end of the rod with your hands and just wiggle it back and forth while pulling outward and it will eventually pop free. The base of the rod has a small o-ring on it, you can remove that now and set the rod aside.
The next thing to go is a small pill-shaped piece of metal that is sitting just behind where the threaded rod was resting. Take a picture of the way it’s oriented while sitting inside there, that’ll be important later. It likely won’t fall out on its own because of a buildup of grease and gunk on the inside, but if you stick a pair of needle nose pliers in there it’ll come right out. Set that aside too and don’t lose it. Now you have all of the caliper-side internals out.
The last thing to go is the handbrake lever itself. It was being held inside by that small metal pill piece you just took out, and now you can slide it straight up and out after you remove a pin on the body of the caliper. This is just pressed into a hole with both sides being knurled(-ish). Time to get an appropriately sized punch and tap it out. Using the vice makes this easier, but you might need some force since it’ll also likely have corrosion around it.
Once that’s out, you should be able to just slide the handbrake lever straight up and out with little resistance. This also has a flared seal on the underside where it sits on the caliper body. It will either come out with the lever, or might sit inside the body. Either way, use a pick or screwdriver to remove this seal, and make sure you remove all of it because it might tear apart as you take it out.
That’s the last piece of the disassembly. Your calipers may also have some needle bearings inside the handbrake lever hole. One that I disassembled did, the others I took apart didn’t. If you do have them, its worth spraying some brake cleaner in there to try and un-gunk them. You can see from this picture mine were pretty funky.
Also, now is the time to clean everything else that came from inside the caliper. Dirt, grease, rust, all gotta go. Make sure to clean the inside of the caliper too. The area with the handbrake lever probably has some gross grease buildup in it, get that all out. Use brake cleaner, q-tips, paper towels, whatever you need to do.
Now that everything is clean, the assembly is quite literally the reverse of what you just did to take it all apart. Make sure to use rubber grease on all the seals when installing them, and grease the fuck out of the handbrake lever and metal pill before putting them back in (I used brake grease for this). Before putting the pill back in, you can gently tap the knurled pin for the handbrake lever back into place as well.
The metal pill only really has one way to fit inside the handbrake lever cavity. If you try and rotate it around in there with pliers, you’ll find it will settle a certain way. Hopefully you took a picture of it like I told you to before so you don’t second guess yourself.
Put a new small o-ring on the base of the threaded rod. You’ll notice the base also has a rounded slot cut into it, that is supposed to rest on the other side of the metal pill we just put back. Wiggle the rod back into place until it doesn’t go down any further.
Now is a good time to test to make sure the handbrake mechanism is all aligned. If you turn the handbrake lever with your hand, you should notice the threaded rod slightly extends outward. This is what makes your handbrake engage when you pull the handle in the cabin. Go ahead and push it back to its resting position.
Now comes the worst part of the rebuild. Start dropping in your clean washer, spring and 6-prong retainer clip.
I probably spent the better part of two hours trying to press in this clip with a combination of flathead screwdrivers, engine picks, sockets, and anything else I had laying in my garage that I thought would help. It looked like I was doing brain surgery on this thing at one point. I tried pushing it into a large socket to get it in, that didn’t work either.
I eventually gave up and phoned a friend with a 3D printer. We designed a simple collar in CAD that the retainer would fit into and had a large enough opening to use a socket to press it down into place. The collar would squeeze the prongs under the lip on the body, and would also catch on that lip as you pressed down and compressed the spring with a socket. It took all of 10 seconds to pop each retainer in after that. If you take no other advice from this entire thread, save yourself the frustration and just print out a few collars for this.
The collar itself is just a hollow cylinder. 1.4 inch outer diameter, 1.0 inch inner diameter. 3/4 inch height. I don’t have the file on-hand or I’d attach it for you.
The rest of this is a cakewalk. Next seal is the square ring, lube that guy up and push it into the channel of the caliper body. You can use a small pick to make sure it sits flush, just don’t tear it.
Lube up your dust boot and re-seat it onto your new (or cleaned) piston. As you probably already figured out, the piston screws onto the rod. Lube the sides of the piston, too, that’ll help it slide into place. Once it engages you’ll need to use one of the three methods mentioned earlier to keep rotating it down into the body. Before you fully compress it, make sure to press the base of the dust boot around the outer edge of the body.
Those are the last steps I will cover in detail in this guide. Your next steps would be to re-assemble the brakes as if you were changing brake pads. Slide pin bushings, slide pins, grease, and pads in the brackets. Don’t forget your bleeder screw and external springs. As I mentioned above, Damond’s guide for their slide pin bushings is wonderful, even if you are re-using the rubber ones. They have torque specs for all the bolts, too. Hopefully you found this rambling guide helpful.
And since I know no one asked, the reason I did all this was because (as you probably noticed in the pictures) my previous owner decided to do a bad job of spray painting his calipers yellow at some point. I wanted to powder coat them orange, and since they needed to be fully disassembled for the cleaning process of that work I re-did all the seals and stuff too. I was also doing new EBC pads, rotors and SS lines as well, so I wanted to do all this work at once. Nice, shiny, clean new calipers! And it only took a ripped dust boot, a bent lever pin, and a lot of swearing.


