phate
Motorhead
I don't think much explanation is needed. I want more tire, fenders are in the way, so let's chop the shit out of them.
Edit - Pictures DO work, but you have to right click and open in a new tab. Photobucket, in June-ish of 2017, has held everyone's pics for ransom after many years of providing a service for free. The current $400 charge is ludicrous, so just right click to check them out. They're all still there.
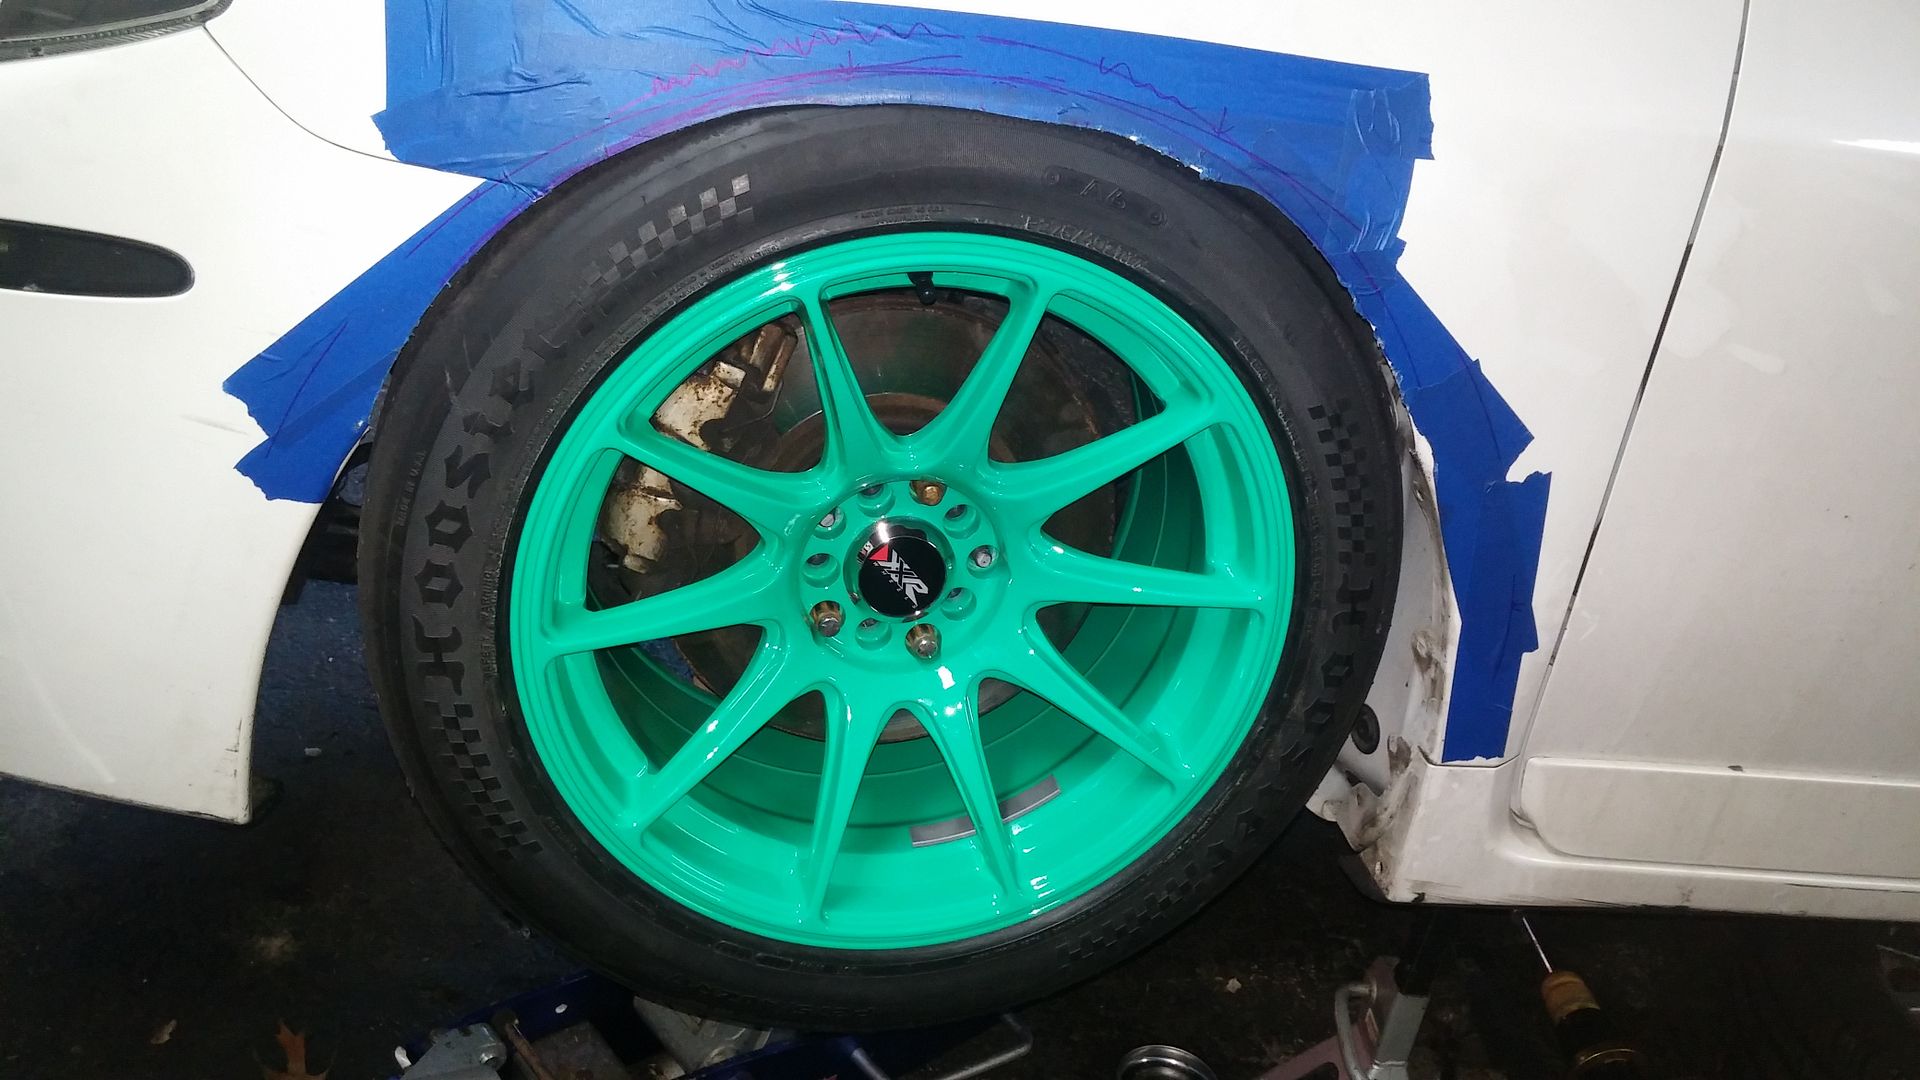
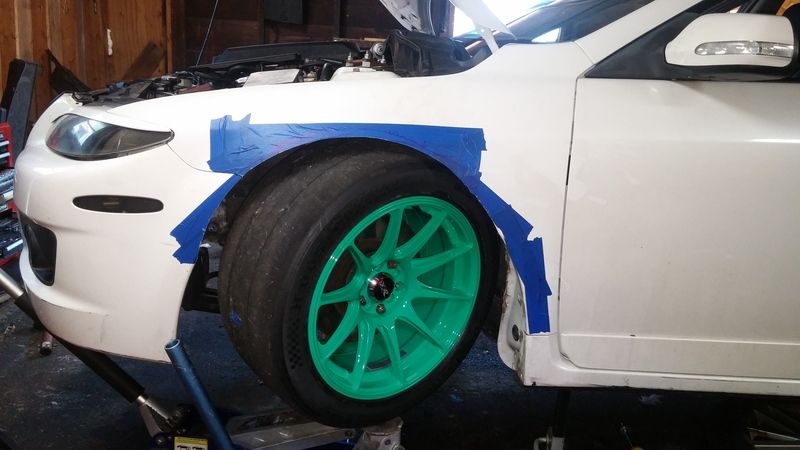
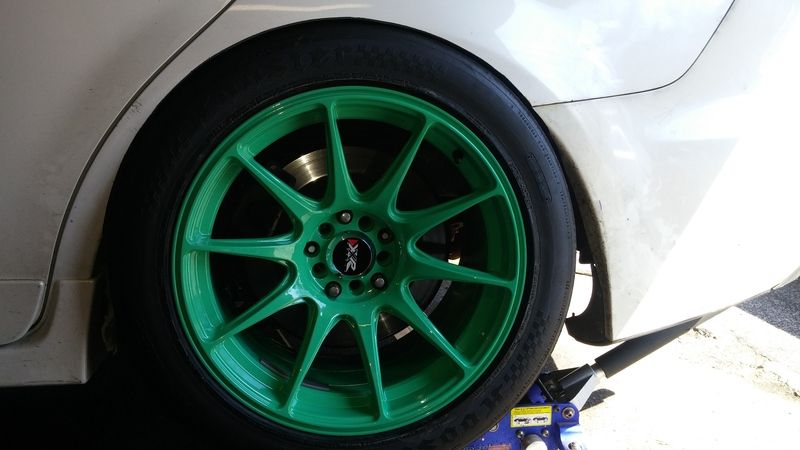
All the poke, before:
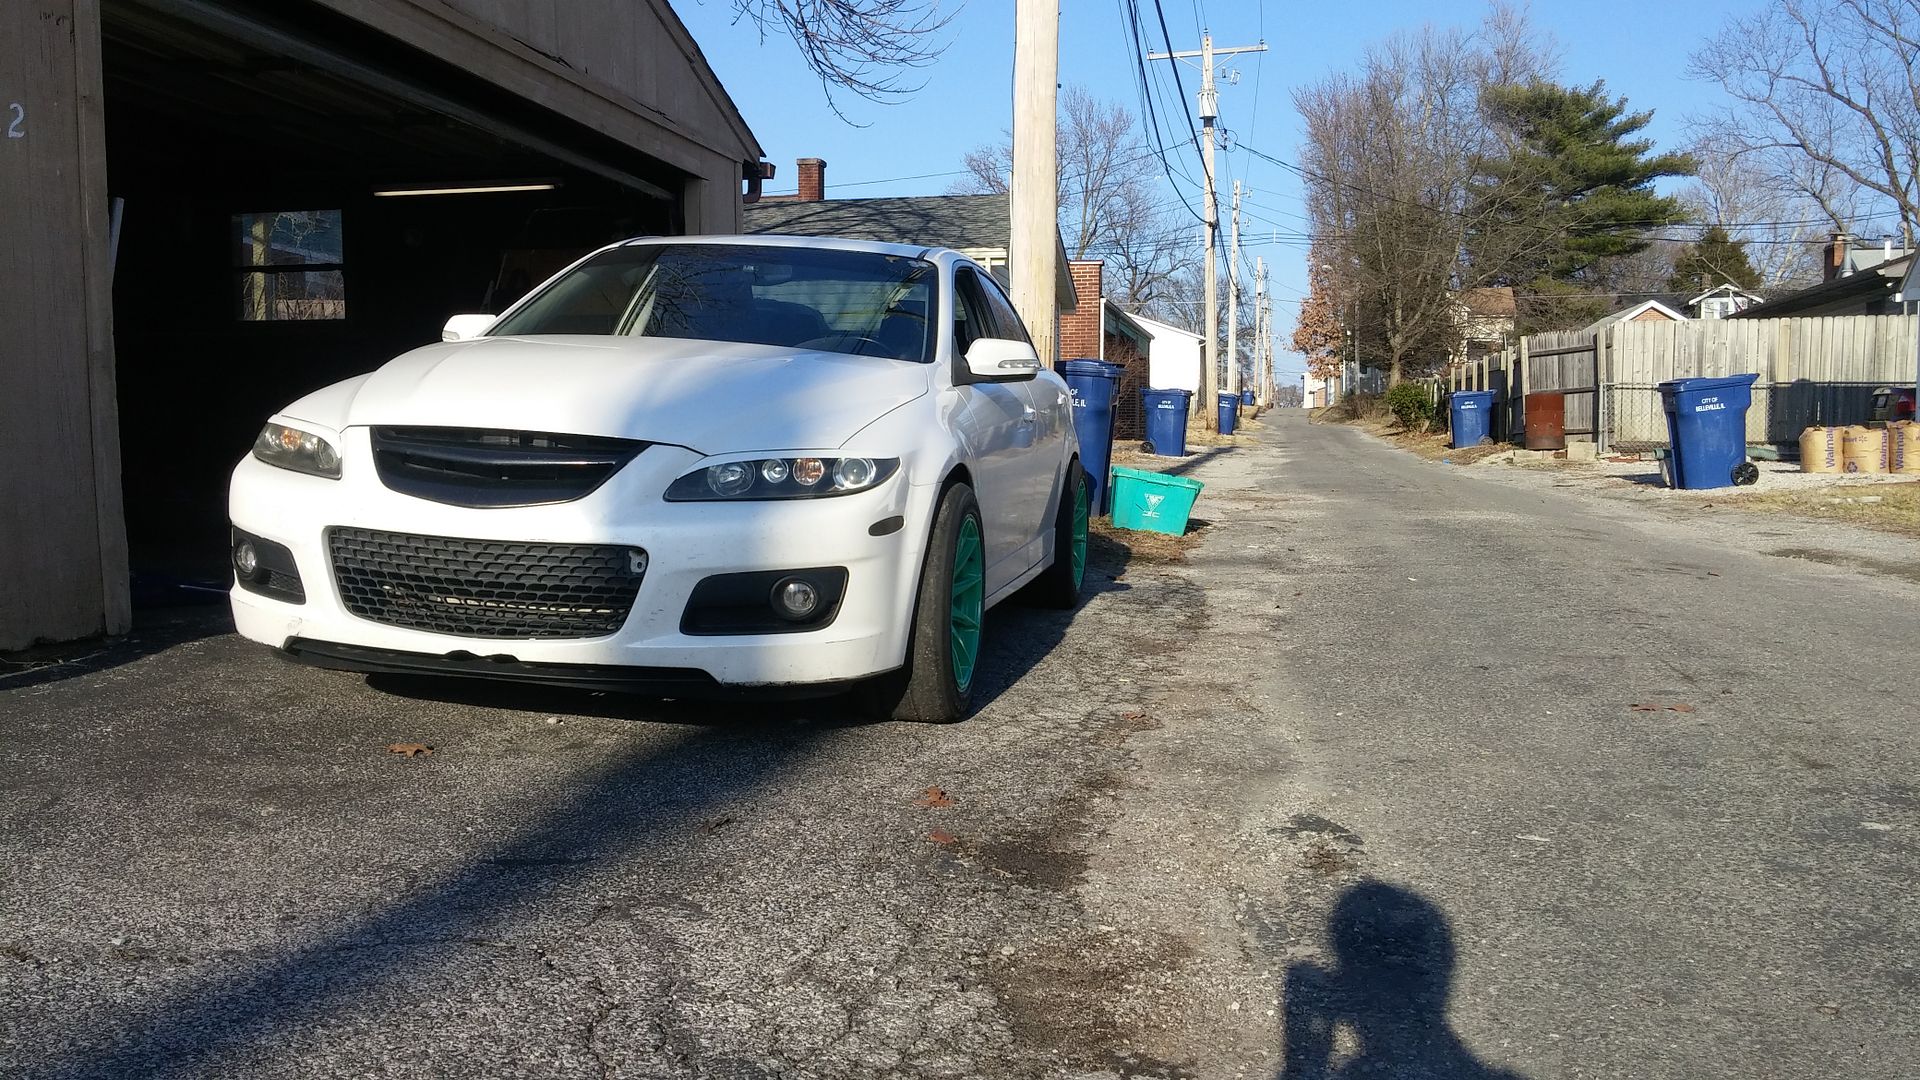
Yes, 275/40/17 Hoosiers
To get an idea of what needs done, you can do some sweet MSPaint work. Take your springs out and move the wheel assembly to full bump.
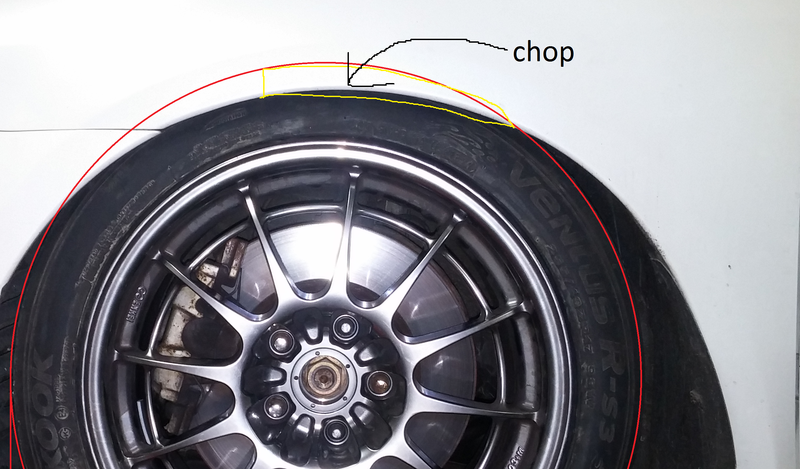
Any fender in the red area is going to get in the way. This is just a rough estimate, once you have the initial cut done you MUST turn the steering wheel back and forth to check clearance with steering angle.
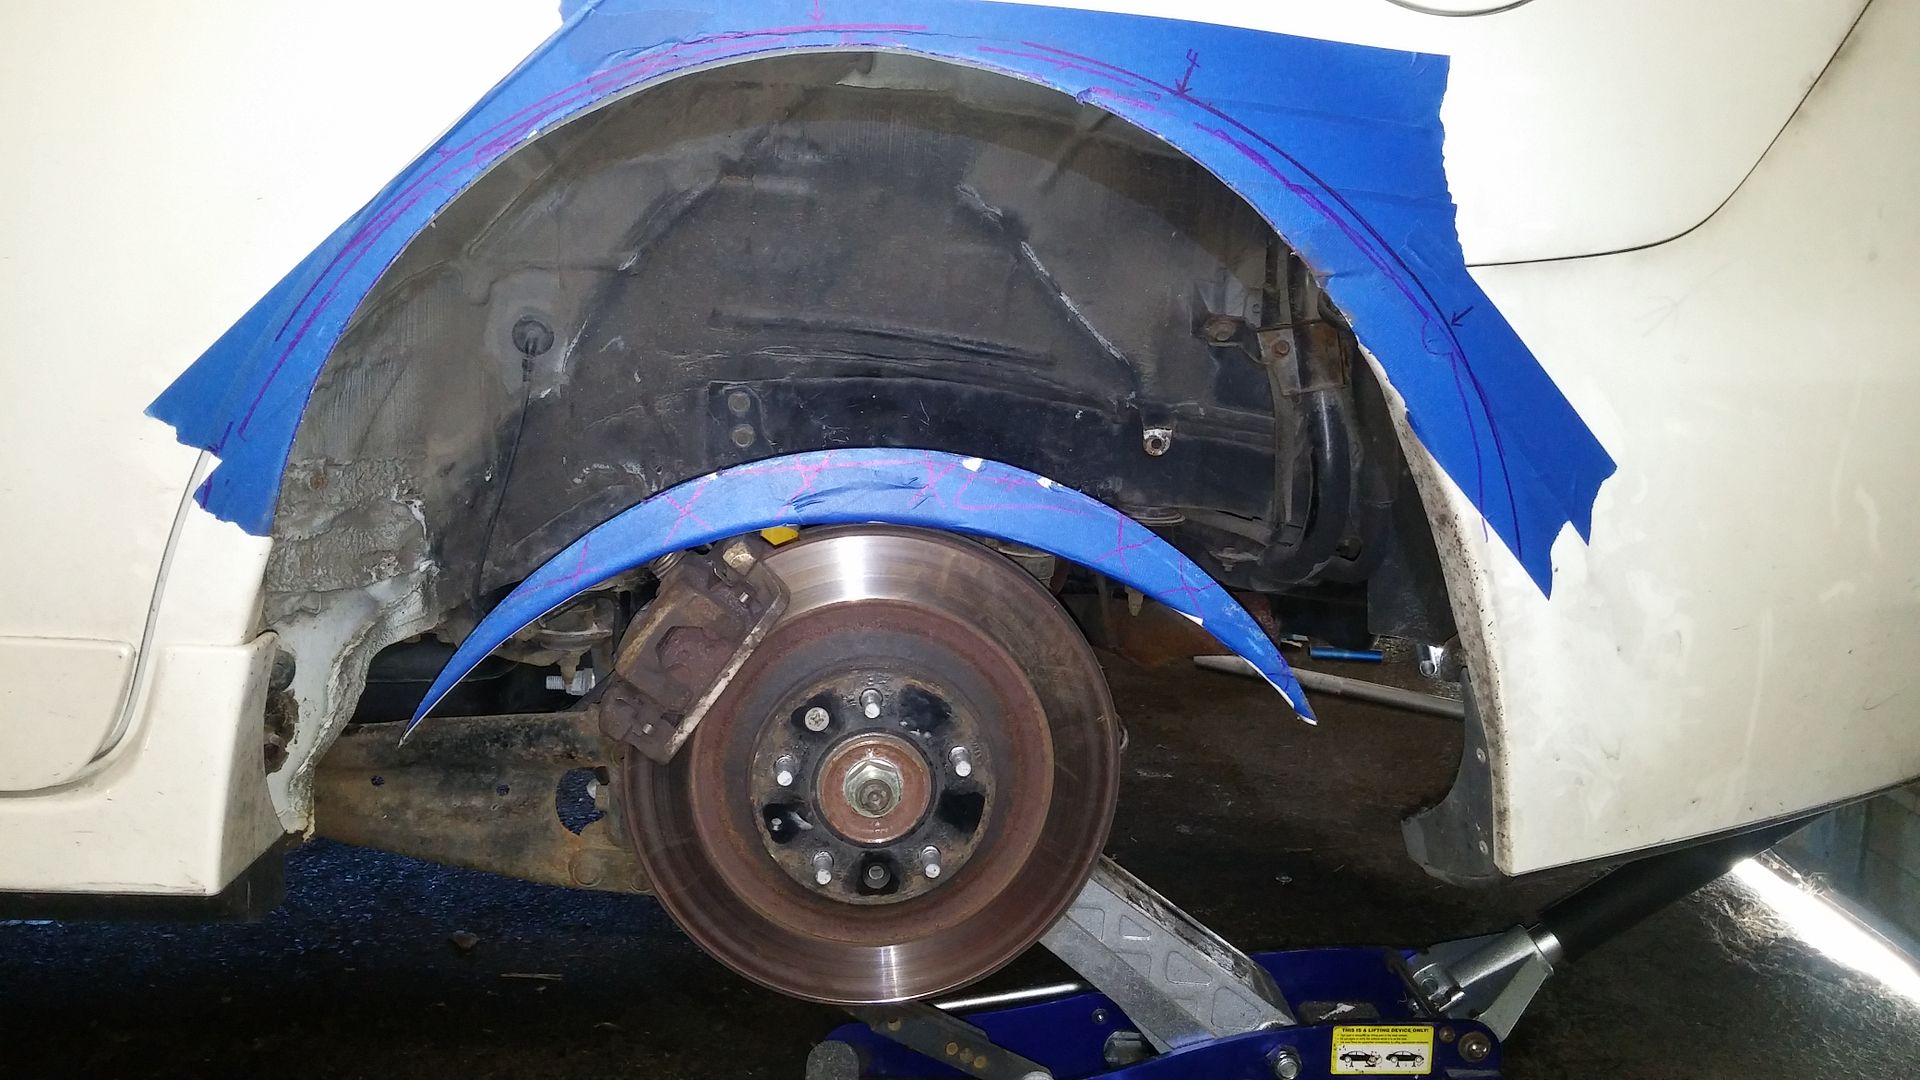
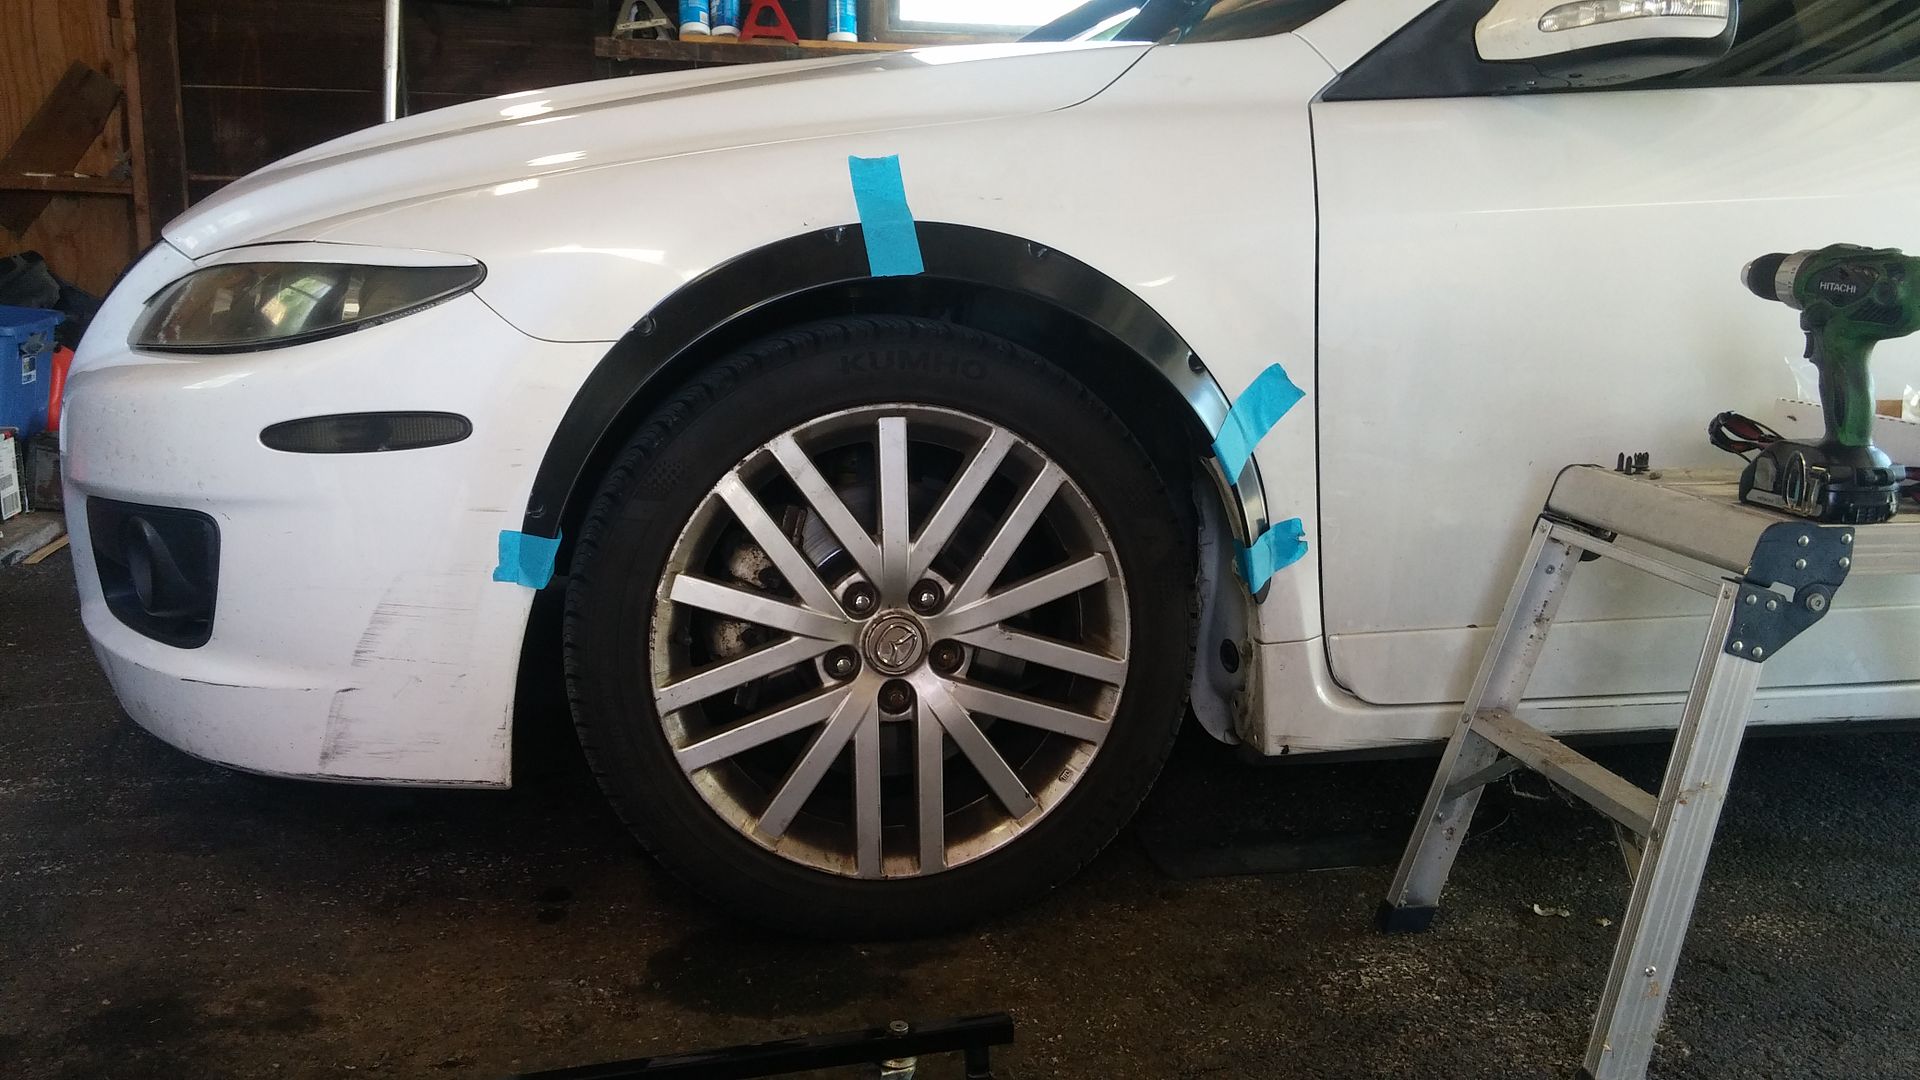
In order to transfer that circle onto the car, I used a 2' caliper as a compass and traced it onto a taped off fender:
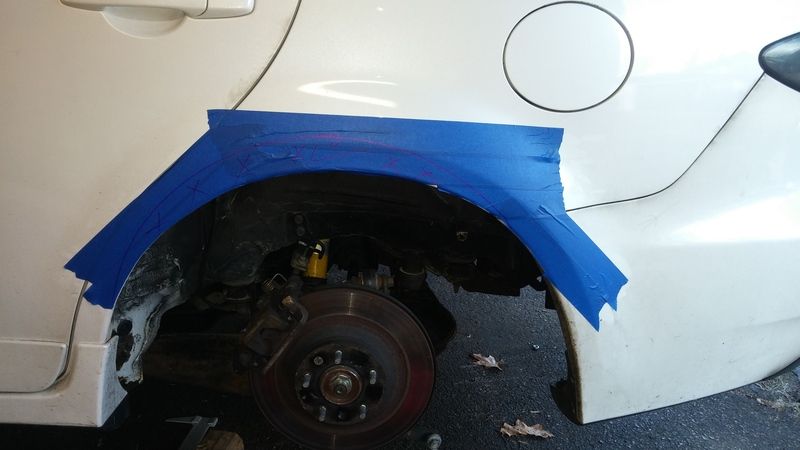
Check to make sure there's enough metal left over to attach the flare:
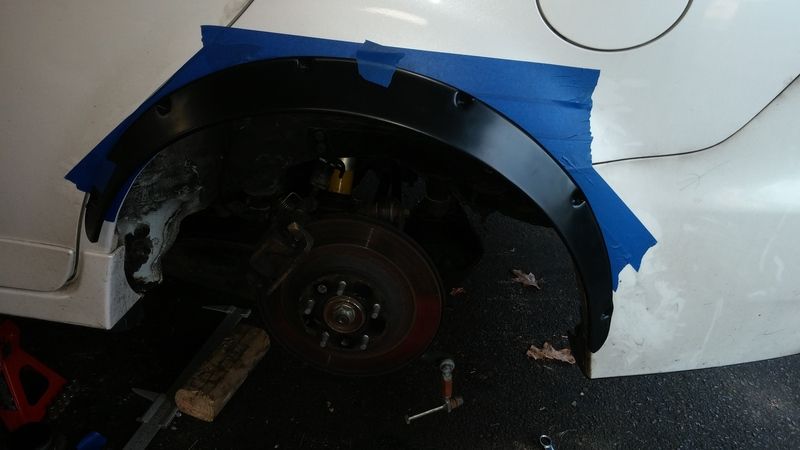
Looks good, now time to chop. I got one of these SWEET body saws from Harbor Freight.
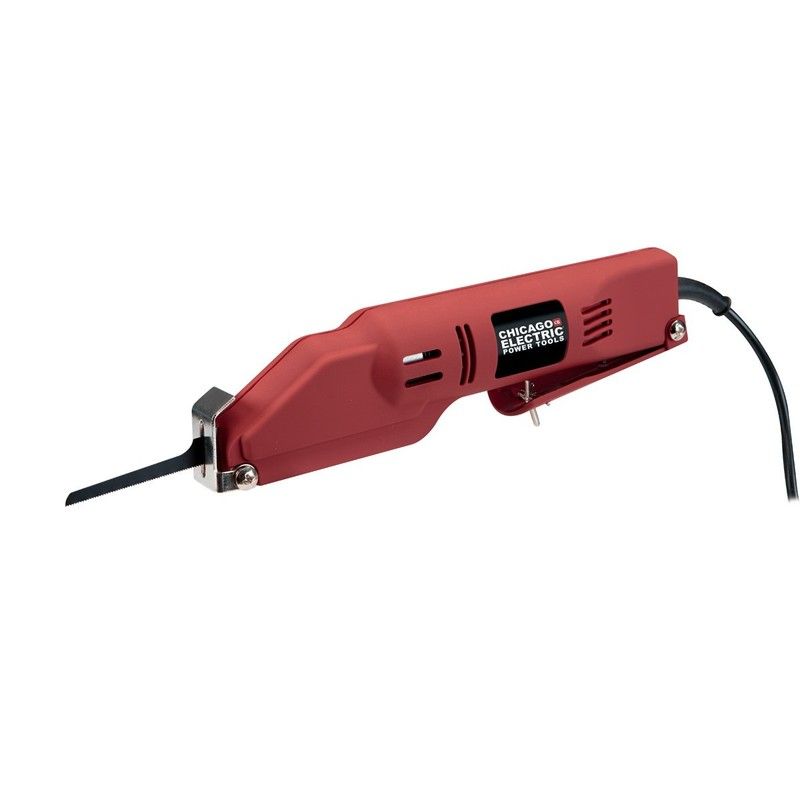
It did really well. I used one blade on all 4 fenders, it went through like butter. It's easy to control and can cut decently tight radii.
You can do multiple cuts to sneak up to your line. You might even be thinking to yourself, "well I might just cut a little bit..."
But let's be serious, you're already CHOPPING THE FUCKING FENDERS. Get it all out of the way, no reason not to, right?
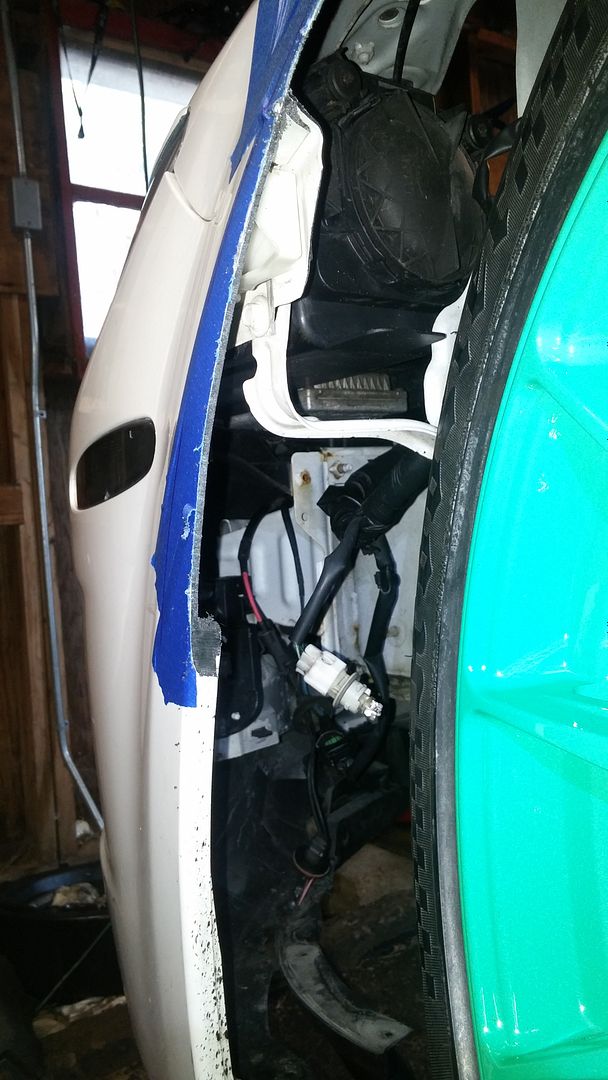
Oh yeah, no interference anywhere. Remember to turn lock to lock at full bump to check clearance. There might be things in there that get in the way, like these silly little brackets waiting to slice your tire open:
Once you get comfortable with the saw and the fact that you're resale value is now $0, you just go at it in one cut:
Easy peasy. Better check that clearance on the rears:

1/2" is plenty. Once you're happy with the cutting, don't forget to primer those bare metal edges! They'll start to rust immediately if they aren't coated.
Flare time, boys and girls. I'm just assuming that the flares are going to get beat to hell at autocross, so I'm not spending a bunch of time making them all perfectly molded and beautiful. I'll leave that for the stance guys, I just wanna go fast.
Since anyone that is interested in flaring is going to ask, I'll just give you the info about these flares:
Quick Rivnut tutorial:
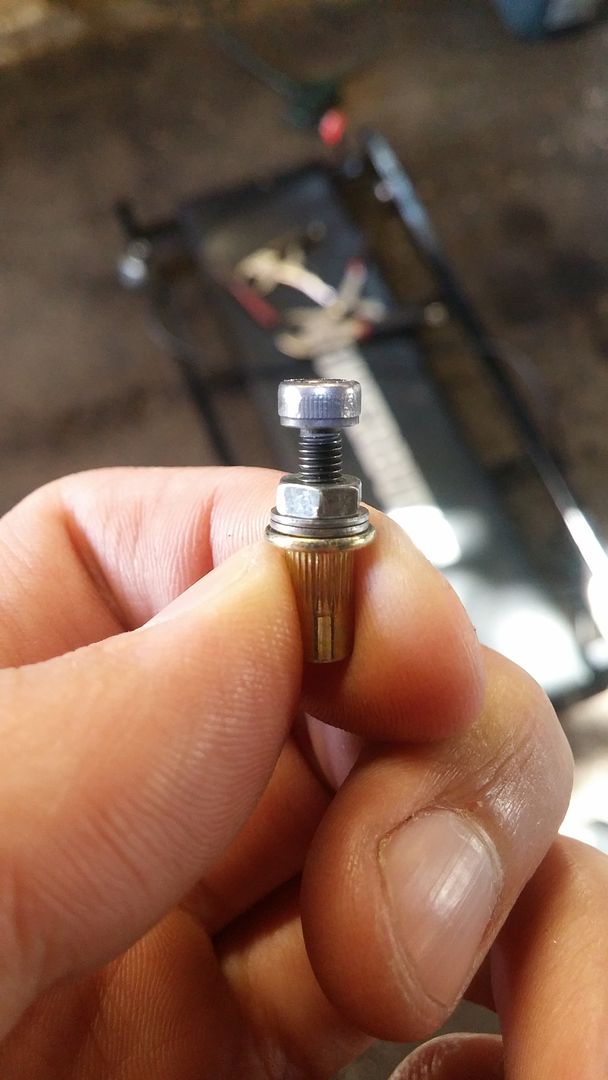
You stick it in a hole and you crank the nut down, trying to compress the rivnut so that the fluted area compresses vertically and expands radially. The radial expansion is what holds it in the fender. Do everything in your power to keep the rivnut from rotating with the nut - hence the two washers. I even went as far as to use some lubricant on the washers to help the process. You don't want the rivnut to spin, you want to crush it.
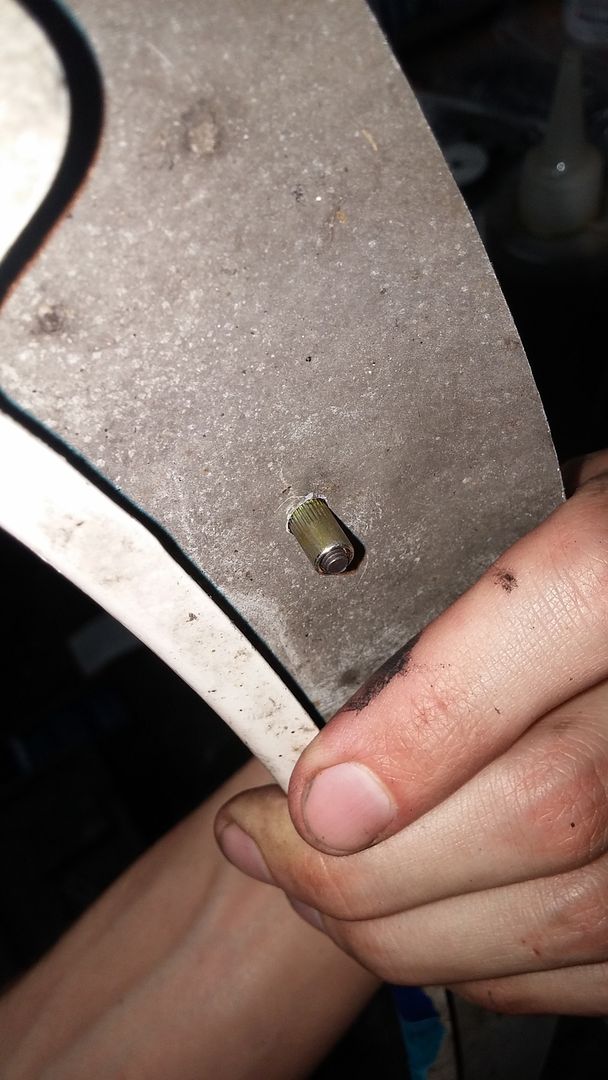
Stick it in the hole:
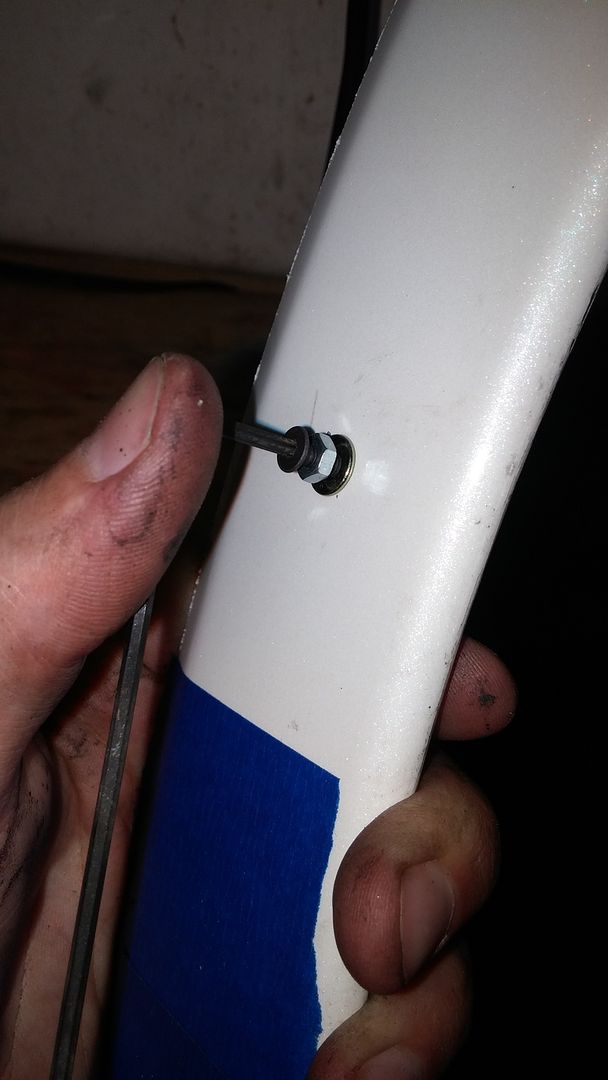
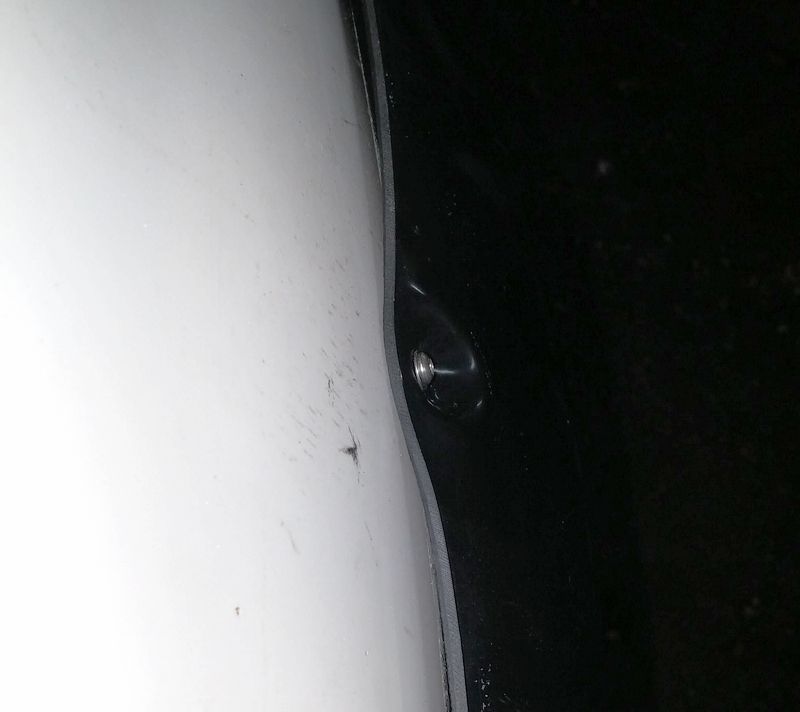
It looks like this from the backside:
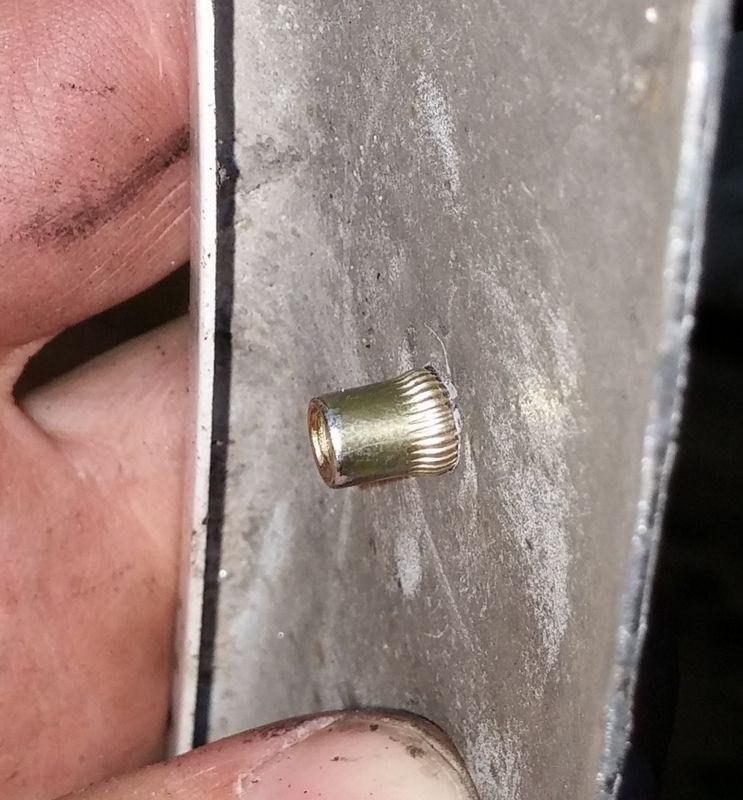
This is what it looks like when everything goes correctly:
I would say that happens ~1/3 of the time. The other 2/3 you strip a nut or bolt and end up saying nasty words about that SOB that created M3 rivnuts that don't crush before you strip grade 10.9 hardware...
You might imagine that these flares fit poorly since they're (1) Universal, (2) JDM, and (3) from Russia. If you made that assumption, you're absolutely correct. These things are made for a flat, vertical surface to mount on. Like a box truck.
So that leaves a gap pretty much everywhere. Anywho, starting out you need to eyeball the placement so that it looks like you kinda care about what this is going to look like:
If it looks good to you in that spot, awesome, otherwise move it around some. Don't worry about how poorly it fits against the fender in 98% of the places it should be fitting. When I did this part, I did one of the center holes first, then worked my way out one by one. DO NOT drill every hole first then try to fasten it down. If you do this, you will be very upset to find that the changes you have to make in one section affect the entire flare.
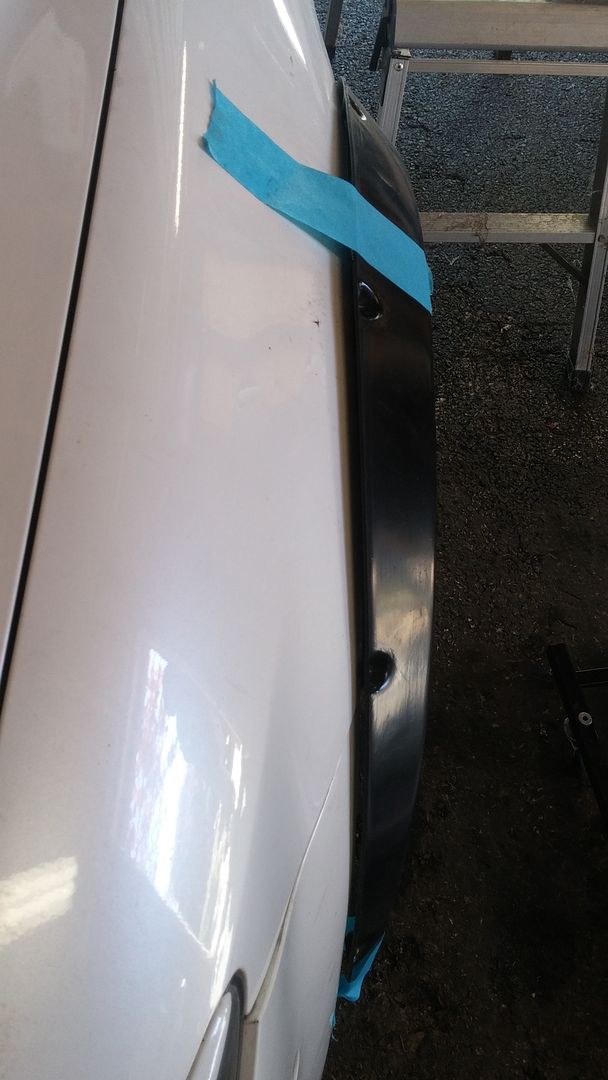
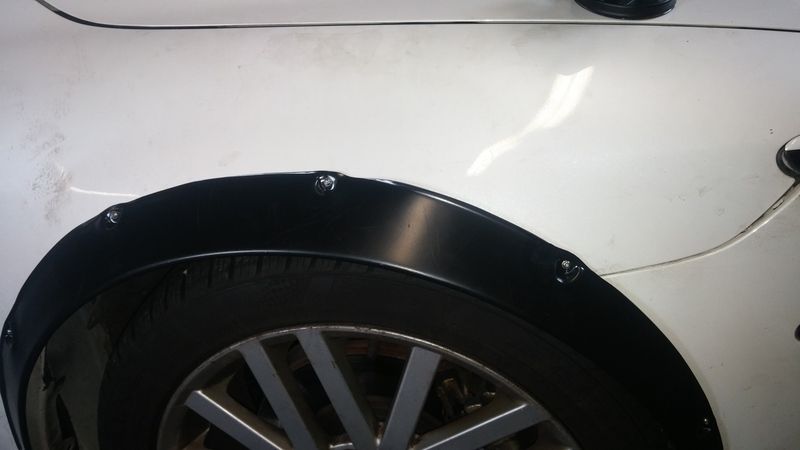
Before we drill anything, we need to get the rivet flats sitting flat against the fender. In order to do this, you need a heat gun (not a hair dryer, they probably aren't hot enough). You need to heat the rivet flat until it is pliable, then press against it with something small/round to force it to contour to the body. The plastic has to be HOT to do this, be careful. When you do it in a small area, it's going to look like shit, sort of like this:
That's an after picture, of course. Once you get the rivet flat contoured to the body, it's time to drill a hole. I started with a 7/64" bit, which is the same diameter as the M3 shaft. I went through both flare and fender at the same time, making absolutely sure the bit didn't slip when it started on the fender. Once you have that pilot hole, remove the flare (that's the hole size in the flare you need if you're doing rivnuts) and drill the fender side hole to accommodate the rivnut body. Insert and secure the rivnut. Reattach the flare using the inserted hardware. THEN move on to your next holes after you get the flare re-positioned correctly.
Don't worry too much, we'll fix all that shittiness later with lots of heat. Like I said above, I did one in the center, then worked my way out one at a time. Take your time, try not to char or ignite your flares. When you get all of the rivets/rivnuts in and secured, you'll have something that looks like this:
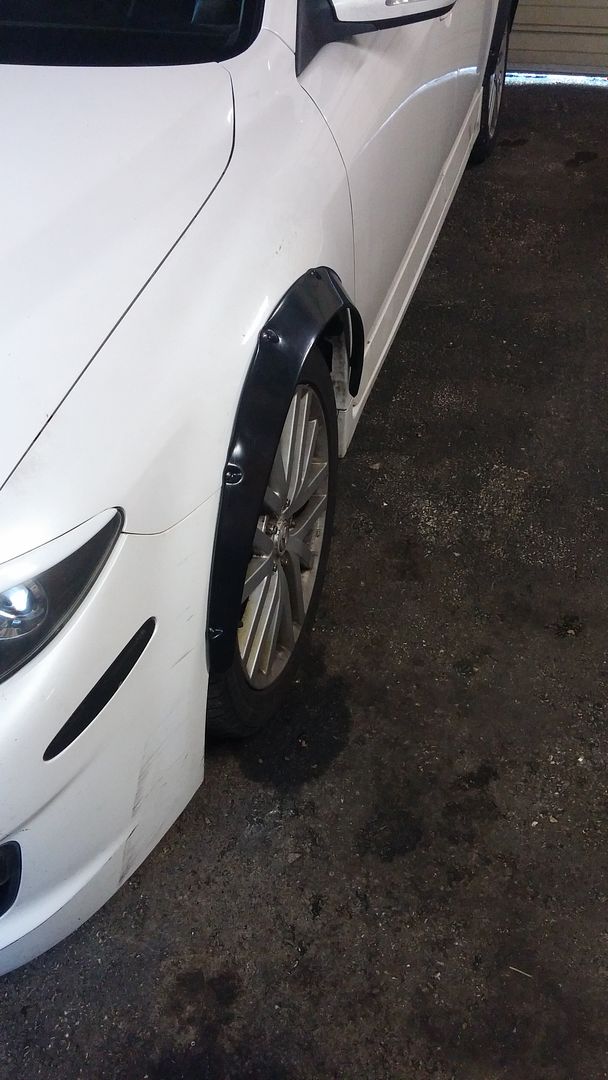
You'll be ready to hit the streets in true ricer fashion.
We need to fix that bulging in-between the rivets. Heat is the answer, and finding something that is roughly the contour you need is really helpful. Let's just watch a video, yeah?
Sweet, now you've seen heat in action. Use heat to mold it the best you can. Try not to press into the ABS too hard when it's super hot, because it does squish a little bit. You might end up with a little bit of waviness and bulges around the rivet flanges, but that's hopefully a quick fix if you can remove them and flatten with a file or similar.
And that's where I'm currently at. I might take them off this weekend to clean them up a little bit, but overall they're going to do just fine. Finished pictures coming this weekend.
HHUUUUGGEEEEE thanks to @MS3brohanna for the help with these. I don't think I would tempt this one by myself, it's a lot of work and things going on all at once.
Edit - Pictures DO work, but you have to right click and open in a new tab. Photobucket, in June-ish of 2017, has held everyone's pics for ransom after many years of providing a service for free. The current $400 charge is ludicrous, so just right click to check them out. They're all still there.
All the poke, before:
Yes, 275/40/17 Hoosiers
To get an idea of what needs done, you can do some sweet MSPaint work. Take your springs out and move the wheel assembly to full bump.
Any fender in the red area is going to get in the way. This is just a rough estimate, once you have the initial cut done you MUST turn the steering wheel back and forth to check clearance with steering angle.
In order to transfer that circle onto the car, I used a 2' caliper as a compass and traced it onto a taped off fender:
Check to make sure there's enough metal left over to attach the flare:
Looks good, now time to chop. I got one of these SWEET body saws from Harbor Freight.
It did really well. I used one blade on all 4 fenders, it went through like butter. It's easy to control and can cut decently tight radii.
You can do multiple cuts to sneak up to your line. You might even be thinking to yourself, "well I might just cut a little bit..."
But let's be serious, you're already CHOPPING THE FUCKING FENDERS. Get it all out of the way, no reason not to, right?
Oh yeah, no interference anywhere. Remember to turn lock to lock at full bump to check clearance. There might be things in there that get in the way, like these silly little brackets waiting to slice your tire open:
Once you get comfortable with the saw and the fact that you're resale value is now $0, you just go at it in one cut:
Easy peasy. Better check that clearance on the rears:
1/2" is plenty. Once you're happy with the cutting, don't forget to primer those bare metal edges! They'll start to rust immediately if they aren't coated.
Flare time, boys and girls. I'm just assuming that the flares are going to get beat to hell at autocross, so I'm not spending a bunch of time making them all perfectly molded and beautiful. I'll leave that for the stance guys, I just wanna go fast.
Since anyone that is interested in flaring is going to ask, I'll just give you the info about these flares:
- They're from eBay, seller JDMFF
- They're from RUSSIA, shipping took ~6 weeks for me, YMMV
- They're ABS Plastic and universal, and you can mold them with heat
- These are 2" flares on all 4 corners
Quick Rivnut tutorial:
You stick it in a hole and you crank the nut down, trying to compress the rivnut so that the fluted area compresses vertically and expands radially. The radial expansion is what holds it in the fender. Do everything in your power to keep the rivnut from rotating with the nut - hence the two washers. I even went as far as to use some lubricant on the washers to help the process. You don't want the rivnut to spin, you want to crush it.
Stick it in the hole:
It looks like this from the backside:
This is what it looks like when everything goes correctly:
I would say that happens ~1/3 of the time. The other 2/3 you strip a nut or bolt and end up saying nasty words about that SOB that created M3 rivnuts that don't crush before you strip grade 10.9 hardware...
You might imagine that these flares fit poorly since they're (1) Universal, (2) JDM, and (3) from Russia. If you made that assumption, you're absolutely correct. These things are made for a flat, vertical surface to mount on. Like a box truck.
So that leaves a gap pretty much everywhere. Anywho, starting out you need to eyeball the placement so that it looks like you kinda care about what this is going to look like:
If it looks good to you in that spot, awesome, otherwise move it around some. Don't worry about how poorly it fits against the fender in 98% of the places it should be fitting. When I did this part, I did one of the center holes first, then worked my way out one by one. DO NOT drill every hole first then try to fasten it down. If you do this, you will be very upset to find that the changes you have to make in one section affect the entire flare.
Before we drill anything, we need to get the rivet flats sitting flat against the fender. In order to do this, you need a heat gun (not a hair dryer, they probably aren't hot enough). You need to heat the rivet flat until it is pliable, then press against it with something small/round to force it to contour to the body. The plastic has to be HOT to do this, be careful. When you do it in a small area, it's going to look like shit, sort of like this:
That's an after picture, of course. Once you get the rivet flat contoured to the body, it's time to drill a hole. I started with a 7/64" bit, which is the same diameter as the M3 shaft. I went through both flare and fender at the same time, making absolutely sure the bit didn't slip when it started on the fender. Once you have that pilot hole, remove the flare (that's the hole size in the flare you need if you're doing rivnuts) and drill the fender side hole to accommodate the rivnut body. Insert and secure the rivnut. Reattach the flare using the inserted hardware. THEN move on to your next holes after you get the flare re-positioned correctly.
Don't worry too much, we'll fix all that shittiness later with lots of heat. Like I said above, I did one in the center, then worked my way out one at a time. Take your time, try not to char or ignite your flares. When you get all of the rivets/rivnuts in and secured, you'll have something that looks like this:
You'll be ready to hit the streets in true ricer fashion.
We need to fix that bulging in-between the rivets. Heat is the answer, and finding something that is roughly the contour you need is really helpful. Let's just watch a video, yeah?
Sweet, now you've seen heat in action. Use heat to mold it the best you can. Try not to press into the ABS too hard when it's super hot, because it does squish a little bit. You might end up with a little bit of waviness and bulges around the rivet flanges, but that's hopefully a quick fix if you can remove them and flatten with a file or similar.
And that's where I'm currently at. I might take them off this weekend to clean them up a little bit, but overall they're going to do just fine. Finished pictures coming this weekend.
HHUUUUGGEEEEE thanks to @MS3brohanna for the help with these. I don't think I would tempt this one by myself, it's a lot of work and things going on all at once.
Last edited:

