Taking a journey through pain and a misfortune. A speed6 saga.

It's that time of year again where the summer fun has come and gone. I've got time to brows the forums, sit back relax a bit and prep for next years adventures.

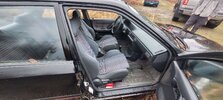
I haven't spent much time with my Speed 6 in the last 6 - 7 months. My son was hit while driving his Mx3 we rebuilt. No one was hurt, it wasn't a hard hit, but it was enough for insurance to write the car off. As luck would have it a friend of mine was looking to down size his car collection. In that collection was a 1993 Mazda Protege, 25th Anniversary Canadian GT edition. This is a 1 of 500 Canadian only model. Poor thing had been sitting in a field since 2019.
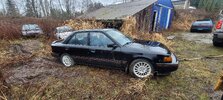
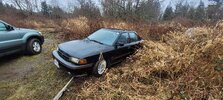
20250309_164342.jpg20250309_164402.jpg20250309_164415.jpg
What's so special about this car you might ask? A couple of reasons. This car got a JDM interior and some other JDM bits not available in the North American market. This perticular car was owned by a close friend of mine who passed away in 2018. Time to resurect the dead.

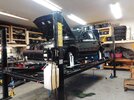
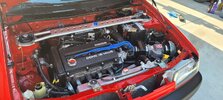
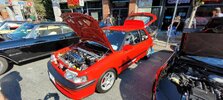
Since the Mx3 and Proteges chassis share a lot in common, my son and I stripped the Mx3 down and used it as a parts donar to bring this Protege back to life. The interior of the Protege got completely stripped down since there had been rodent issues, everything got cleaned and sanatized. We had to go through all the doors to clean, lubricate and free up the locks, window regulators ect. The KLG4 V6 from the Mx3 got installed. It's been quite the project.
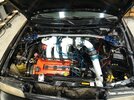
556206189_10163644970243701_247933986199716862_n.jpg560814131_10163712168268701_3763144629539235602_n.jpg

It's still not finshed but it's now drivable as we sort out some of the teething issues from such a big project.
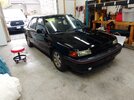
561350905_10163712168123701_4878154249251706873_n.jpg

After a cut and polish the paint is still quite ruff. Sitting in the field has done some damage that's not reparable, but from 5 - 10 feet away the car looks fantastic.
 
Last edited:
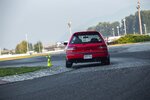
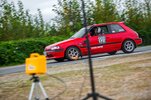
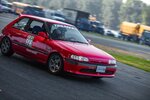
While the Protege project was under way, "Princess" came out to play. This is my autocross/track focused Mazda 323. It was originally built by my friend who passed away in 2018. Yep, the same friend who owned the Protege. Him and I spent a number of years building our cars and racing together. It's been a great adventure running this car in memory of him. Kiddo and I spent the summer going to local autocross races, and doing some travelling. We hit up the Canadian nationals and Packwood for the Solo National Tour event. 5c23b9a552ddb9979309cbca94f16261.jpg20c906329a617358082c8d961a197d6f.jpg7625fd040de63e01b77c9aa8d4bcf973.jpgdef9107ed56f9750d8815a223741c924.jpg
He built Princess the car got stripped down. All of the suspension components and sub-frames were powder coated. He was a master when it came to paint correction and restoration work.

507165665_10163127162653701_1318826071986665493_n.jpg507973725_10163127515488701_7354657356446019157_n.jpg
 
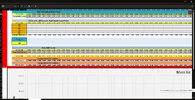
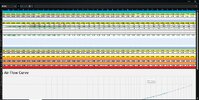
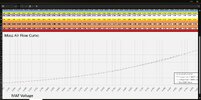
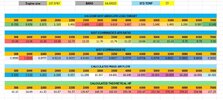
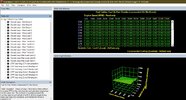
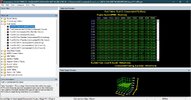
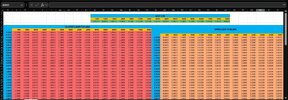
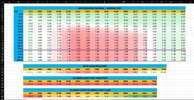
With those updates out of the way, how about we get back to the Speed 6 and some of the tuning stuff I've been playing around with. Anyone interested in a MAF tuning excel sheet? After doing a bunch of MAF tuning on Fords and GM's I built this sheet to mimic what you can do in the HPtuners world.

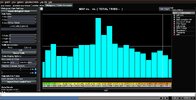
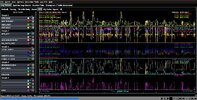
There's room to stack mutple logs, adjust what percentage of a change you are making plus compare multiple MAF cals. There's a graph to look at. I use this along side Megalogviewer so that I can easily do some copy past work when making changes. MAF Cal Excell file.jpgMAF Cal Excell 3.jpgMAF Cal Excell file 2.jpg
 

Attachments

  • Megalog viewer histogram.jpg
    Megalog viewer histogram.jpg
    280.2 KB · Views: 2
  • Megalog viewer full log view.jpg
    Megalog viewer full log view.jpg
    461.9 KB · Views: 1
Remember a previous post I made where I showed you how it was possible to calculate the theoretical crank HP?

I started with the stock WOT air load command, stock WOT.jpg

Sent it through some basic calculations, dove into the stock VE map a little bit.. and spit out this image?
HP with VE.jpg

If you don't go back 1 page, enjoy the read.. cause I am going to slowly build on it.. I started out with 1 question. What if it was possible to calculate your entire APP command table? That spiraled into, What if you could have 1 table that shows you the commanded AFRs? Spark map? DBW map perhaps? Is it possible to use some of this to help estimate or maybe even calculate a good ball park for your load limits, boost limits and safety cut off limits?
APP to HP stock map.jpgPossible stock commanded tables.jpg

Ok I don't have the safety cut stuff figured out yet.. This other stuff is pretty ruff since I don't have a full understanding or a dyno to properly test some of the tables I that need to be used.. but then again this isn't meant to be 100% accurate. It's meant to give someone a decent ball park and a way to understand the sea of tables available... If you've looked through the stock tune files, you might think WTF is Mazda thinking, why is there so many Closed Loop Max tables, what the hell do they do? Cobb closed loop tables.jpg

Why is there multiple closed loop fuel tables, open loop fuel tables and then WOT fuel tables...How does it all get put together? When can I expect 1 table to be used vs another table... How can I sort out some odd things I might see while tuning?..
Cobb Fuel tables.jpg

This is the rabbit hole I've been diving down..In the GM world where there's lots of very in depth conversations around this kind of stuff on the forums. I am hoping to spark some more of that here as I go along.. So chime in with your comments. I am not fragile, you wont hurt my internet feelings by calling me an idiot..
 
Last edited:
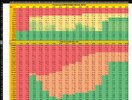
If we want to understand how various maps work and when they are in effect, we need a starting place. For now we are going to assume everything is working normally, targets are being hit without any issues, there's zero knock present. Let's start with the APP tables. It's important to know that the ECU will always target the lowest possible value. So if there are over lapping maps, or a modifier (we'll get into that later) in play. The ECU will target the lowest value.

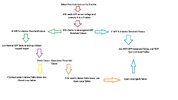
This Chart shows the basic flow (No modifiers, optimal conditions) starting with you the driver.
ECU APP command theory.jpg

These are the APP WOT Threshold tables. Since the Highest possible APP% is 100, if you set these tables to values above 100 - 105% the ECU never enters a WOT state. This means it wont use any tables or commands (such as Flat Foot shifting or Launch Control) that rely on a WOT state.

The picture shows that the ECU will go into a WOT state when the APP% is above 75% . That means anything above 75% APP will use the WOT tables. Cobb and Versatuner list 5 of these tables . I am not sure when each one is active. If it was based off what gear you were in. You'd think there should be 6 of them. The stock tune has 2 of these tables set to 110% between 2000 and 5500 RPM. VersaTuner lists these as Threshold tables 1 and 4. Torque limiting happens in 1st and 2nd using WOT tables, so it's safet to say you wouldn't dissable WOT in 1st gear. At some point I'll got back and revisit playing with these tables.

APP Threshold.jpg

Here's your WOT Airload Command tables. The Low BAT (Boost Air Temp) tables are the ones you'll primarily be using. We'll get more into the High BAT tables later.
WOT APP Targets.jpg

This would be the APP Normal Table you'll be using when you aren't in a WOT state.
App Normal table.jpg

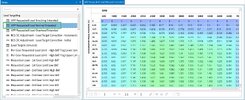
These are the Closed Loop to Open Loop Load Threshold tables. There's 4 of them. Figuring out when each of these are being used has been a mystery to me. All 4 have different values. These tables determine when the ECU transitions between Closed Loop into Open Loop, or from Open Loop back into Closed Loop. The Transition Timer tables dictate how long the switches take place. The timer tables are in whats called a "tick" value. 80 ticks doesn't mean 80ms.. It's not relatable to time in that way. The mystery behind how these tables work on an individual level is something I'd like to unravel. I haven't figured out a good way to setup repeatable tests that can help me compare the changes I make in order to sort this out. One thing is known for sure. If you are in an area of your APP table that is below these values, you'll be in Closed Loop. If you are above these values you'll be in Open Loop.

Closed to Open Loop Load Threshold.jpg

All of this makes for some interesting Tuning strategies.. So lets dive in shall we?

One strategy is Open Loop Tuning. This is my go to when I am starting with a fresh tune. When I do Open loop tuning I dissable WOT in order to simplify what maps are active. To do this you set the Closed Loop Open Loop Load Threshold Tables to a very low value. Such as 0.05. Then you set the APP Threshold tables to 110%. From there you make sure you've got a decent Open Loop Target AFR table setup. For spark, you are working off the Open Loop table. There's some things you need to know about the Spark tables, but that'll come a bit later. In order for this strategy to work well you need to use a scanner like ForScan or Versatuner. Both of them show Commanded EQ/AFR pids and your Actual EQ/AFR pids. You'll use a little math ([AFR]-[AFR Target])/[AFR Target]*100 In order to create and error percent. This error percent is what you'll use to make adjustments to your MAF curve, or VE table. When you are starting with a fresh tune, there's a good change you'll have some hole in it that'll cause some big swings in your AFR readings. Open Loop tuning lets you see this instantaniously. That way if you see it happening while you're driving. You can quickly stop and make changes before doing any kind of damage to your engine. This means you can go from light driving into hard pulls in 1 log confidently.

Closed Loop Tuning is another strategy. All though it's not something I like to do. Fuel trims are delayed and filtered data. It takes time for them to change and show you how much change is needed. This means you have to drive in a manner that's holding the car at different RPMs and Loads to collect the data needed. It's difficult to do when you are street tuning. There are some variations on how closed loop tuning can be done. One way to do this is to disable long term fuel trims. I'll explain how to do that later on. You can keep Long term trims active and use something called "Total Trim". This is a calculation combining your long and short term trims together. In order to activate closed loop tuning you'll need to increase the Closed Loop Open Loop Load threshold values to something thats above the values in your APP tables. While doing this I'd disable WOT and avoid any kind hard driving. If you have a big hole in your tune it'll take time driving in that area for fuel trims to show you how much of a change is needed. This can be dangerous. Closed loop tuning in my opinion is something you'd use when Commanded EQ/AFR pids aren't avabile to log. (I am looking at you Cobb Access Port). There are other reasons for closed loop tuning, but this doesn't relate to the Mazdaspeed platform.

There are more strategies, but in my opinion these 2 follow the KISS philosophy. Since you are limiting the ECU to 1 driving state and only using 1 of the 2 ways to gather the fueling error you need to make MAF curve or VE table changes.

Using all of this info, lets have a look at the stock ECU tune and some of the custom excell sheets I've built. AFR tables have some set values use in order to clearly show the difference tables and when they are active.
AFR Tables.jpg

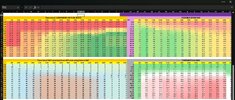
Here we have the stock APP table, WOT Airload command talbe, APP Threshold table and Close Loop Open Loop Load Threshsold table.
APP and WOT tables.jpg
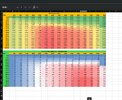
Now I've taken all this data and squished it down into it's own Theoretical AFR table. From there I squished it all down and overlayed it on the APP table. My formulas used to overlay the APP table is doing some interpolating between values which means we get some blending. This is show by some of the funky values.
AFR and APP combined.jpg
 
Back
Top