GCPhotographers Build

GCPhotographers

Greenie N00B Member
Greenie Member
2 years of thinking about it and now it is time. From NYC to NC and now in California, I have the space to make it happen but this will take maybe 3 years to accomplish on my budget. My goal is to have a motor that is capable of 650hp but daily a 450-500hp car. On completing my built, I don't plan on using any auxiliary fuel right away. The advantage on California is E85 (hopefully that doesn't change because 91 is crap here).

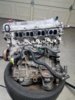
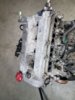
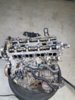
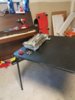
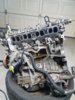
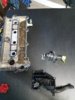
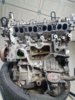
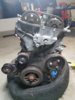
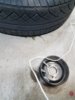
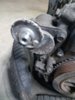
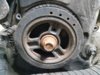
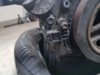
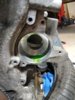
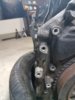
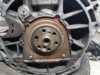
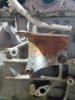
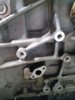
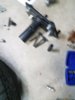
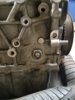
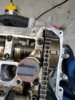
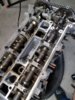
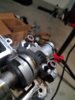
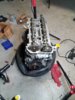
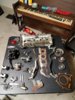
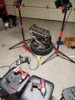
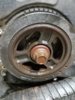
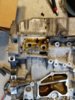
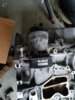
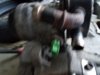
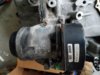
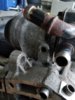
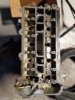
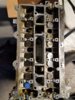
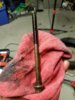
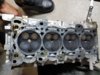
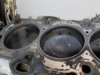
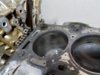
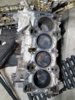
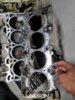
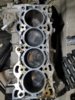
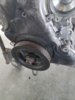
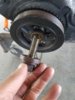
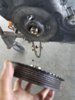
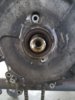
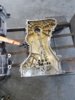
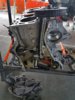
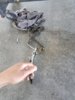
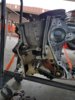
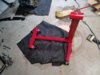
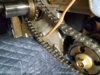
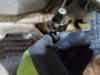
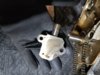
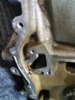
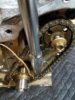
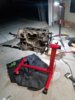
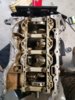
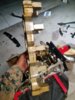
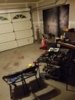
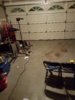
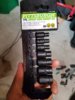
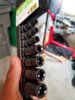
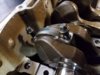
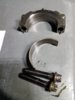
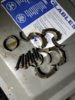
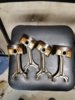
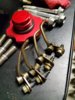
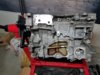
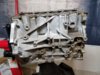
Picture below is how I am starting out. I had a crane but returned it the beginning of last year but I have my engine stand so once I take everything a part, I should have able to utilize the stand after the machine shop visit.

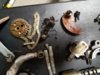
As of now, based on what I already have, I will be taking my time with this while learning everything.

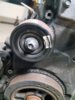
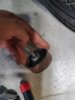
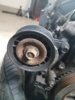
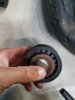
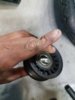
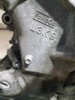
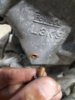
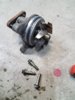
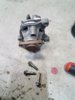
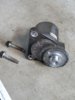
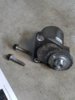
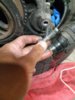
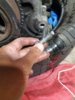
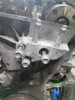
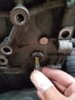
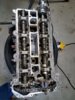
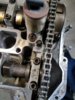
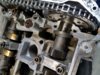
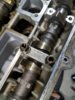
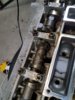
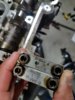
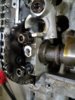
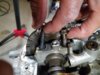
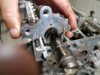
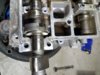
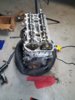
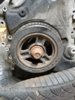
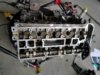
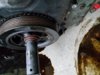
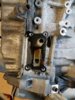
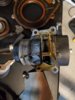
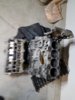
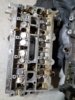
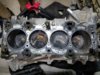
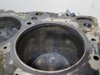
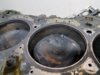
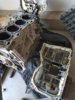
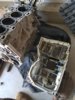
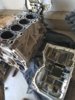
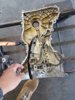
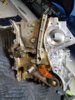
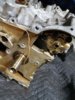
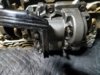
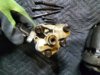
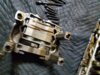
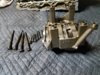
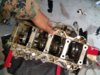
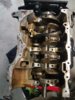
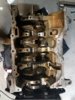
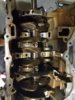
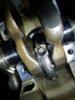
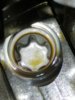
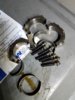
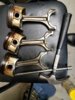
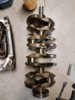
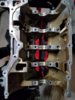
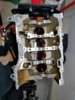
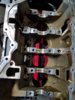
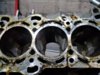
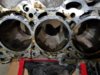
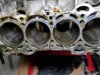
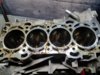
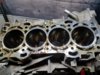
Got a deal on this long block. They said it was just a leakdown issue. We will see...maybe not since it is coming apart. My hope is the core is good and I don't need to do too much work on fixing the core before maintenance
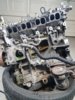
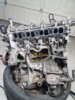
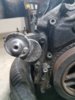
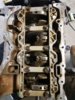
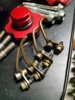
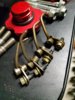
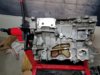
 

Attachments

  • 16129886_1549042495124999_544953565_o.jpg
    16129886_1549042495124999_544953565_o.jpg
    150.6 KB · Views: 38
So I started but had to stop because I can't get the dam crank pulley off. I am using a harbor freight wireless impact gun no luck. I read about using the hole on the block of the pulley and the breaker bar ripped right through it. I have some PB blaster soaking while the drill charge up. It was about 1/4. Talking to my Hypnotic Tuning family, they said get a better drill and/or pulley holder. I am going to look into this pulley holder and see if I need to buy it or I can rent it for almost nothing.
[doublepost=1484708410][/doublepost]I am going to upload many photos. My goal in doing this build (FIRST EVER) is to disassemble with the guidance of many and install but giving all the details in photos as much as possible. I used 12 point sockets for the dissemble and I will do the same at the end. Here's the start to the photos I took with my phone.
 

Attachments

  • 20170117_161616.jpg
    20170117_161616.jpg
    2.1 MB · Views: 25
  • 20170117_161625.jpg
    20170117_161625.jpg
    2.1 MB · Views: 26
  • 20170117_162150.jpg
    20170117_162150.jpg
    2.3 MB · Views: 27
  • 20170117_162155.jpg
    20170117_162155.jpg
    1.6 MB · Views: 25
  • 20170117_162509.jpg
    20170117_162509.jpg
    2.1 MB · Views: 23
  • 20170117_162743.jpg
    20170117_162743.jpg
    1.7 MB · Views: 23
  • 20170117_162749.jpg
    20170117_162749.jpg
    1.9 MB · Views: 23
  • 20170117_162935.jpg
    20170117_162935.jpg
    2.1 MB · Views: 23
  • 20170117_163029.jpg
    20170117_163029.jpg
    2.1 MB · Views: 23
  • 20170117_163038.jpg
    20170117_163038.jpg
    1.8 MB · Views: 21
  • 20170117_163633.jpg
    20170117_163633.jpg
    1.8 MB · Views: 22
  • 20170117_163841.jpg
    20170117_163841.jpg
    1.6 MB · Views: 22
  • 20170117_163844.jpg
    20170117_163844.jpg
    1.8 MB · Views: 22
  • 20170117_163912.jpg
    20170117_163912.jpg
    1.3 MB · Views: 19
  • 20170117_163928.jpg
    20170117_163928.jpg
    1.5 MB · Views: 21
  • 20170117_163930.jpg
    20170117_163930.jpg
    1.6 MB · Views: 21
  • 20170117_164041.jpg
    20170117_164041.jpg
    1.3 MB · Views: 22
  • 20170117_164110.jpg
    20170117_164110.jpg
    867.9 KB · Views: 21
  • 20170117_164113.jpg
    20170117_164113.jpg
    833.5 KB · Views: 20
  • 20170117_164115.jpg
    20170117_164115.jpg
    1.3 MB · Views: 21
All this is Day One. I wanted to do more but I was stopped by the dam pulley. I have all the bolts out of the timing cover....just the dam pulley is stopping me. Again, there are many things that was not on my block when I got it like the injector harness, manifolds, injectors and so on but those are easy to remove. If need help removing them, there are many walkthroughs out there.
 

Attachments

  • 20170117_164154.jpg
    20170117_164154.jpg
    3.5 MB · Views: 14
  • 20170117_164234.jpg
    20170117_164234.jpg
    3 MB · Views: 15
  • 20170117_164304.jpg
    20170117_164304.jpg
    3.6 MB · Views: 15
  • 20170117_164308.jpg
    20170117_164308.jpg
    1.2 MB · Views: 14
  • 20170117_164329.jpg
    20170117_164329.jpg
    1.3 MB · Views: 15
  • 20170117_164517.jpg
    20170117_164517.jpg
    1.3 MB · Views: 14
  • 20170117_164528.jpg
    20170117_164528.jpg
    1.5 MB · Views: 14
  • 20170117_164702.jpg
    20170117_164702.jpg
    1.8 MB · Views: 13
  • 20170117_164706.jpg
    20170117_164706.jpg
    2.1 MB · Views: 14
  • 20170117_164710.jpg
    20170117_164710.jpg
    1.5 MB · Views: 13
  • 20170117_164732.jpg
    20170117_164732.jpg
    1.5 MB · Views: 14
  • 20170117_165011.jpg
    20170117_165011.jpg
    1 MB · Views: 14
  • 20170117_165016.jpg
    20170117_165016.jpg
    1.1 MB · Views: 14
  • 20170117_165026.jpg
    20170117_165026.jpg
    1.5 MB · Views: 13
  • 20170117_165107.jpg
    20170117_165107.jpg
    1.1 MB · Views: 13
  • 20170117_165108.jpg
    20170117_165108.jpg
    1.4 MB · Views: 12
  • 20170117_165130.jpg
    20170117_165130.jpg
    1.7 MB · Views: 14
  • 20170117_165147.jpg
    20170117_165147.jpg
    1.8 MB · Views: 14
  • 20170117_165332.jpg
    20170117_165332.jpg
    1.9 MB · Views: 14
  • 20170117_165513.jpg
    20170117_165513.jpg
    1.5 MB · Views: 16
While removing, many bolts were missing or damaged. This is something I will need to put on my shopping list. I will share my list with you soon
 

Attachments

  • 20170117_165528.jpg
    20170117_165528.jpg
    2.2 MB · Views: 11
  • 20170117_165531.jpg
    20170117_165531.jpg
    1.7 MB · Views: 11
  • 20170117_165738.jpg
    20170117_165738.jpg
    3.2 MB · Views: 11
  • 20170117_165744.jpg
    20170117_165744.jpg
    1.6 MB · Views: 11
  • 20170117_170257.jpg
    20170117_170257.jpg
    1.7 MB · Views: 11
  • 20170117_170301.jpg
    20170117_170301.jpg
    1.5 MB · Views: 11
  • 20170117_170343.jpg
    20170117_170343.jpg
    997.6 KB · Views: 11
  • 20170117_170354.jpg
    20170117_170354.jpg
    4.9 MB · Views: 11
  • 20170117_171906.jpg
    20170117_171906.jpg
    2.2 MB · Views: 11
  • 20170117_171918.jpg
    20170117_171918.jpg
    1.4 MB · Views: 11
  • 20170117_174415.jpg
    20170117_174415.jpg
    1.7 MB · Views: 11
  • 20170117_174424.jpg
    20170117_174424.jpg
    1.3 MB · Views: 11
  • 20170117_174428.jpg
    20170117_174428.jpg
    1.2 MB · Views: 12
  • 20170117_174434.jpg
    20170117_174434.jpg
    1.4 MB · Views: 13
  • 20170117_174552.jpg
    20170117_174552.jpg
    1.2 MB · Views: 13
  • 20170117_174641.jpg
    20170117_174641.jpg
    1 MB · Views: 14
  • 20170117_174709.jpg
    20170117_174709.jpg
    1.5 MB · Views: 13
  • 20170117_174748.jpg
    20170117_174748.jpg
    3.3 MB · Views: 12
  • 20170117_174752.jpg
    20170117_174752.jpg
    2.5 MB · Views: 12
  • 20170117_174804.jpg
    20170117_174804.jpg
    1.2 MB · Views: 12
The removal was done with a breaker bar and impact gun. To me, it is the best approach, if it is not, I would like one of the pros to correct me. Disassembly, I was told is suppose to be simple... dam crank pulley. As you can see, it is soaking in 3 rounds of PB blaster. I am going to try the impact one more time and if nothing, I will see about getting a pulley holder.
 

Attachments

  • 20170117_174858.jpg
    20170117_174858.jpg
    1.4 MB · Views: 16
  • 20170117_174901.jpg
    20170117_174901.jpg
    1.6 MB · Views: 16
  • 20170117_174903.jpg
    20170117_174903.jpg
    1.4 MB · Views: 15
  • 20170117_174908.jpg
    20170117_174908.jpg
    904.1 KB · Views: 15
  • 20170117_175619.jpg
    20170117_175619.jpg
    1.4 MB · Views: 15
  • 20170117_175630.jpg
    20170117_175630.jpg
    1.1 MB · Views: 16
  • 20170117_175643.jpg
    20170117_175643.jpg
    1.5 MB · Views: 15
  • 20170117_175821.jpg
    20170117_175821.jpg
    1 MB · Views: 13
  • 20170117_175848.jpg
    20170117_175848.jpg
    1.3 MB · Views: 13
  • 20170117_175850.jpg
    20170117_175850.jpg
    1.5 MB · Views: 13
  • 20170117_175901.jpg
    20170117_175901.jpg
    1.2 MB · Views: 11
  • 20170117_183715.jpg
    20170117_183715.jpg
    1.6 MB · Views: 12
  • 20170117_184026.jpg
    20170117_184026.jpg
    1.8 MB · Views: 12
  • 20170117_184033.jpg
    20170117_184033.jpg
    1.6 MB · Views: 12
  • FB_IMG_1484705003942.jpg
    FB_IMG_1484705003942.jpg
    1.7 MB · Views: 13
  • FB_IMG_1484705048450.jpg
    FB_IMG_1484705048450.jpg
    2.1 MB · Views: 13
  • FB_IMG_1484705179934.jpg
    FB_IMG_1484705179934.jpg
    1.8 MB · Views: 13
  • FB_IMG_1484706520594.jpg
    FB_IMG_1484706520594.jpg
    1.5 MB · Views: 13
If you continue to use the harbor freight gun, best of luck.

Good hand tools, not so great electrical.

Find an impact gun with a high torque capacity, because that crank pulley bolt has the force of hell and beyond holding it down, as per mazda assembly procedure.
 
If you continue to use the harbor freight gun, best of luck.

Good hand tools, not so great electrical.

Find an impact gun with a high torque capacity, because that crank pulley bolt has the force of hell and beyond holding it down, as per mazda assembly procedure.

You are right. I got my ass handed to me by the Hypnotic Tuning Family but luckily I just connected with a shop that will allow me to borrow tools in exchange for a little labor support.
[doublepost=1484835671][/doublepost]
Good luck getting that car on the road in the Peoples Republic of Kalifornia. No way it pass visual or emission tests.
I wouldn't even pass now. I am keeping my plates from NC and currently working on an inspection waiver.
[doublepost=1484836171][/doublepost]Back at attacking the crank pulley and no luck with the universal crank pulley holder so I am going to take the the bottom end to shop to using there 3/4 snap on impact gun. That shit is like to hand fulls. I will do that today or tomorrow.

Since the pulley is a pain, I removed the nut from the bottom of the timing covering (the last thing holding the cover on) that is located below the pulley and removed the oil filter adapter as well. As you can see, it's a Gen One adapter so when time comes, I will upgrade it.
 

Attachments

  • 20170118_162213.jpg
    20170118_162213.jpg
    1.3 MB · Views: 12
  • 20170118_164059.jpg
    20170118_164059.jpg
    1.2 MB · Views: 12
  • 20170118_164314.jpg
    20170118_164314.jpg
    1.1 MB · Views: 12
  • 20170118_164323.jpg
    20170118_164323.jpg
    1.7 MB · Views: 12
  • 20170118_165735.jpg
    20170118_165735.jpg
    1.9 MB · Views: 12
  • 20170118_165018.jpg
    20170118_165018.jpg
    1.5 MB · Views: 12
  • 20170118_165021.jpg
    20170118_165021.jpg
    1.1 MB · Views: 11
  • 20170118_165023.jpg
    20170118_165023.jpg
    2.8 MB · Views: 12
  • 20170118_165026.jpg
    20170118_165026.jpg
    3.1 MB · Views: 11
  • 20170118_165037.jpg
    20170118_165037.jpg
    1.1 MB · Views: 14
  • 20170118_165040.jpg
    20170118_165040.jpg
    1.3 MB · Views: 15
  • 20170118_165617.jpg
    20170118_165617.jpg
    1.9 MB · Views: 14
  • 20170118_165623.jpg
    20170118_165623.jpg
    1.3 MB · Views: 13
Now attacking the head studs. It is important (everyone say it and I see why) to use a 12mmm 12pt impact capable socket with a LONG breaker bar. I used a impact deep well 12pt with an impact short extension. As you know, I am doing this disassembly along and the head studs are torqued down to about 300 ft lbs so I had to move block against the concrete wall of my garage since it is not on a stand to take the head studs out. one of the head studs was rounded. I was pissed but I managed to hammer down an extractor on top of it and get it off.

After this, I had to bend the timing cover a little (I will have to get a new one) just to get the top end of. I broke some plastic but it looks replaceable so I am good for now. Just a quick visual inspection of the cylinders I don't see any wrong. The person I purchased it from said it had a possible leakdown.
[doublepost=1484836926][/doublepost]So my goal today is to get that bottom end to the shop to get that crank pulley out so I can disassemble the bottom end. Hopefully, I will have time after work to do this.
 

Attachments

  • 20170118_172051.jpg
    20170118_172051.jpg
    1.6 MB · Views: 12
  • 20170118_172055.jpg
    20170118_172055.jpg
    1.7 MB · Views: 12
  • 20170118_190917.jpg
    20170118_190917.jpg
    1.1 MB · Views: 12
  • 20170118_190925.jpg
    20170118_190925.jpg
    992.8 KB · Views: 12
  • 20170118_191525.jpg
    20170118_191525.jpg
    2.1 MB · Views: 13
  • 20170118_192004.jpg
    20170118_192004.jpg
    2.2 MB · Views: 12
  • 20170118_192758.jpg
    20170118_192758.jpg
    1.4 MB · Views: 12
  • 20170118_192801.jpg
    20170118_192801.jpg
    1.9 MB · Views: 12
  • 20170118_192823.jpg
    20170118_192823.jpg
    1.5 MB · Views: 12
  • 20170118_192947.jpg
    20170118_192947.jpg
    1.8 MB · Views: 12
  • 20170118_192959.jpg
    20170118_192959.jpg
    2.9 MB · Views: 13
  • 20170118_193001.jpg
    20170118_193001.jpg
    3.1 MB · Views: 13
  • 20170118_193003.jpg
    20170118_193003.jpg
    3.5 MB · Views: 12
  • 20170118_193006.jpg
    20170118_193006.jpg
    3.2 MB · Views: 13
  • 20170118_193011.jpg
    20170118_193011.jpg
    1.7 MB · Views: 13
  • 20170118_193036.jpg
    20170118_193036.jpg
    1.6 MB · Views: 13
  • 20170118_193041.jpg
    20170118_193041.jpg
    1.5 MB · Views: 13
Is that a harbor freight socket too?

What tools and torque wrenches are you planning on using when assembling the engine again?
 
Is that a harbor freight socket too?

What tools and torque wrenches are you planning on using when assembling the engine again?
For assembly, I have access to snap on and mac
[doublepost=1484892324][/doublepost]So today, I was able to get that the crank pulley bolt out in less than 2 seconds. That 3/4 snap on impact gun is a beast. If I knew better, I would have when with this first. Before leaving for the shop, I removed the oil pan. I should of removed the oil feed and balance shaft but I was excited to get that bolt out. With that, I was able to get the timing cover off and more.
 

Attachments

  • 20170119_120814.jpg
    20170119_120814.jpg
    2 MB · Views: 13
  • 20170119_120816.jpg
    20170119_120816.jpg
    1.9 MB · Views: 14
  • 20170119_120818.jpg
    20170119_120818.jpg
    1.9 MB · Views: 13
  • 20170119_122548.jpg
    20170119_122548.jpg
    1.5 MB · Views: 12
  • 20170119_125518.jpg
    20170119_125518.jpg
    2 MB · Views: 12
  • 20170119_132518.jpg
    20170119_132518.jpg
    1.9 MB · Views: 12
  • 20170119_132528.jpg
    20170119_132528.jpg
    1.5 MB · Views: 12
  • 20170119_132534.jpg
    20170119_132534.jpg
    1.8 MB · Views: 11
  • 20170119_132551.jpg
    20170119_132551.jpg
    2.2 MB · Views: 11
  • 20170119_132700.jpg
    20170119_132700.jpg
    2.4 MB · Views: 10
  • 20170119_132704.jpg
    20170119_132704.jpg
    1.6 MB · Views: 10
  • 20170119_132708.jpg
    20170119_132708.jpg
    2.8 MB · Views: 11
  • 20170119_132720.jpg
    20170119_132720.jpg
    2.1 MB · Views: 10
  • 20170119_132740.jpg
    20170119_132740.jpg
    1.4 MB · Views: 10
When i got back to my garage, I continue the disassembling process. When I removed the oil feeder and balance along with all the accessories that was connected under the timing cover.
 

Attachments

  • 20170119_173344.jpg
    20170119_173344.jpg
    3.8 MB · Views: 13
  • 20170119_173354.jpg
    20170119_173354.jpg
    2 MB · Views: 12
  • 20170119_173430.jpg
    20170119_173430.jpg
    3.2 MB · Views: 11
  • 20170119_173434.jpg
    20170119_173434.jpg
    2.8 MB · Views: 11
  • 20170119_173437.jpg
    20170119_173437.jpg
    3.2 MB · Views: 9
  • 20170119_173531_001.jpg
    20170119_173531_001.jpg
    1.9 MB · Views: 10
  • 20170119_173549.jpg
    20170119_173549.jpg
    3.2 MB · Views: 11
  • 20170119_173637.jpg
    20170119_173637.jpg
    3.4 MB · Views: 10
  • 20170119_173641.jpg
    20170119_173641.jpg
    1.4 MB · Views: 10
  • 20170119_173738.jpg
    20170119_173738.jpg
    3.2 MB · Views: 9
  • 20170119_173750.jpg
    20170119_173750.jpg
    1.7 MB · Views: 10
  • 20170119_173754.jpg
    20170119_173754.jpg
    1.5 MB · Views: 11
  • 20170119_173846.jpg
    20170119_173846.jpg
    1.3 MB · Views: 11
  • 20170119_173850.jpg
    20170119_173850.jpg
    1.5 MB · Views: 10
  • 20170119_173910.jpg
    20170119_173910.jpg
    1.4 MB · Views: 12
  • 20170119_173913.jpg
    20170119_173913.jpg
    1.7 MB · Views: 12
  • 20170119_173945.jpg
    20170119_173945.jpg
    4 MB · Views: 11
  • 20170119_174051.jpg
    20170119_174051.jpg
    3.2 MB · Views: 12
  • 20170119_174200.jpg
    20170119_174200.jpg
    3 MB · Views: 12
  • 20170119_174425.jpg
    20170119_174425.jpg
    1.2 MB · Views: 14
I had an engine stand for over a year. I assembled it because I was going to start this project in august but I had to prepare to move and the logistics of the move was important and more the focus on a step by step uninstallation process along with everything that will take place in between before I am ready to start building.

With all the extras off, I was able to lift the short block on to the stand. It was still over 200 lbs but it had to be done so I can organize better everything and have a much cleaner space. I don't want my garage full of engine parts all over the place unorganized.

After removing the main studs which I think was as tight more than the head studs, I was able to remove the cradle. Well I was going hard in the gym today so I can't really tell but it was rough using a long extension.

I called it night when I got to the piston and rods. I didn't have the right socket to remove the cap and I don't want to risk rounded the star pattern.
[doublepost=1484895123][/doublepost]Right now, I am looking at a multipurpose workbench from harbor freight so I can keep everything in order and organized for this build. Right now, I have everything on a fold our table or on the ground. I plan on having everything I will be working directly with on top of the table and everything else in a draw covered in plastic ( of course everything on the table as well when I am not using it).
 

Attachments

  • 20170119_174454.jpg
    20170119_174454.jpg
    1.4 MB · Views: 13
  • 20170119_174500.jpg
    20170119_174500.jpg
    1.4 MB · Views: 14
  • 20170119_174525.jpg
    20170119_174525.jpg
    1.4 MB · Views: 13
  • 20170119_174529.jpg
    20170119_174529.jpg
    4.2 MB · Views: 12
  • 20170119_175308.jpg
    20170119_175308.jpg
    1.6 MB · Views: 11
  • 20170119_180611.jpg
    20170119_180611.jpg
    1.5 MB · Views: 13
  • 20170119_180616.jpg
    20170119_180616.jpg
    1.6 MB · Views: 14
  • 20170119_180700.jpg
    20170119_180700.jpg
    3.5 MB · Views: 13
  • 20170119_180747.jpg
    20170119_180747.jpg
    3.7 MB · Views: 13
  • 20170119_180835.jpg
    20170119_180835.jpg
    1.4 MB · Views: 13
  • 20170119_180840.jpg
    20170119_180840.jpg
    1.1 MB · Views: 13
  • 20170119_180849.jpg
    20170119_180849.jpg
    1.8 MB · Views: 11
  • 20170119_180855.jpg
    20170119_180855.jpg
    1.5 MB · Views: 12
  • 20170119_180858.jpg
    20170119_180858.jpg
    1.5 MB · Views: 12
  • 20170119_191245.jpg
    20170119_191245.jpg
    1.2 MB · Views: 12
  • 20170119_191248.jpg
    20170119_191248.jpg
    1.5 MB · Views: 11
  • image_22681.jpg
    image_22681.jpg
    71.5 KB · Views: 10
  • Like
Reactions: Sho
So after work, I took some pictures to remind myself that I needed a hex set and of course I went to harbor freight to acquire this because I can get a set for $10 plus they had a sale going on plus I didn't know what the size would measure out to. I went on all data and nothing about the tool. I googled it and get some forum searching and nothing. The answer was a 14mm hex impact socket. after removing the caps and bearings, I was looking for reasons why this block was sold cheap (less than $1500). Removed the pistons one my one and I saw on one piston a ring missing and it wasn't in the cylinder .
 

Attachments

  • 20170120_065826.jpg
    20170120_065826.jpg
    1.7 MB · Views: 14
  • 20170120_065840_001.jpg
    20170120_065840_001.jpg
    881.4 KB · Views: 15
  • 20170120_065842.jpg
    20170120_065842.jpg
    664.2 KB · Views: 14
  • 20170120_165634.jpg
    20170120_165634.jpg
    1.2 MB · Views: 15
  • 20170120_165644.jpg
    20170120_165644.jpg
    1.3 MB · Views: 14
  • 20170120_165940.jpg
    20170120_165940.jpg
    3.2 MB · Views: 15
  • 20170120_170023_001.jpg
    20170120_170023_001.jpg
    2.1 MB · Views: 14
  • 20170120_170047.jpg
    20170120_170047.jpg
    1.6 MB · Views: 14
  • 20170120_170120.jpg
    20170120_170120.jpg
    1.5 MB · Views: 14
  • 20170120_170134.jpg
    20170120_170134.jpg
    1.2 MB · Views: 13
  • 20170120_171719.jpg
    20170120_171719.jpg
    1.6 MB · Views: 13
  • 20170120_171725.jpg
    20170120_171725.jpg
    1.7 MB · Views: 12
  • 20170120_173005.jpg
    20170120_173005.jpg
    1.7 MB · Views: 11
  • 20170120_173013.jpg
    20170120_173013.jpg
    1.7 MB · Views: 12
  • 20170120_173036.jpg
    20170120_173036.jpg
    1.6 MB · Views: 13
  • 20170120_173046.jpg
    20170120_173046.jpg
    1.3 MB · Views: 13
  • 20170120_173054.jpg
    20170120_173054.jpg
    1.5 MB · Views: 13
  • 20170120_173405.jpg
    20170120_173405.jpg
    1.6 MB · Views: 13
  • 20170120_173406.jpg
    20170120_173406.jpg
    1.8 MB · Views: 13
  • 20170120_173407.jpg
    20170120_173407.jpg
    1.8 MB · Views: 14
I checked some more and removed all the pistons and nothing. The piston and rods were good. The bearings were good. The cylinder were clean. I flipped the block over and over and nothing. With, my eyes, I don't see any problem. I did notice before all this that the head gasket was not seated correctly. Oil in the wrong place etc but they could of been me being messy.

Shit, for my first time, I did well I think. Next time or when the time come to assemble, I will invest in a crane. I will have the right impact tools as well. With that, the disassembly would have been completed in one night.
 

Attachments

  • 20170120_173411.jpg
    20170120_173411.jpg
    1.7 MB · Views: 9
  • 20170120_173849.jpg
    20170120_173849.jpg
    3.9 MB · Views: 10
  • 20170120_173853.jpg
    20170120_173853.jpg
    3.9 MB · Views: 11
  • 20170120_173913.jpg
    20170120_173913.jpg
    3.8 MB · Views: 10
  • 20170120_174011.jpg
    20170120_174011.jpg
    3.6 MB · Views: 11
  • 20170120_174018.jpg
    20170120_174018.jpg
    2.9 MB · Views: 11
  • 20170120_174023.jpg
    20170120_174023.jpg
    3.5 MB · Views: 10
  • 20170120_174040.jpg
    20170120_174040.jpg
    3.1 MB · Views: 10
  • 20170120_174114.jpg
    20170120_174114.jpg
    3.6 MB · Views: 9
  • 20170120_174115.jpg
    20170120_174115.jpg
    3.6 MB · Views: 10
  • 20170120_174120.jpg
    20170120_174120.jpg
    3.5 MB · Views: 10
Last edited:
So for maintenance, I am looking something like:

Shop Sleeved Block - Need to do more research

Darton MID Block Sleeve Kit 700-100 - $732.00

Machine Shop - cleaning fee - $85.00

Bore and hone block with torque plate - $150.00

Deck Engine Block - $145.00

Polish Crankshaft - $35.00

Valve Job, Deck Cylinder head - $225.00

Still doing research on what I really need in all but I believe this is everything for the beginning.
 
Stock sleeves are good for 650. Sleeves are usually pretty expensive to install, especially those MID sleeves because you need some pretty precise machines to cut out all of the water jackets properly. If you still feel you need sleeves you should get some dry sleeves from Darton or LA Sleeve. They're also a fair bit cheaper.
 
Stock sleeves are good for 650. Sleeves are usually pretty expensive to install, especially those MID sleeves because you need some pretty precise machines to cut out all of the water jackets properly. If you still feel you need sleeves you should get some dry sleeves from Darton or LA Sleeve. They're also a fair bit cheaper.

Darton MID Block Sleeve Kit 700-100 - $732.00 is what I saw that was good for our block. I might just say sleeving for 2 second block if I get that far. I need to focus on cleaning the block up, bore and honing while seeing which pistons and rods would be best.
[doublepost=1485135241][/doublepost]I am looking at CP Pistons with Manley H-Bean Rods, set up with Clevite H-Series Rod Bearings and Clevite AL-Series Main Bearings. I didn't select a size yet. I wanted to wait until after the machine shop so I know exactly I can get.
 

Attachments

  • Manley H-Beam Rods for Mazdaspeed 3.png
    Manley H-Beam Rods for Mazdaspeed 3.png
    548.6 KB · Views: 9
  • CP Custom Forged Pistons for Mazdaspeed 3.png
    CP Custom Forged Pistons for Mazdaspeed 3.png
    626.6 KB · Views: 9
  • Clevite AL-Series Main Bearing Set for Mazdaspeed 3.png
    Clevite AL-Series Main Bearing Set for Mazdaspeed 3.png
    535.9 KB · Views: 9
  • Clevite H-Series Performance Rod Bearings (set of 4) for Mazdaspeed 3.png
    Clevite H-Series Performance Rod Bearings (set of 4) for Mazdaspeed 3.png
    559.2 KB · Views: 8
Back
Top